November 26, 2018
#291

Gentle reader,
After the more than forty year journey building the best sounding stereo system that I could afford, I have tried a LOT of components of all kinds.
I have determined, that for maximum signal contact, banana plugs cannot be beat for speaker wires and cables. Below shows several types and brands of terminals one can use instead of bare wire. The forked ones are called Spade Lugs.
 Above are examples of the many types of plugs I have tried. The one laying down in the middle is a double-banana plug.
After MANY tries with various brands and styles, I decided these from Nakamichi to have the greatest contact area and firm hold.
 However, sometimes they hold too tight. So, lately, I have been using these:
 The one drawback is that the bodies although painted are still conductive. Fortunately, my amps have built-in protection which automatically resets. There are many fake Nakamichi plugs made largely in China. So if you like what you see here, look carefully at their design.


If I need a speaker switch, I want one that uses banana plugs.

Some years ago, I came across a LEGEND LE412 Speaker Control. It had three-way binding/banana plug terminals, a unique style and look. So, I bought it.
Soon after, they may have stopped making them, or so it seems. I could not even find a photo on one!
Soon after, they may have stopped making them, or so it seems. I could not even find a photo on one!
What you see here, is only the SECOND LEGEND brand speaker switch that I have ever seen. So, naturally when I spied it on eBay, I bought it.
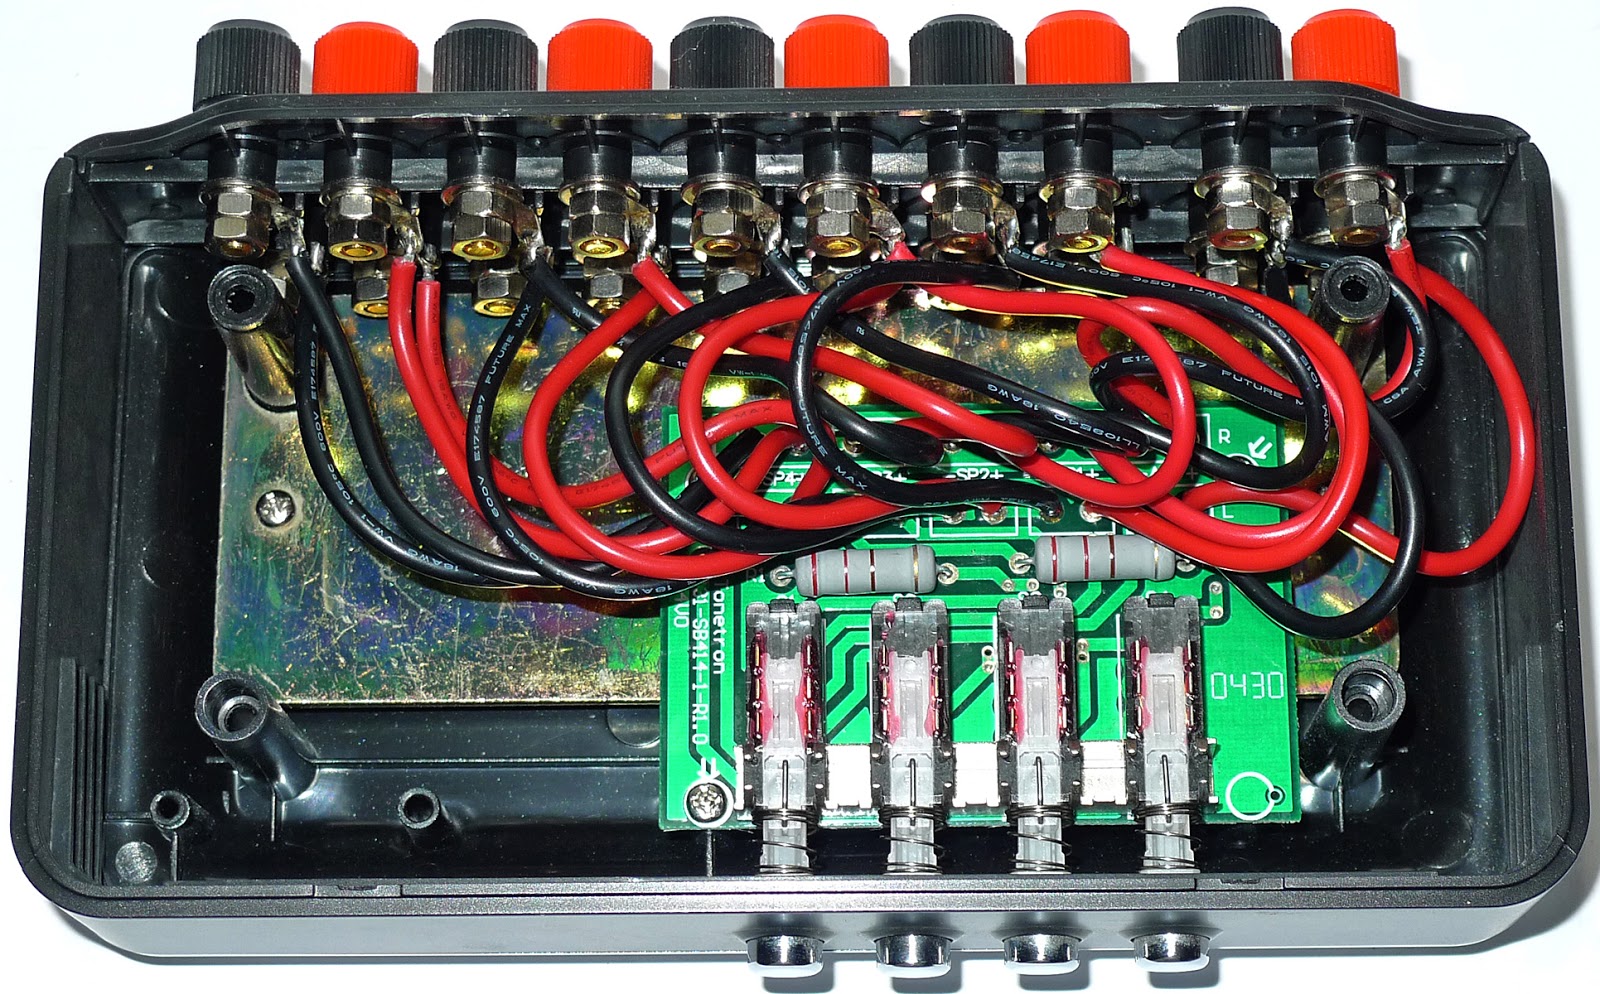
It is the LE414 and switches FOUR pairs of speakers.
It is the LE414 and switches FOUR pairs of speakers.

They cleverly used clear rubber feet to cover the screw holes on the bottom. One was missing, but that is not a problem.

See what I mean, a clean and unique design, well thought out and executed.

Measured top-to-bottom, the terminals holes are the industry standard 3/4 of an inch apart. Which means using double-banana plugs is an ideal solution.

The problem is, they assembled it with the + and - terminals going left to right, not top to bottom. Side-by-side, they are less than 3/4" apart.

So, I fixed that. Let me show you how I did it. And if you are fortunate enough to EVER find one of these LEGEND Speaker Controls, you too can make it work better.
First, pry off the clear rubber feet. A utility knife, Xacto knife or sharp tweezers will free them from the bottom cover.
Using a #2 Phillips screwdriver, remove the four screws and set aside in a safe place so that they do not get lost.
First, pry off the clear rubber feet. A utility knife, Xacto knife or sharp tweezers will free them from the bottom cover.
Using a #2 Phillips screwdriver, remove the four screws and set aside in a safe place so that they do not get lost.


Three #2 Phillips screws secure the board to the case's base. Set them aside as well. They are shorter than the main screws, but the same diameter.

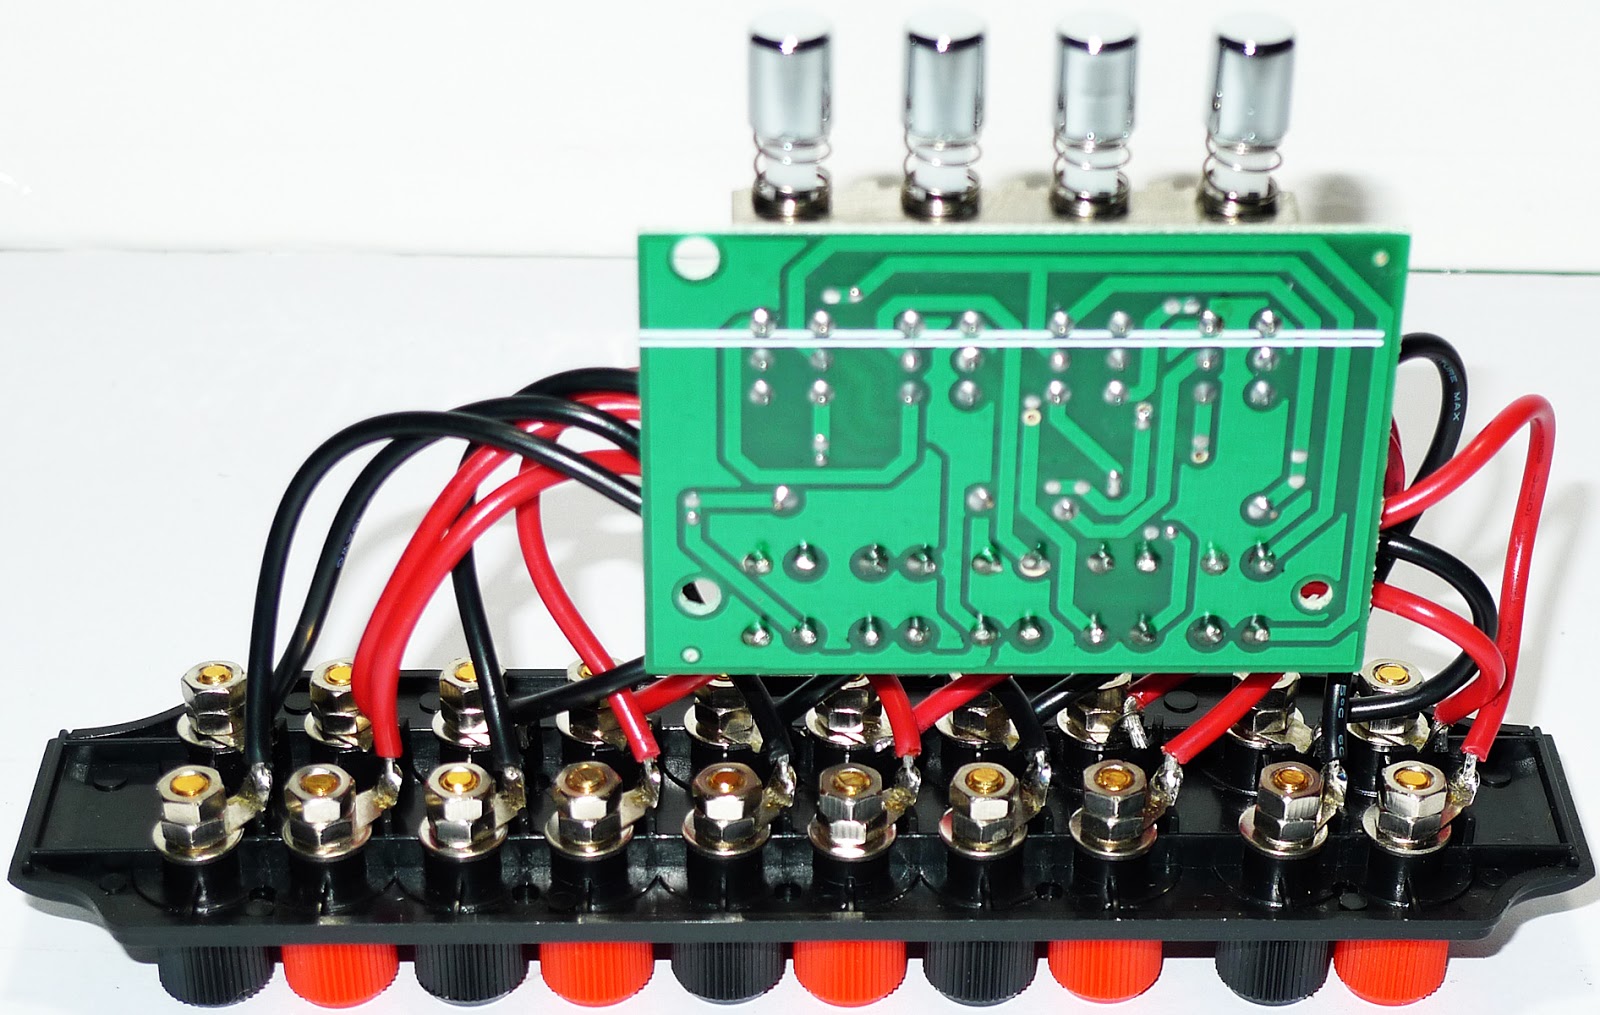


NOTE: The board where each pair of wires passes through is marked as to which goes where which should help.


BE VERY CAREFUL when tightening the nuts! These are very thin terminal barrels and I broke one. Fortunately, I kept the old ones from my LE214 from when I upgraded that unit to heavier duty terminals.
I was forced to do that since I was using the Nakamichi banana plugs with a zig-zag slot cut in them rather than the traditional spring design bananas. While that type offer the best conduction, they are hard to get in or out of terminals and I snapped a few of the terminals on my LE412 as a result.


As we have seen, there are two resistors on the board, I assume to add resistance since this is a parallel circuit switch. However, I would still not use more than two pairs of speakers at a time, even though one can press all four switches in.
I have those twelve new double banana plugs coming (shown near the top of the article) which I will be using with the switch. Their design will help to prevent breaking the sadly thin metal barrels of these terminals.


I have six speakers in my system in the listening room. Klipsch KG4s are the main ones and a pair of Advent Baby Advent II wired through a Dynaco QD2 and a pair of Dynaco A25XLs as the surround speakers.


This version is an improvement and adds a center channel which can be switched out.


Wooden Speaker Stands and Risers too Expensive? Try Bamboo Stools. How-To Guide.
The link above shows the bamboo stands which are actually stools which I repurposed to raise the A25XLs closer to ear level. The stands (above) under the Klipsch KG4 speakers are also made from bamboo. The factory bases were too low for me.
I hope that you have enjoyed my latest project. I have replaced spring terminals with three-way binding/banana terminals (look at the photo with the switch on my PC) before, so if you want to buy and try one of the Dynaco QD-1 Series II units, it is possible to do.
Thank you once again, for taking the time to read my words and view my images. You are the reason why I spend hours documenting my adventures.
Scott
November 26, 2018
#291


Thanks for this little review :) I myself (from Germany) actually have such a Legend speaker selector, bought it years ago on Ebay as new Item from a retailer. I'm now back on this topic because i want a second one - but not to switch speakers, but to switch amplifiers to one pair of bi-amped speakers. Because they're bi-amped thats why I need a second speaker switcher.
ReplyDeleteHi, I am not sure if the thin wiring inside can handle switching amplifiers. But I wish you good luck in finding another one. Thank you SO much for reading my blog.
ReplyDelete