September 21, 2020
#403
Gentle reader,
This is a continuing saga of how Nancy and I work toward a fun yet different downhill* race course for 1:64th scale diecast cars. Which have come to be generically called: Hot Wheels.
Previous chapters can be read here:
*The course can be used to race UPHILL as well with the Crash Racers cars as well as Hot Wheels Sizzlers and K.I.T.T. electric powered cars.
We, like most people have limited room to host such a facility. We have a family room downstairs with a fireplace which was subtly divided by the original homeowners who finished it with a small protruding wall by the door to the outside.
That side had served many purposes over our years living here. Since grandkids came along it has served as a play area. It has also doubled as a dog crate area.
I reorganized it a few weeks ago with the intent of making it roomier. We ended up stacking the plastic crates containing HW track components and the many cases filled with cars and trucks in the corner shown below.
We looked at that corner and realized that since it had no furniture, it might be able to house the course.
That meant designing a compact course to fit it, but not impede access to the dog crate's doors as well as door to the outside.
This is what we came up. It has both right and left hand curves, but precludes the potential use of landscaping materials.
All the HW (Hot Wheels) track is classic pieces so there will be no dreaded BLUE DOTS every 12 inches, nor visible track joints. The two orange straights are 48 inches long comprised of four dual 24 inch long straight pieces.
So, we probably will utilize one of the Maxx Traxxx 90 degree corners after a short straight pass from the starting gate/chicane.If you read the previous chapters where I was inserting glued/clamped stacks of various craft sticks into the the slots beneath the HW and CR tracks, I had bemoaned that the plastic classic HW track connectors were a weak and easily bent spot at every joint.
Above, on the brown mat, you can see my solution. I cut Super Jumbo craft sticks in half and rounded their ends which when substituted for the HW joiners, provide strong and grippy track connectors for both HW and CR tracks.
This circa 1969 Brake/Start Gate from Hot Wheels Sizzler Track days works perfectly and similarly to the one 3D/2D use as well as the DRC track in Shri Lanka, but dropping below the level of the track surface. I just need to glue small pieces (of something) atop the current orange square stops because they are too low, when raised, for some cars to remain stationary.
To make a race more interesting and realistic, we feel that the cars need to be racing slower. On many of the downhill courses shown on YouTube, the races are over in less than THREE SECONDS. The cars are a blur which to us is unsatisfactory.
3D/2D and WRC located in Shri Lanka have done the same and their viewer numbers show that their method works.
As you can see, we used what was at hand in the room to set things up, using masking tape to hold the track to the boards.
We have plenty of wood and several types with which we will build the actual supports.
Obviously, this is just the Crash Racer's track portion of the setup. The next step will be figuring out what angles the orange Hot Wheels track straight sections will need and how high the entire setup will be when completed.
After completing this mock-up, we used the car shown to test the layout.
Guesstimating the speed the car(s) would be doing exiting the last banked orange Hot Wheels dual-lane curve, the car easily completed the last of the course while looking like a realistic scale speed was achieved.
Here are the HEIGHT measurements top to bottom for the CR portions shown:
18 inches at the top of the CR track where the car is parked. Dropping to 12 inches at the beginning of the first curve which is made of SIX track pieces and 8 inches high at the bottom of that curve and beginning of the second straight. That straight is not as steep with a drop of only 2 inches over it's length. It is also only ONE piece of CR track. Thus, the SECOND curve (also SIX track pieces) is only 6 inches off the floor, dropping to 5 inches at the beginning of the next straight. That straight is even more shallow, dropping only one inch to the last curve (made of FIVE track pieces) is 4 inches off of the floor. The final curve drops 4 inches to the last straight comprised of two CR straight pieces.
To put that all in scale, (Crash Racer cars are closer to 1:50th scale than 1:64th) that equates to a 75 foot drop in a very small area which would be truly dizzying in a real race car.
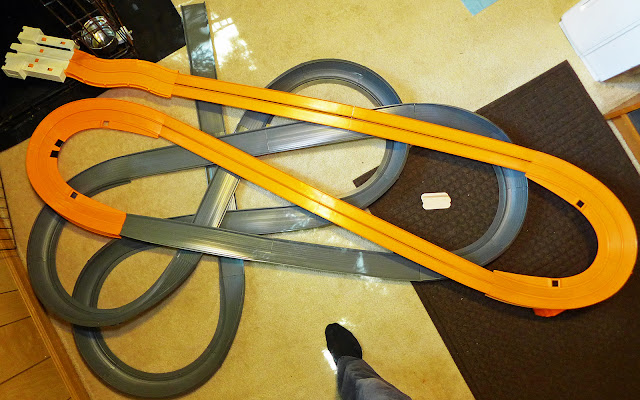
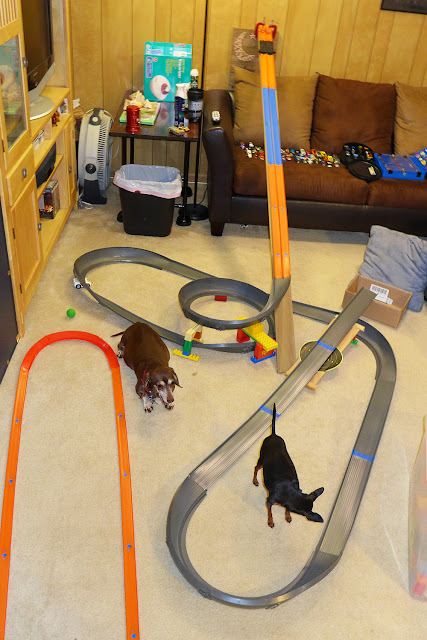
Below are some photos of CR track in combination with HW track we have tried since joining this fun world of Diecast Car racing.
The orange oval we put together to test the first completed K.I.T.T. car on. The downhill setup used all of the CR track we have but takes a lot of floor space.
Trying out the Maxx Traxxx 90 degree curves and the first HW Sizzlers dual lane curve we were able to buy. The dreaded BLUE DOTS we want to avoid are seen above and below.
Another real estate gobbling setup. It does show the variety of curves one can make with CR track.
Here is another idea with the track doubling back on itself which in our case uses too much floor space. The "grabber" and red flashlight were to retrieve cars that made it under the couch at the end of their test run.
Thank you SO much for taking the time to read our humble blog. Please take a moment to click FOLLOW above (right below the long list of article dates) to receive notices when a new chapter comes out. And leave a comment below or on Facebook, if you like.
Scott & Nancy
September 21, 2020
#403


