November 10, 2018
#287
Gentle reader,
My last post was about the various kinds and types of meters one can employ in their stereo system. It can be read here:

My closing remark was along the lines of, "Now which pair of speakers to use it with...."
It occurred to me there was a solution to a question I had not asked myself: "Why not use it on both sets of speakers or even more?" The answer, while not "Genius!" was to me, a great idea.
The epiphany I had was this, "Why not use my speaker switch, but in reverse. That way, I can switch the meter to the speakers I am listening to." Brilliant!
The epiphany I had was this, "Why not use my speaker switch, but in reverse. That way, I can switch the meter to the speakers I am listening to." Brilliant!
I prefer binding/banana speaker terminals over the cheap, minimal contact spring terminals. After much searching I found this economical speaker switch years ago.

LEGEND LE412 is what they called it. I can find NO information on them now. Not even a single picture. How is it I am the ONLY person to buy one of these?
I did a number of modifications on it, including adding those weights to the front of it. The cables I use are heavy and it doing "wheelies" was a no go. I also used BluTak reusable adhesive (available under many brand names) to secure the switch.
I did a number of modifications on it, including adding those weights to the front of it. The cables I use are heavy and it doing "wheelies" was a no go. I also used BluTak reusable adhesive (available under many brand names) to secure the switch.
Here is what the back of it looks like now, after my modifications.

The company made it with the three-way terminals having the industry standard of 3/4" apart so that double banana plugs can be employed. BUT, they did not arrange them as you see them here. Nope. As you can see it is marked as having the Right channel on the top and the Left on the bottom.
I took it all apart and rearranged all the terminals and internal wiring so that they are as seen above. The terminals on the left are originals. Sadly, they were not sturdy. I had to replace the eight on the right, since the metal inside was too thin. The ones I installed are more robust, but were too thick to be placed so closely together. Thus the "rounding" I had to do to each plastic nut to make them fit. Attractive, it is not. Effective, it is.
Below shows the wiring solution I came up with. It may not be pretty, but from where I sit, all I see are the faces of the meter and switch-box. And it works.

In the previous article, (linked at the top of the page) I introduced you to various audio power meters. All but one were made and sold by Radio Shack. This one is new to me and extremely well made. Albeit with spring terminals. It is a Realistic AMP-300. Of the four series they made, the finest construction.
Below is the first step for mine, since I needed banana plugs.

I have had these double banana plugs for decades. They are ugly, but well made, right here in the USA. No 24 karat gold plating, not red or black. (See the raised bar on the sides facing each other? I chose that side for all negative wires.) These plugs were employed with signal cables. I rescued them and the cables from the dumpster. Unlike the ones available today, they still hold strongly, the bananas have never lost their spring tension. I had exactly SIX of them, five purple, one brown. $0.

Also in the previous article, I showed you the colorful red, white, blue and black cable (left, above) I made by twisting them together. For this, I put yellow shrink tubing on each to mark where they will go. I added large ring terminals trimmed to slide onto a binding post terminal, or four:


Obviously, I needed a second set and chose two shades of green for left and right, positive, along with dark blue and black for the negative wires.

I HAD written a long explanation on how one sets up and employs double banana plugs like these. But decided it was unnecessary to the article.

Please pay attention to polarity ( + and -) for each set of wires. Otherwise you may inadvertently cause a problem. And, no, one does not have to twist them.

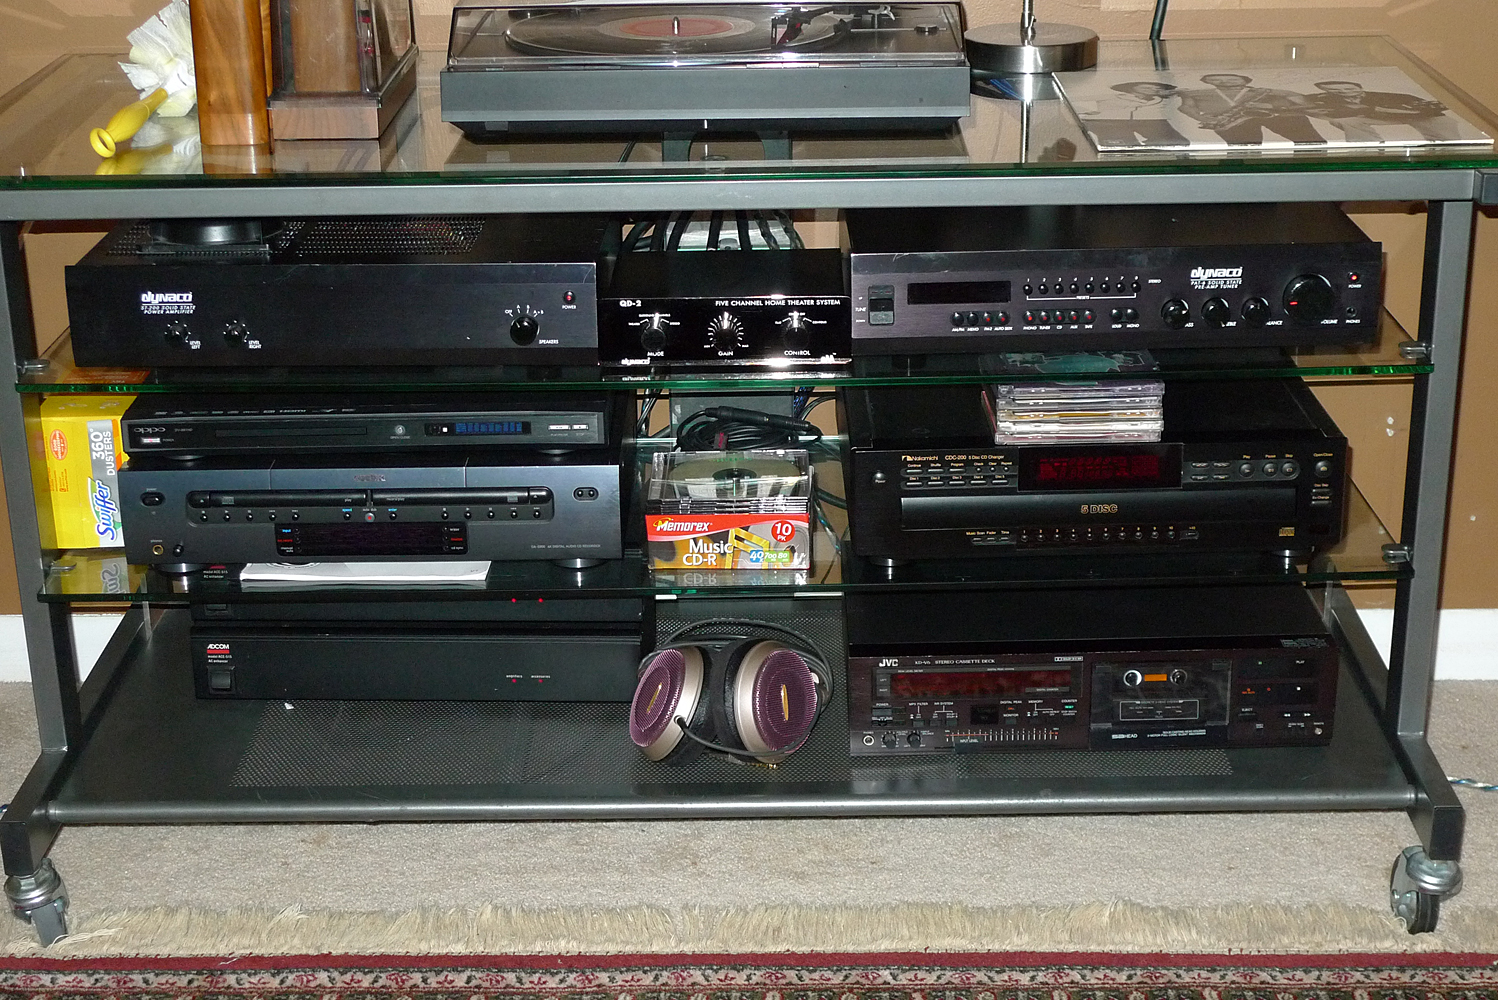
As I have a bunch of objects for cleaning records next to my turntable, it made sense to stack the two units.

This photo shows how I used the wires bare, stripped about 5/8" long, to attach to these are two-way binding/banana terminals, Sadly, my eight ring/spade terminals were wasted.
 I
needed to mark the speaker cables (Monster Cable Z-Series) as to which
terminals they plugged into on my amp. You can see my simple
solution above.
I
needed to mark the speaker cables (Monster Cable Z-Series) as to which
terminals they plugged into on my amp. You can see my simple
solution above.
 Yes, that IS a Swiffer 360. It is very effective for cleaning records that are just dusty.
 Here is how they look from the front. The APM-300 has lots of red LEDs to show the music in action.
 This meter can be set to read 0-2.0 watts or 2-200 watts. It can also show RMS (moving constantly) or PEAK which means it will display the highest (loudest) moment of the music which would show whether the amp had been driven to "clipping". A term that means the music was distorted.
 The bottom speakers are Klipsch KG-4s which my digital meter shows are five Ohms.
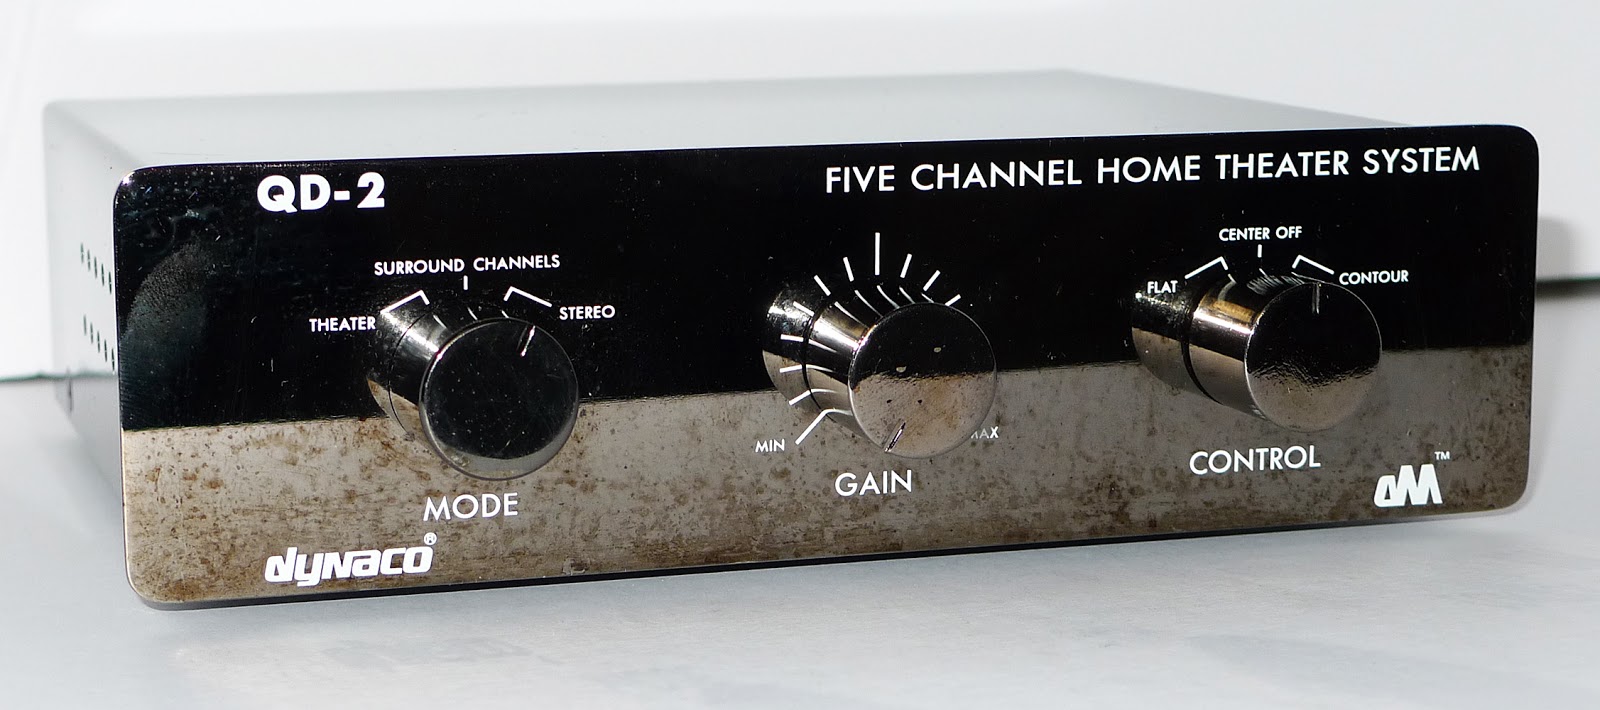
The top speakers (Advent Baby Advent II) are employed along with a pair of Dynaco A25XL speakers through the QD-2 device shown below. Together, they read 4.5 Ohms. So, I switched the meter to the 4 Ohm setting.
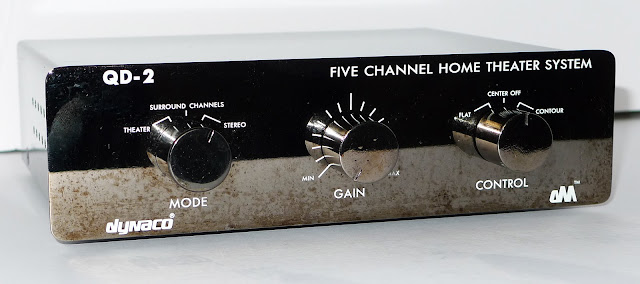
 The QD-2 is an update on the original 1970's Dynaco Dynaquad device. It reveals ambiance and echoes which makes one feel as though they are sitting listening in the recording studio or concert hall. Works great and I love it. Previous QD models have spring terminals.
 I have been fortunate to find and buy the Dynaco ST-200 power amplifier, QD-2 and PAT-6 Tuner-Preamplifier, all from the late 1990's. When Panor (originally Pan Orient) Company started making new products with the Dynaco brand name.
If you are interested in the products they made, good luck finding anything. I scoured the Internet and wrote about what I had found here:
Dynaco Given a Second Life. Pan Orient Company: Panor for Short. A Photographic History PART ONE.
And, here:
Dynaco: Panor for Short. History PART TWO Plus ODD Dynaco Speakers.
And for more on the QD series:
Quadraphonic Adventures: 1990's Dynaco QD-2 Passive Surround Sound Device Tested.
So, there you have it, a way to use one set of power meters with countless pairs of speakers. As many as your speaker switch will handle.
I thank you for taking the time to read my words and view my photos. Your kind words make all the effort worthwhile.
Scott
November 10, 2018
#287


The top speakers (Advent Baby Advent II) are employed along with a pair of Dynaco A25XL speakers through the QD-2 device shown below. Together, they read 4.5 Ohms. So, I switched the meter to the 4 Ohm setting.

If you are interested in the products they made, good luck finding anything. I scoured the Internet and wrote about what I had found here:
Dynaco Given a Second Life. Pan Orient Company: Panor for Short. A Photographic History PART ONE.
And, here:
Dynaco: Panor for Short. History PART TWO Plus ODD Dynaco Speakers.
And for more on the QD series:
Quadraphonic Adventures: 1990's Dynaco QD-2 Passive Surround Sound Device Tested.
So, there you have it, a way to use one set of power meters with countless pairs of speakers. As many as your speaker switch will handle.
I thank you for taking the time to read my words and view my photos. Your kind words make all the effort worthwhile.
Scott
November 10, 2018
#287