Gentle reader,
I recently wrote about my adventures in trying a pair of unique speaker cables that are hand made in Florida. The company is BLE Design and they sell all kinds of audio cables and bits on eBay. Here is a link to the first post:
Here is a link to the maker/seller's eBay seller's page: ble-design02 | eBay
Brian is the fellows name and he read my review of his 6BC cables and decided to put a link to that post in his eBay auction page. He offers many lengths and gives you your choice of terminals for each end. The terminals are top-line too.
He wrote to me and suggested that I try his 10BC cables, they have 40 per cent more conductors and can handle more power. So I took him up on his offer and two days later, they arrived.

As you can see, these are thicker and even more complicated looking in their weave. I still do not know how he does it. I suspect Kimber Kable has machines that weave theirs. But of course, Kimber's are MUCH more expensive. I specified NO terminals as I had plenty of Nakamichi banana plugs.


If you read his description of these cables on eBay, you will see they are made of top-line wiring. Without further ado, you will see step-by-step, the process of making them ready to install, below:

The first step is separating the white and blue wires from the weave. Doing so making them about four inches long and twisting them.

Make sure to twist each set in the same direction and get them as tight as you can.

Next, you have to separate them for about an inch and a half. Strip the insulation from each of the ten (or six if that is what you bought) conductors.

Logic would dictate that one strips each wire's insulation the same length. But when you re-twist them, you will find that some still have insulation getting in the way. Which requires you to tease out each wire and strip some more insulation off. It takes time, but with practice, you get quicker at it.


The jaws are shut above showing the various gauge holes. Below is the other side. That side gently grips the wire so the other side (above) can cut the insulation and slide it off the wires.

Below shows one of the cables completely terminated. One end has the bent pin terminals that I needed for my PROTON D540 integrated amplifier which only accepts bare wire or this type of pin terminals. The other end are the super conductor banana plugs that grip so well.

Nakamichi's banana plugs silver grip/housing slips over the banana plugs from the pointed end. The pin terminals, one has to slide the grip/housing on the cable FIRST, then attach the gold-plated terminal. The terminals have two tiny set screws, one on each side that secure the copper wiring to the terminals. The the grip/housing threads (screws) on.
Now a series of photos depicting the installation process into the D540's "A" speaker terminals after removing the thick gray Monster Cable M-Series cables from the Cerwin-Vega! LS-12 speakers and the Legend speaker switch. I transferred the 6BC cables from the amp's terminals to the switches #1 terminals. Which required me to remove the pin terminals and install banana terminals.

Look's like an electrician's nightmare, doesn't it?

A closer view shows the 10BC cables now firmly attached to the D540. Note the folded Velcro pieces between the terminal grip/housings in the "B" speaker terminals. Turns out the grip/housings are in fact conductive. Good thing the D540 has protection, as the music kept cutting off and I couldn't figure out why. So, if you have to use something other than banana plugs AND they are Nakamichi brand terminals, take care to keep them apart!

Above shows the completed speaker switch's wiring. The inputs are on the right. I deliberately used double-banana plugs from Monster Cable in those inputs for two reasons: 1, The cables, in this case; Monster Cable M-Series, come in from the sides, and, B, double-banana plugs have the ability to have other banana plugs plugged into them. As you can see.
As my little wooden former Radio Shack Minimus 7W speakers are my main speakers and are wired through the 12" subwoofer, AND as they are wired with (when new) super expensive, top-of-the-line Monster Cable Z-Series cables, they are connected thusly. I simply leave the speaker switches buttons off. If I choose to listen to the Philips speakers OR either of the pairs of speakers in THIS room (BOSE 301s and my former Radio Shack Minimus 11 speakers), I simply unplug the black cables from the double-banana plugs and choose "B" on the amp and either #1 or #2 on the speaker switch. Confused yet?
Yes, your math IS correct, I have no less than FIVE pairs of speakers capable of being driven by ONE amplifier. Oh, and the subwoofer too. That makes eleven speakers. Does it surprise you that my wife doesn't even think about trying to listen to music in the "Listening Room"?
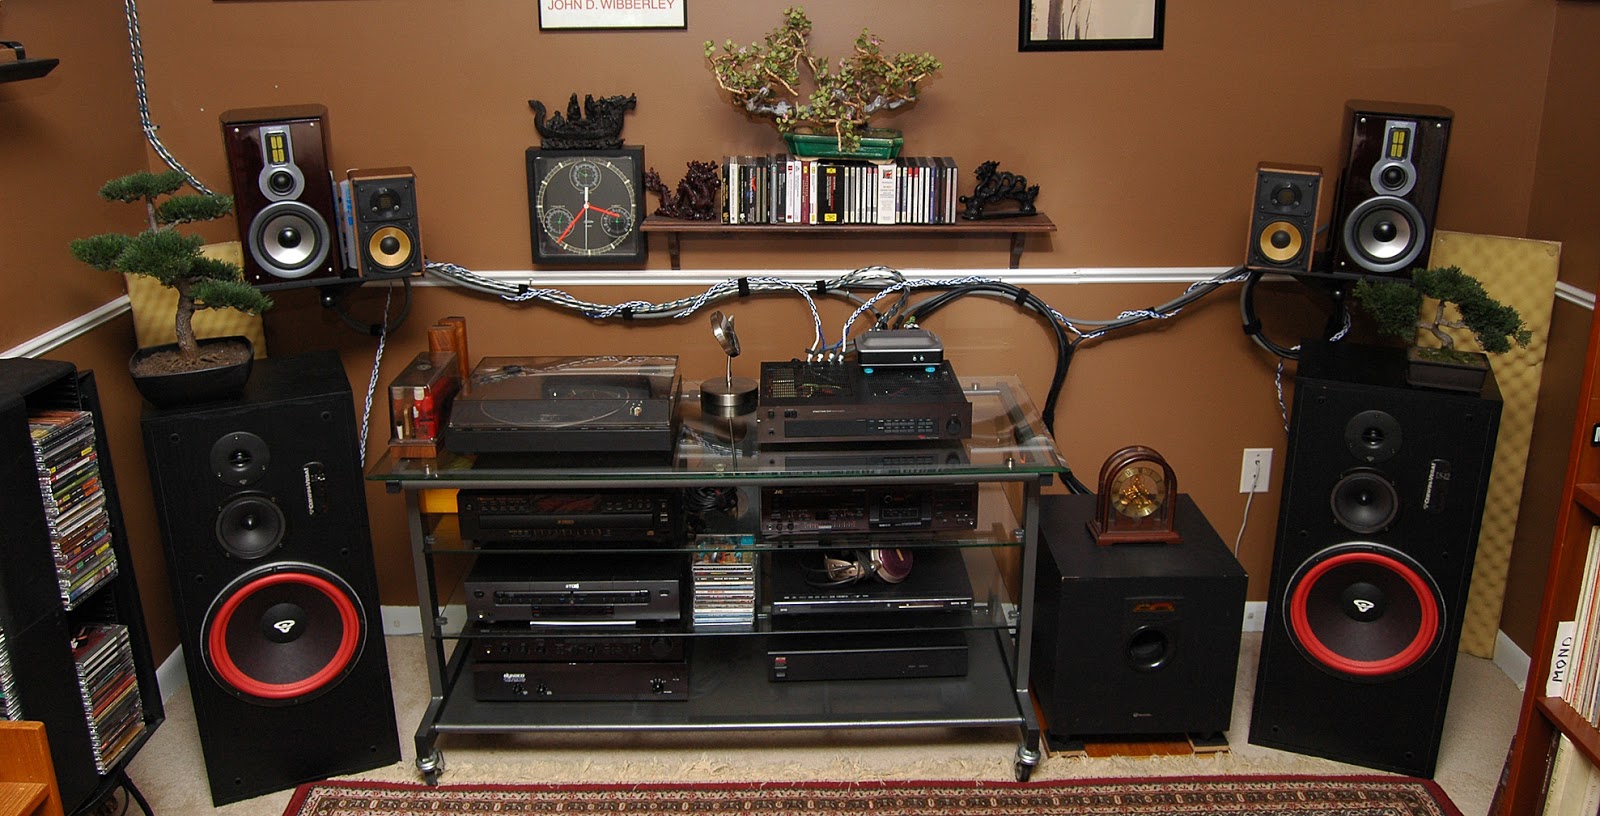
OK, now for some photos of the completed set up:

Above, the whole shebang.

That blue stuff under the speaker switch is Blu-Tak. Great stuff for audio.


Above, on the right, you can see the black cables that descend to the subwoofer's high-level inputs. If using the subwoofer, it electronically separates the bass from the rest of the music and reproduces that portion itself. It sends the rest of the music out the high-level output terminals and up to the small speakers. If it is OFF, all the music reaches the small speakers.

As I have pointed out in previous posts, it's easier to make a wire shorter than it is to make it longer. Thus, the coiled cables around the support posts. The right speaker is above and the left speaker is below.

Note that the "umbilical cord" cables as my wife calls them that attach to the #2 terminals on the speaker switch are not yet attached and routed in these photos. But fear not, in this reprise photo below, they are.

Those cables travel to a speaker terminal plate in the corner of the ceiling. They same cables travel through the attic to a speaker terminal plate in the ceiling in THIS room. Two pairs of Monster Cable speaker wires attach to the BOSE 301 speakers and/or the metal former Minimus 11 speakers in here. I have blogged about modifying both sets of former Radio Shack speakers and mounting the BOSE 301s too.
NOW, how do these 10BC cables sound? In a word: Fantastic! As I did all this work today (March 4, 2017) I haven't had a lot of time to enjoy them. But I did play David Sanborn's CD Up Front tonight before starting on this post. I savored the incredible clarity of each performer's music. I could clearly "see" where each stood as they played. There was width, height and depth to the music. I could also "feel" the space they played it. How? There was a real sense of ambience to the sound.
I highly recommend giving BLE Design's products a try of your own. Hand made in America. Incredible attention to detail in their design and construction. First rate components are employed. True high performance home and studio products which will give you a lifetime of enjoyment. I cannot give them a higher recommendation. I've been seeking the best sound from my music since 1975. Brian's complex 6BC and 10BC braided speaker cables have brought me closer than ever to that goal.
So, finally, these are the thick, heavy and expensive Monster Cable M-Series cables that the 10BC cables have replaced:


Will I miss them? Not in the least!
Thanks for looking, and again, give Brian's products a try!
Scott