Gentle reader,
You may find it strange what I am about to tell you. Sometimes I get a thought, I call it "a little voice" that tells me to do something. Experience has shown that if I listen to that "voice" and do what it suggests, good things happen. Such as I hear on the traffic report, moments after taking an exit earlier than my normal one, I hear on the traffic report about a huge backup that begins just down the highway. If I ignore it's suggestions, I quickly realize it. I could tell you many other examples. Am I crazy? No I prefer to think it is a guardian angel.
That being said, that voice suggested that I stop at Goodwill. I deliberately have gotten out of the fun, but sometimes expensive, habit of touring thrift stores many days of every week. I have PLENTY of records and CDs. I am very happy with my sound system. Do I really want to fill our house with other peoples stuff? But, I know about that voice. When I ignore it's suggestions, I soon regret it.
So, I did stop and shop. I always head to the electronics department first. First look around, I didn't see it. Then it caught my eye. It's an integrated amp that I have never seen before. Made by Technics, a company that is once again building nice equipment to get back into the market it once did so well in. Model number is SU-VX800. A big and heavy beast with lots of knobs and switches and no cheap spring terminals on the back for the speakers.
 My ORION AUDIO BLUE BOOK states that is was made in 1991 and 1992. It states the watts-per-channel at 125. Also refers to it as a "MILITARY" UNIT. It retailed for $320 when new. On the front it has "Class AA". Supposedly Class A is the highest quality of sound. So this must exceed that! I will see about that.
This link will take you to HiFi Engine's page about it:
Technics SU-VX800 - Manual - Stereo Integrated Amplifier - HiFi Engine
Frequency response: 20Hz to 20kHz
Total harmonic distortion: 0.007%
Damping factor: 80
Input sensitivity: 0.25mV (MC), 2.5mV (MM), 150mV (line)
Signal to noise ratio: 67dB (MC), 79dB (MM), 100dB (line)
Channel separation: 50dB (line)
Output: 150mV (line)
Speaker load impedance: 4Ω to 16Ω
Dimensions: 430 x 158 x 429mm
Weight: 17kg
Year: 1991
Price: GBP £450 (1991)
Note the price above? All the units I found for sale on eBay and other sites are NOT in the United States. So how this baby ended up here, I do not know. But I'm glad it did. Frankly, I've been feeling the itch for something new to play with and this one fit the bill. Note also that one can choose between a moving magnet and a moving coil cartridge for their turntable with this unit.
It was quite dirty inside and out and an odd color, not black, nor certainly not OD green (military color) either, but somewhere in between. I still had in my bag in the car my "testing equipment" which is: cassette tape, RCA stereo interconnects cables and two speaker wires. With those, I can test most audio related things I come across. They had a nice (and overpriced) cassette deck there and plenty of speakers to choose from. Like a lot of the nicer equipment, this one has features that one has to decode to figure out why there is no sound. This I did and found both channels and several inputs worked although scratchy sometimes. Nothing some contact cleaner couldn't clear up. Here's what the back looked like:


 Here's an odd feature: AC inlets and outlets directly above the speaker terminals. What were they thinking? A removable AC cord/cable and adjustable voltage makes it more versatile for use in many countries around the world. Of course, those ARE USA type AC outlets, however.
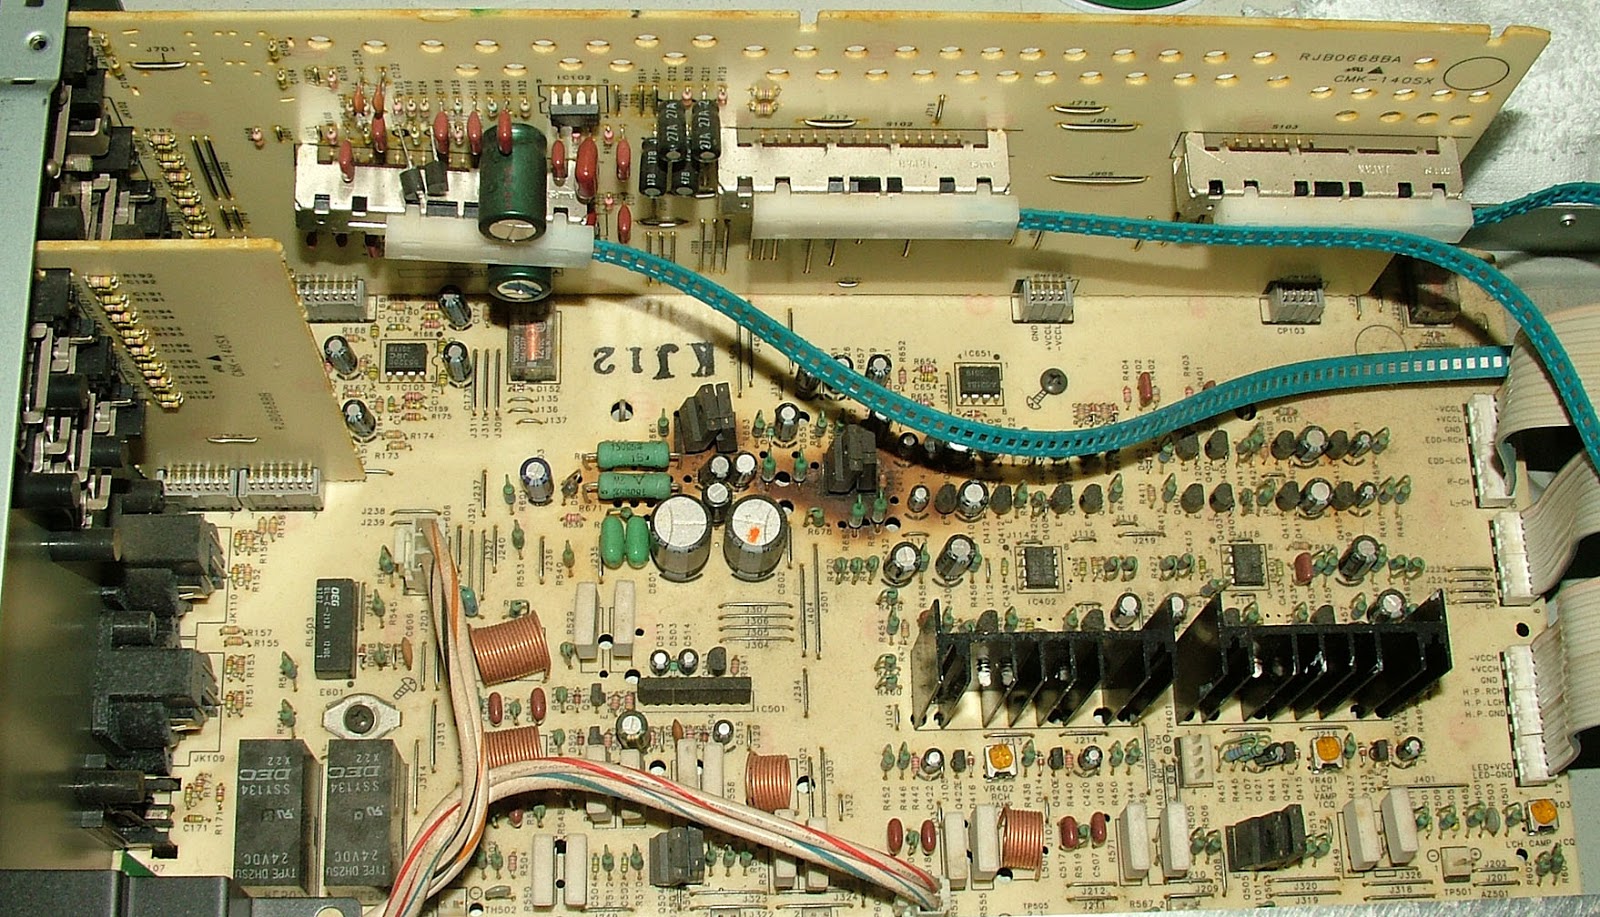
It took it apart to see what's inside and to clean it inside and out. I can't locate my contact cleaner designed for audio equipment, so will have to get some. And a foot or feet too.
 The contact cleaner I do have, tried to remove the black on the sticker atop the large and heavy transformer above and below. Serious aluminum heat sink for the power transistors.


 An odd thing is the obviously overheated section around two upright transistors. Whatever they do, if it is in fact damage, doesn't affect anything I have found so far. Perhaps previously repaired.
 Below are photos of it now nice and clean and back together. I removed the Dynaco power amplifier (and all the accoutrements I had atop it) and placed this heavy and large beast in it's place.
 The volume and big switch knobs are solid metal. The smaller five are plastic. I removed all eight and cleaned them too.
 I made the photo above full sized so you can see all the choices one has on the front. Extended Direct Drive is for choosing a source plugged into either the XLR or RCA terminals. What it does exactly, I do not know. I plugged my OPPO into those RCAs and played a SACD and boy did it sound great! Unless playing through those press that button until the LEDs go out and select your source from the far right knob. Neat that one can record one source while listening to another one.


 Above and below shows the factory thin AC cord and a nice adapter that allows one to use an aftermarket "audiophile" power cable instead. Which is what I did.

 So, here it is "in situ" as the Latin states. I was switching from phono to CD to E.D.D which were each playing music. I've been using it all day and aside from an occasional scratchy sound, it sounds, wait for it, fantastic!


This link will take you to HiFi Engine's page about it:
Technics SU-VX800 - Manual - Stereo Integrated Amplifier - HiFi Engine
Specifications
Power output: 110 watts per channel into 8Ω (stereo)Frequency response: 20Hz to 20kHz
Total harmonic distortion: 0.007%
Damping factor: 80
Input sensitivity: 0.25mV (MC), 2.5mV (MM), 150mV (line)
Signal to noise ratio: 67dB (MC), 79dB (MM), 100dB (line)
Channel separation: 50dB (line)
Output: 150mV (line)
Speaker load impedance: 4Ω to 16Ω
Dimensions: 430 x 158 x 429mm
Weight: 17kg
Year: 1991
Price: GBP £450 (1991)
Note the price above? All the units I found for sale on eBay and other sites are NOT in the United States. So how this baby ended up here, I do not know. But I'm glad it did. Frankly, I've been feeling the itch for something new to play with and this one fit the bill. Note also that one can choose between a moving magnet and a moving coil cartridge for their turntable with this unit.
It was quite dirty inside and out and an odd color, not black, nor certainly not OD green (military color) either, but somewhere in between. I still had in my bag in the car my "testing equipment" which is: cassette tape, RCA stereo interconnects cables and two speaker wires. With those, I can test most audio related things I come across. They had a nice (and overpriced) cassette deck there and plenty of speakers to choose from. Like a lot of the nicer equipment, this one has features that one has to decode to figure out why there is no sound. This I did and found both channels and several inputs worked although scratchy sometimes. Nothing some contact cleaner couldn't clear up. Here's what the back looked like:

Sadly, the speaker terminals are not banana plug accepting ones.

Yep, missing a foot.

Made in Japan, not elsewhere, like China.

Yes, those are XLR inputs! My first. Those funny looking things in the phono inputs are plugs.

It took it apart to see what's inside and to clean it inside and out. I can't locate my contact cleaner designed for audio equipment, so will have to get some. And a foot or feet too.


Check out the copper on the transformer. Me thinks that is for show.

Here's a close-up of those large power capacitors:

Dirt on electronics, especially circuit boards can be difficult to remove.


Many of today's high end audio products have XLR inputs and outputs.

Built in bi-wiring ability. Very nice.


Above you can see the oddness of the AC on top of the speaker terminals. One must use only bare wires for the speakers. I'd love to replace them with proper three-way binding/banana terminals. And yes, I did see the right phono plug is not completely plugged in. It is now.

You can more clearly see the Pangea AC-14 power cable plugged into the adapter in the photo above. I have not tried the stock, skinny cord except in the store.
UPDATE: I have completed the restoration. All electrical contact locations, controls and all surfaces inside and out have been cleaned with various chemicals and lubed if needed. I ordered new feet from China and they arrived today. The completed beast is below:

UPDATE: I have completed the restoration. All electrical contact locations, controls and all surfaces inside and out have been cleaned with various chemicals and lubed if needed. I ordered new feet from China and they arrived today. The completed beast is below:
Conclusions: I could live comfortably with this fine amplifier. However, I love my Yamaha/Dynaco pre/power amplifier combination and their sound, power and versatility. This Technics SU-VX800 Integrated Stereo Amplifier is big, heavy and packs a clean and powerful punch. I plan on enjoying it for quite a while before passing it on to it's next steward.
Steward? Yes, since we only live on this earth for a short while, we never actually "own" anything. Especially land. Therefore, I feel we are simply taking care of things which we acquire in our lifetime. Most things, "durable" items included like cars, are made, sold, bought and if not wrecked, eventually recycled into new cars.
That being said, special things, such as cars, cameras, electronics, watches, artwork, and jewelry and other things that might hold or exceed their original cost should be passed on. Thus I feel strongly about taking care of things that I have and do nothing to them that could not be undone later on. I take my stewardship seriously.
Thanks for looking!
Scott


