February 27, 2018
#235
Gentle reader
We bought a typical suburban mass-produced single family home about 25 miles south of Washington, D.C. in 2001. The area is called Dale City, a part of Woodbridge. It came about as a center of affordable housing outside of the far more expensive Fairfax, Alexandria and Arlington suburbs of D.C. I can't find information as to the exact sales of the first homes, but it was in the late 1970's I believe.
Because these townhouses and single family houses were "stick built" and quickly, they did what so many builders did, spray paint everything inside off-white and put down cheap vinyl floors in the foyer and kitchen, tile floors in the baths and cheap wall-to-wall carpeting on the rest of the floors.
Ours is a split-foyer and like many Dale City houses was sold with the lower level unfinished. Previous owners finished it. The carpeting was replaced and the whole place repainted prior to out moving in. The house was 14 years old then. Below shows the metal roof we had installed a few years ago.

Since I retired last May, I began doing improvements inside and out. Starting with painting all the trim on the outside, including the doors. We pulled all the faded (as above) plastic shutters off and spray painted them. What a difference that made.
Anyone that watches television is inundated with ads for carpet and flooring companies. Since the cheap carpeting was definitely in need of replacement, we decided to go with wood. But not real wood, vinyl planking. With four small dogs, and two cats, we wanted something that "accidents" would not harm.

We chose a company, who shall remain unnamed, and they had a nice selection to choose from. This is called Acacia. Coincidentally, we have two Acacia trees in the backyard that we planted along with several other varieties.

The cabinet I wrote about previously is in the photo above. The floors are a little darker than in these photos and more red too.

Because the houses were planned to have carpeting, the builders added a second layer of plywood beneath the eventual vinyl flooring. This presents a problem when replacing carpet with flooring. The height difference. The installers had these transition pieces.

Another problem is the floor moulding. We were going to install wainscotting in the dining room and living room, so we had removed all the old cheap and plain moulding anyway. The height difference which did not exist with carpeting now presented a challenge. My wife suggested simply ripping the kitchen's moulding so they would be the same height where they met. A brilliant idea (really it was) which I did. The problem arose in that the moulding she bought while pre-painted like the rest was from a different maker and a little thicker!

We wanted to cover the cheap vinyl sheeting that covered the end of this island and since we were doing wainscotting, that was the answer. This is a vinyl sheet which is fortunately taller than the wood-product that was used elsewhere. It was tall enough to cover the entire island wall. The quarter-round moulding was supplied by the installer. Normally, one puts it everywhere, but I made sure the floor moulding reached the Acacia flooring, so no quarter round moulding was needed.

For the kitchen, we went with something similar in tone to the original sheet vinyl. We are redoing the cabinets (but will probably replace them) as they are showing their 31 years.

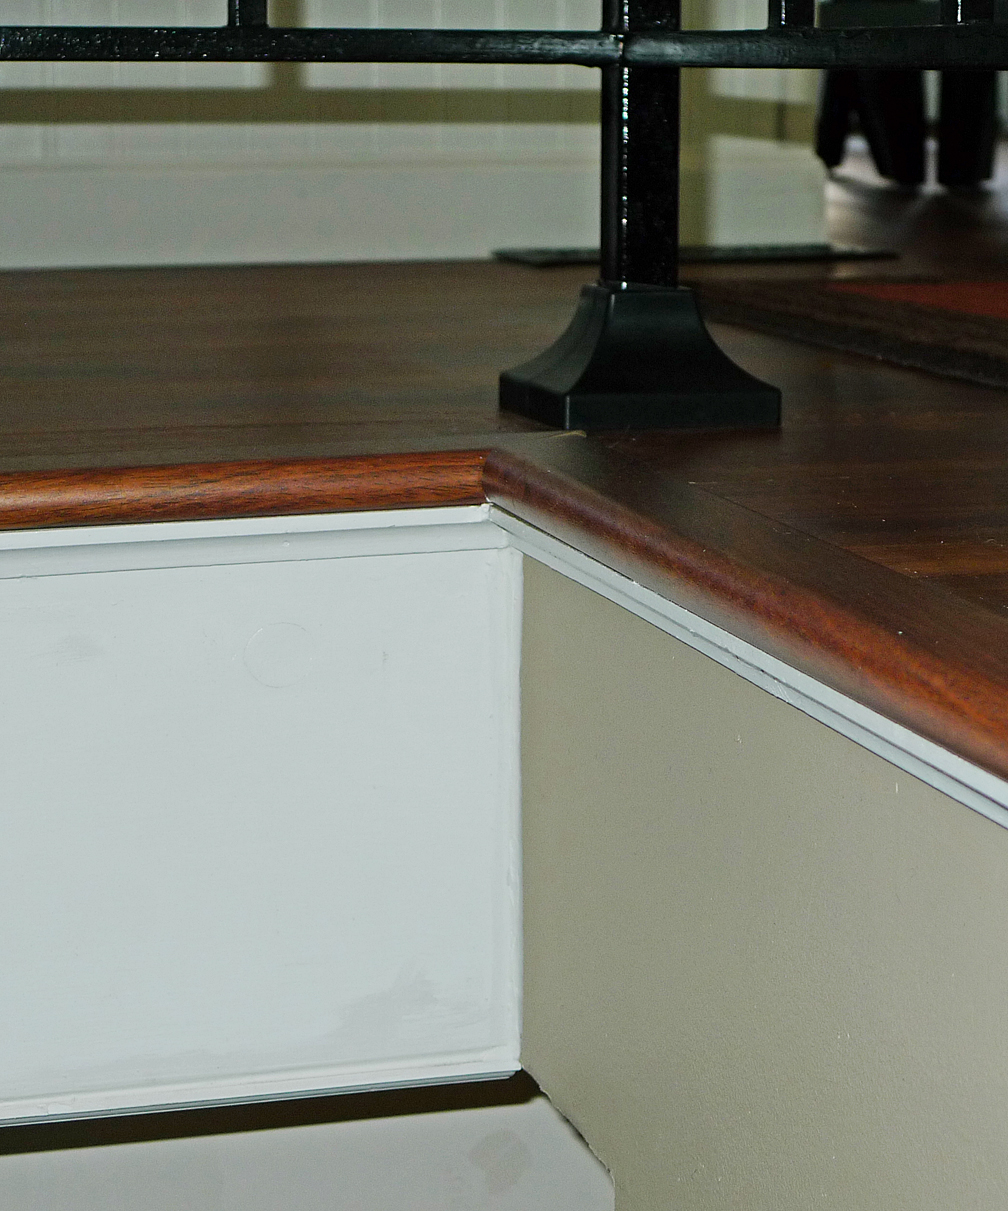
Above is one of the corners leading into the kitchen from the foyer and hallway. See how tight the floor moulding is on the Acacia floor?

The flooring company uses metal half-round pieces to cover the edges of the floors over openings like this. However the installers answer was, "We don't have that." They installed cheap and cheap-looking metal that was "L" shaped. Nailed to the new flooring.
That would not do. They also failed to finish the entire job. I negotiated a $500 refund to cover the cost of finding/buying this proper stair nose moulding. That's what it is called. Plus my labor in finishing what they were contracted to do.
I came home one day to find that my wife had pulled the carpeting off the stairs from the foyer up to this level. Again, since they were installing carpeting, they nailed a board across the vertical opening at the top of the stairs to have something to wrap the carpet around on it's way down the stairs. She removed: carpet, padding, tack strips, and MANY staples.
From the wall at the right (above) to the board was a piece of drywall. It needed to be one piece of wood from this corner to the wall on the left side of the stairs. We had a 1x12 ripped to 10 1/2 inches and I cut it to length. I installed it and it painted it (and all the risers) bright gloss white.

By the design of the stair nose, it overhangs the opening. To add strength and improve the looks, I installed inside corner moulding beneath it. It makes for a dramatic transition from walls to stair nose. It is easier to see in the photo with the corner above.

Wainscotting is made 32" tall. They get three four foot long pieces out of a 4x8 foot sheet. It coincidentally is also one third of 96 inches (eight feet). We chose this kind with lots of vertical lines so that edges would disappear. The same corner is above and below.

The wainscotting covers the whole dining room and extends the length of the wall to the corner inside the wall at the front of the house. It also wraps around the wall from the dining room to the kitchen door and ends at the pantry door.

We also replaced all the door frame mouldings. All the previous mouldings sat one half inch above the new floors, so it had to go anyway. All the mouldings have lots of creases and interesting lines in them. They make a dramatic difference in the look of the house.

You may or may not have noticed the many different colors we used on the walls. The kitchen has two different colors. The living room is two different shaded of grey and the hallway uses the same colors as the kitchen also on opposite walls. We wanted away from the drab-everything-is-the-same-color look.
Here are some more photos showing the living room with the new rug and furniture. We had bought matching sofa (8 feet long and heavy) and love seat that also reclined. They had to go prior to the flooring being done.

You can see the wainscotting ending as I described, above. The little grey settee was found at a store called At Home. We needed something small but that would still seat two.

Every chair we looked at was enormous! These were the ones we chose, they are the least large and rock and recline. They have what looks like leather, but isn't. Almost like Alacantara. We wanted a rug, (OK, SHE wanted) that would fill the space and tie the various colors together. And it does.


Vertical blinds replaced the horizontal ones of yore. The tables are all a light wood that matches the one the TV and components occupy. Since these photos were made, she decided to turn the chairs 90 degrees from each other with the lower table between. At first, I wasn't sure, but I like it now. Speakers (below) are for the rear channels in the home theater. The sound bounces off the wall behind us.

Since the stairs were bare, the overspray from 1987 was obvious as well as the workmen's footprints. As the dogs use the stairs, we needed to cover them temporarily, so cheap, thin black carpet was stapled to them stairs to keep them from slipping and tumbling.
The wrought iron railing around the foyer and down the stairs was welded inside the house and originally was black. It was white when we moved in and poorly painted. We decided to strip the many layers off by hand. No chemicals were used. What a mess it made and it was a tremendous amount of work, but we succeeded.


Gretchen, one of our Dachshunds, is supervising, below. My wife is on the cheap black carpeting I mentioned. I had removed each pine stair tread, hand sanded off the paint and reinstalled them flipped over. So their rounded edges are now facing the risers. There is a method to my madness.


Railings are now black again. The covers were needed to hide the mounting screws. ONE company sells them and they are not cheap. AFTER we had them, and now a maker's name, we found out how little the manufacturer sells them for. Sigh.

With the upstairs now done, I had to tackle the stairs. We bought stair treads that actually mount over your existing stairs. They are unfinished oak and one has the option of adding matching trim pieces that finish the look.
Many steps (no pun intended) were needed to do this. They are too long to begin with and since this was a quickly-built house, the stairs are not exactly square to the wall the abut to. So, each tread had to be cut to fit specific steps. Then, the end pieces needed to be glued and clamped to the new treads.
Next came pre-stain, yes, that is a thing. Once that dries, staining. Then two coats of Spar varnish. Originally I was going to use shellac, but it is not durable. Since I only had a small area to work, each stair had to be done individually. My wife was certain that I'd never finish.

Bare pine treads, flipped over. I had filled all the staple holes in the upright pieces as well as all the other flaws and painted them white. THEN realized that I wanted to flip them. Of COURSE, the white paint I had applied was now on the walking surface. So, I painstakingly removed it by hand. Thus scratching the white paint on the risers!


Oak treads now cut to length.


Treads are now completed with end pieces.

Next, the treads are stained and test fit.


Next is the foyer floor. It will match the upstairs floor, but I will do it myself. Plus, all new mouldings to match on the floor and inside door frame.
Thanks for looking! I hope this inspires you to make changes in your homes too.
Scott
February 27, 2018


