Gentle Reader,
It's been a while since I posted, but you, dear reader continue to read it. 174 page views yesterday! Thanks so much!
As you may have seen, I've been buying the better small speakers once made for and sold by Radio Shack. Frank quitely*, it ought to be called Cell-Phone Shack nowadays as they have wandered far from what they once were. But I digress... *Frank Quitely was a character's name on a comedy radio show some decades ago. I used it instead of "quite frankly".
Here is part one (of 2.5) of the first ones I did:
The Robb Collections: Upgrading old diecast Realistic Minimus 11 speakers
The Robb Collections: Upgrading old diecast Realistic Minimus 11 speakers
Here is part 2.5:
Here is the next ones I did:
And here is where I introduced you to this version of the Radio Shack Minimus 7:
Now, there is a seller on ebay that has capitalized on the love many have of these tiny speakers. Here is one of the two kits that he sells, the other has "world-class...woofers":
Since I was unimpressed by the sound of these in stock form, I bit and paid the $39.95 for the kit. I added some modern three-way binding banana terminal cups as well to replace the cheap spring speaker terminals.
Since you just saw them fully clothed in the intro-blog, I did not include a picture with the grille installed.

Front above, and rear, with said "spring terminals" as from the factory, below. Oh, and note the "keyhole" bracket for hanging them on the wall. WORST place to put speakers! They need to be some distance from the rear and side walls for the best sound and sound stage.

Directly below is the kit the ebay seller provides. The separate yellow capacitor is for the tweeter, the rest is for the woofer. He states that these speakers have no crossover part(s) for the woofer, but based upon my inspection of the factory crossover, it has an air-core coil for the woofer. Perhaps the more widespread die-cast metal models do not have this coil.

A little explanation: Tweeters, in this case the dome-shaped small driver at the top of the speaker baffle board, is for high frequencies. They will be destroyed if deeper sounds than they are designed to reproduce reach them. So a non-polarized capacitor is installed to block low frequencies. The woofer, is for lower sounds. To protect them from higher sounds, a crossover will contain one or more components, including a choke coil, to block the high frequencies. Speaker designers test their drivers and choose the size of the cabinets and more in order to get the best sound they can for the target price of the speakers. Thus, the simple crossover mounted on the inside of the rear terminal cup seen below.

The next two images are close-ups of the factory crossover.


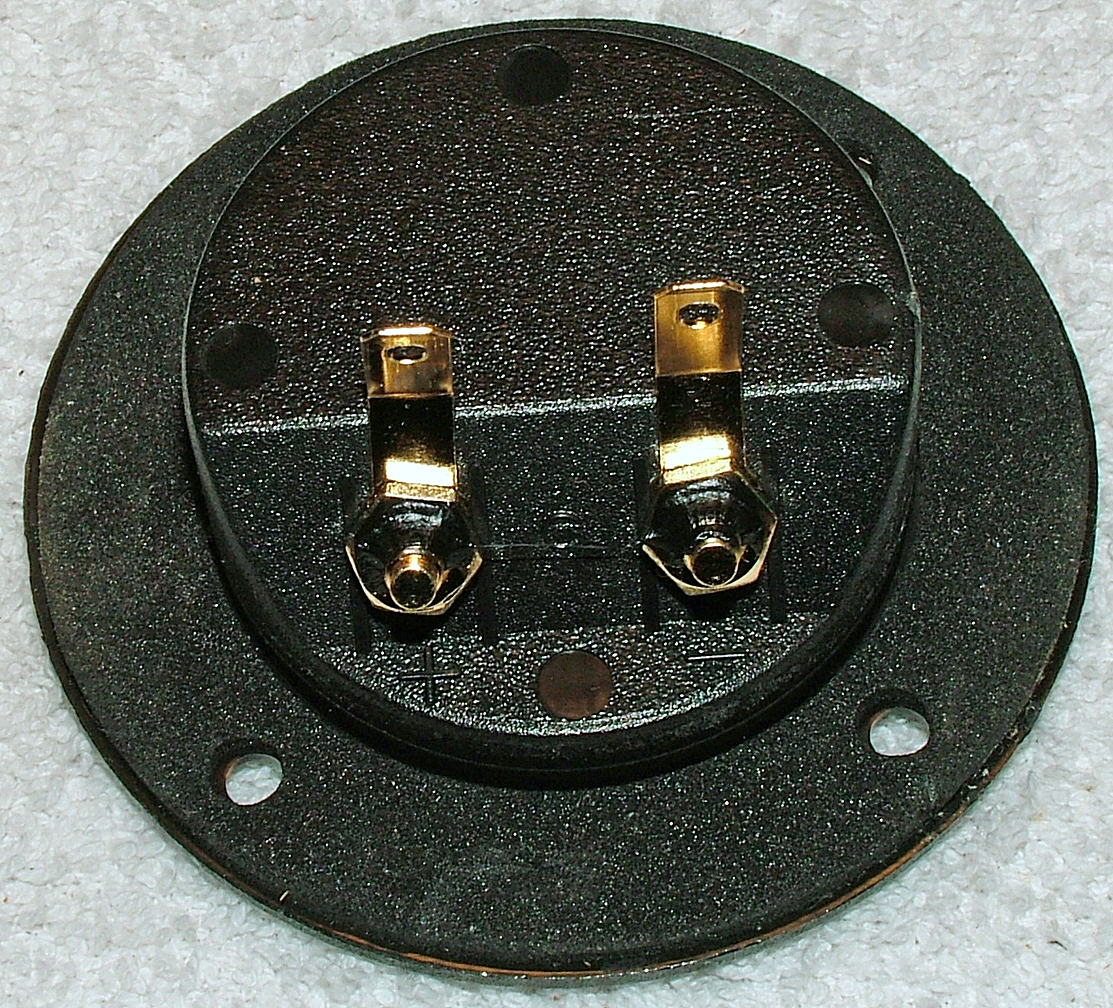
The new ones are from Parts Express, a company in Dayton, Ohio that specializes in speakers and audio for home, auto and professional. Below is the part number for these nice cups.


Step one after removing all the components, and by the way, most Minimus 7 speakers and their descendants are made from die-cast aluminum. So they differ in construction. Glue the board with the provided Gorilla Glue to the inside of the top of the cabinet. This prevents the woofer's magnet from hitting these components upon re-installation.


I have soldered one wire of the yellow capacitor AND the yellow wire of the rest of the crossover to the + terminal. I cut the wires off the old crossover and used the blue wire for the other wire on the yellow cap and the black wire for the ground side of the tweeter. That wire and the black wire of the rest of the crossover are soldered to the - terminal as seen above.

Above shows what I just described. I used some heat-shrink tubing to insulate the other wire so it won't short out if it touches anything metal inside the speaker. Above is NOT where the wires need to go!

Above shows where the wires need to be routed. You'll have to pull-split the red pair as the terminals on these woofers are on opposite sides. Also, I had to make a notch at 3 o-clock and 9 o-clock positions on the woofer's hole to clear these thick wires.
 Above shows the factory filler on the left and on the right some polyfil-type filler. Since the new parts take up so much room inside, I feel that a more complete filling will trick the woofer into "thinking" there is more room behind it.
Above and below are the new cups installed. The original screws are too small, so I used other ones that are bigger.

So, those are the steps necessary to complete the upgrade on Minimus 7 speakers, specifically the wooden ones.
But wait, there's more! In looking at various Radio Shack speakers on ebay, I came across ones with a cult following: Optimus Pro LX-4. They are, like these, made with a wooden cabinet and like BOSE's mdel 301 they are in a horizontal format rather than the usual vertical ones.
Like their LX-5 models that I have, they also have Linaeum ribbon tweeters. Unlike the 360-degree dispersion of the top mounted tweeters, they have ribbons that fire forward only.
Here is a link to a review about them: LX4 review
Why did I bring them up? They too have 4" woofers, however they are make of woven Kevlar. Kevlar is a brand name of Aramid fiber, which is what bullet-proof vests are made of. Well, someone had a pair for sale on ebay. I bought them and will install them once they arrive and give a complete review in Part 2.
Thanks for looking!
Scott


