Gentle reader,
I just posted a list of all my blogs about my stereo equipment adventures. After this, why not take a look: UPDATED Every Stereo Equipment Blog post I have done!
Here's the deal. I started looking into PROTON equipment because the same company that made them also made the revitalized Dynaco line when Panor Corp. bought the name rights. I always wanted some of that new Dynaco equipment and at last found a Stereo 200 power amplifier on eBay and snatched it up! It was part of the all-new audiophile equipment they were putting out as well as selling new Stereo 70 tube amplifiers. By the name, one can tell a Dynaco amp's output, the 200 is 100 watts-per-channel.
So, I found a PROTON D540 integrated amplifier which has their phenomenal "Dynamic Power On Demand" circuitry. I bought it to use as a preamplifier to replace my Yamaha C-45. After a while, I decided to try it as it was designed. Well, the stuff works. That little amplifier is amazing at producing prodigious power! It took everything I threw at it and asked, "Is that all you got?" OK, I may be being a little silly. If you Google PROTON D540, you too can learn about the magic they achieve from a 40 watts-per-channel amp.
So, anyway, I was playing LP after LP and all of a sudden there was a roaring noise, like Pink Noise, along with the music, but only on the Phono circuit. Fortunately, I had bought a spare D540, via eBay, so I wasn't too concerned.
Since I was going to unwire everything I decided to put the Stereo 200 back to work. I rearranged somethings too. Took me many hours. Here's what it all looks like now, and yes, I DO have the cover for the Discwasher components:

The OPPO universal player (has headphones on top of it) and the Adcom power supply were moved from the right side. The TDK CD recorder was moved from the left side and the D540 was moved (and replaced) from the top right to where you see it now. The Dynaco (and the D540 before) has to be on top to hook up all the speaker cables.
Here's the wide angle view of the above photo for reference:

And here's what it looked like before, except those Philips speakers now live elsewhere:

One thing I do not like about the PROTON models is the speaker terminals LOOK like they have three-way banana/binding posts, but they do not. They accept bare wire from the top down into the terminal OR some fancy bent-pin terminals as seen below:


As you can see, it makes for some odd restriction on how one hooks up speakers. Nope, one cannot slide banana plugs in those holes. They do not fit, and there is no continuity in those holes either. They just allow the red and black knobs to rotate.

Below is a close-up of the best conducting banana plug in the world next to the bent-pin terminal. Both are made for Nakamichi in China. I know, I had to get the bent-pin terminals all the way from China.

You see that split zig-zag? They make for ultimate connectivity. Sometimes a little too much as they can be hard to pull back out. Note how the outside cover for the bent-pin units have to be slid onto the wire/cable before putting the terminal on the bare copper. The banana plugs go on first and then the outer cover screws on. For the BEST banana-shaped banana plugs, Nakamichi also sells these:

No, they are not levitating. Though the magic of Photoshop, I rotated the photos 180 degrees. MOST banana plugs, even Monster Cable's do not look like these. If you look closely, the have a little bump on the end and the expanded part can spin around. This makes for easy assembly but poor contact.

Banana Plug lesson is over. Please let me continue the tale by showing how I wire my system to be able to drive up to four pairs of speakers with no danger of too low impedance for the amplifier to handle.

Above and below is the LEGEND LE412 speaker switch I found years ago. Go ahead and try and find one yourself. They seem to have been all sold. What's unique is it has three-way binding/banana terminals AND they are spaced 3/4 for using double-banana plugs which is what you see plugged into it. They are Monster Cable brand and yes, they have spinners.

To secure the switch to the top of the amp, I made round feet out of Blu-Tak which is sticky Playdoh-like material. It sticks but does not leave residue. Those funny looking things on top of the front of the switch are iron weights. I do not remember what they came out of, but they are perfect to prevent the LE412 switch from rearing up like it's doing a wheelie. The LEGEND switch designers never figured someone would use heavy cables like I do.
The gray, (or is it grey?) cables are Monster Cable M-Series and are 10-gauge copper with different sizes of wires making up the conductors. The theory is bass will flow on thick wire, treble on thinner. Can't prove it, but is sells cables.
Here are the various cables on the wall waiting to be reattached:

The black cables are Monster Cable Z-Series and go to the subwoofer and from there to the modified Minimus 7W speakers. Both Minimus speaker sets and others I have modified can be found in the links as seen in: UPDATED Every Stereo Equipment Blog post I have done!
Here is a close-up of the Monster Cable Z-Series:

"Z1R Reference Energy Time Coherent Time Correct Winding" is what it says. Again, it sells cables. And they DO sound fantastic which is why they connect to the incredible and ONLY ones in the world, modified Minimus 7W speakers.
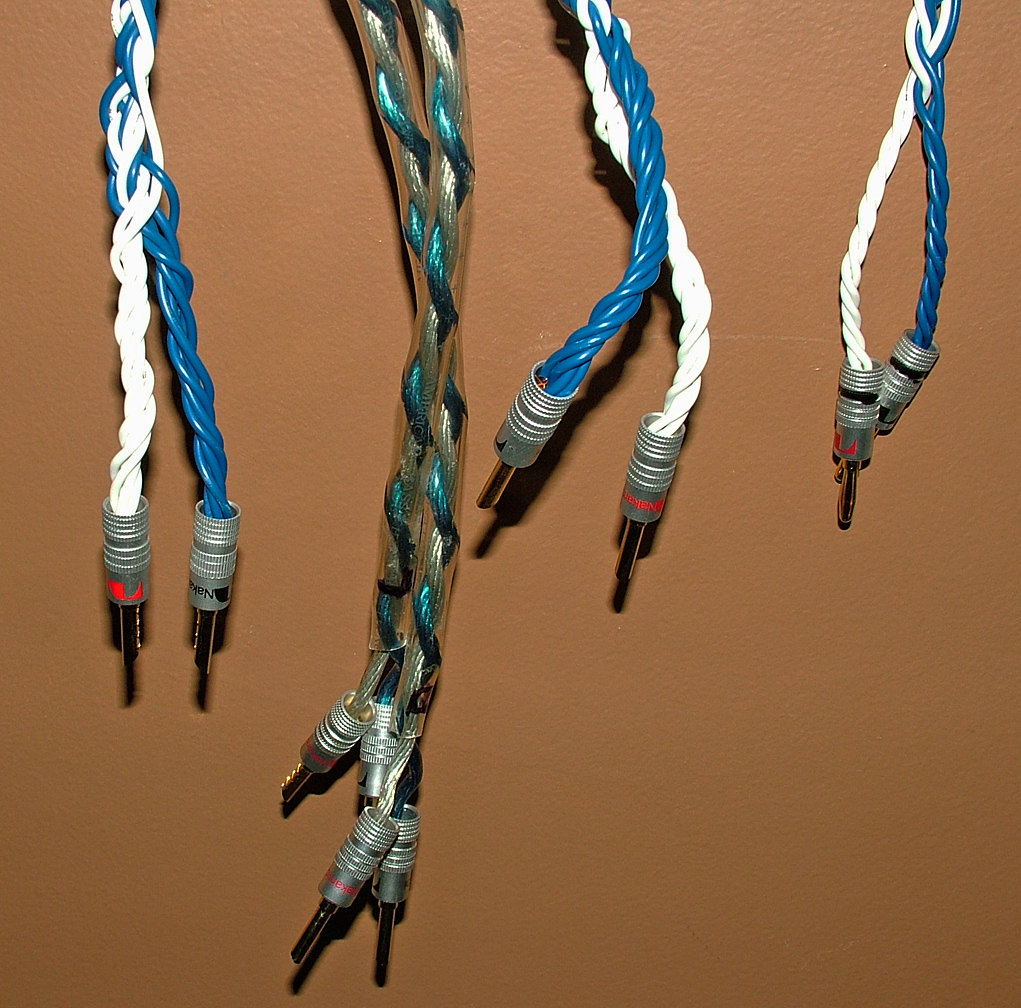
The thicker blue and white ones are the larger BLE Design units comprised of ten separate conductors woven together. They are for the Cerwin-Vega LS-12 speakers. The ones sheathed in clear plastic which my wife says looks like umbilical cord, go through the attic into this room and connect to the BOSE 301 speakers in here. My wife bought the 301 speakers for me. She's like that, and yes she does have two older sisters. One is not married. The smaller BLE Designs cables go to the modified Minimus 11 (silver) speakers.
Below shows the much neater cabling as plugged into the Dynaco with proper speaker terminals:

Those particular Monster Cable M-Series cables are not marked for polarity. So, red and black Sharpies to the rescue. If you are into stereo/surround speakers, buy a digital ohmmeter. They make it easy to determine polarity on speaker wiring.

So you may be wondering just how can I run up to eight speakers at a time? Well, I don't actually. The Dynaco and PROTON both have speaker selector switches which are designed to handle two pairs of speakers in parallel. The LEGEND LE412 speaker switch also has internal resistance for the same purpose. The load never drops to a dangerous level.
You also may be wondering what's up with the black cables plugged into the double-banana plugs on the inputs of the LEGEND LE412 speaker switch? As stated above, the cables go to the subwoofer and then on to the Minimus 7W speakers. To play just those speakers, I choose B on the amp and do not press either switch on the LE412. Should I choose to play the Minimus 11 and/or the BOSE 301 speakers, I simply slide the red plugs out of the double-banana plugs and choose switch 1 or switch 2 or both on the LE412. Also, of course choosing B on the amp. Confused yet? Believe me, it works and I measured the impedance in each case, all is well. Here are the terminals on the back of the subwoofer:

Aren't Nakamichi speaker terminals lovely to look at? They truly are the best and I highly recommend them. As you can see, the Monster Cable Z-Series IS marked for polarity.
To quote the famous and fictitious, Forrest Gump, "That's all I've got to say about that."
Thanks for looking!
Scott


