September 17, 2018
#275
Gentle reader,
Have you priced out wooden speaker stands for your bookshelf-sized speakers? The woodworker/artisans that offer them via eBay are of varying talent. And getting them made out of wood which matches one's walnut or oak veneer speaker cabinets can run into more money than I'm willing to spend.
Last year, I came up with this idea by searching under "wooden stool" and found many designs and sizes. I wanted to raise my $9.99 Klipsch KG4 speakers higher than the factory risers provide. Here is a link to the solution I found and how they turned out:
Since I knew those would not match the black walnut veneer on my vintage (1970's) DynacoA25XL speakers, I needed another option. I got the last pair which are sold as "Child's Bamboo Stool" via Amazon, so I looked there again.

As you can see, they are a very close match as far as the stain they used on the bamboo. Once correctly assembled, these are very sturdy stools.
Bamboo is not wood. It is grass. But, it is extremely strong and Asian companies have perfected the art of transforming round hollow tubes into flooring, trays, utensils and even stools. I'm sure there are a lot more things made from it.
Not being wood, there is no "grain" that characterizes so many woods we are used to and it's attractiveness. So, bamboo flooring is not going to have the dramatic look of some woods such as Acacia, which is what we chose to replace the wall-to-wall carpeting in our house.


I found this style of bamboo stools having a wide variety of prices all for the exact same ones. So, naturally, the ones selling for $12.99 were my choice. Being Amazon Prime members, we came home Sunday night to find the box on the porch. Yay!

Since so much of the "Swedish" furniture sold via Ikea is in fact made in China (well Volvo is owned by a Chinese automaker, and look how gorgeous their new models are!) they are very good at packaging their items compactly.

This is what it looks like after sliding out of the box. And below shows all the contents. Instruction sheet is not shown as it is useless. No attempt was made to guide the customer who buys these stools. So I will help you step-by-step.

Each leg has four holes. The holes that are near one end go on the top. The side of the legs with the recessed holes go on the outside. The Allen screw and bolt heads are flush with the surface of the legs when fully tightened.

The best way to start construction is by attaching the legs to the base. The small 4mm Allen wrench they provide is NOT going to work. The holes the drilled are a wee bit small for the screws. And your fingers are going to be hurting trying to screw them in. One cannot get enough leverage with such a short length.

Being a retired subway train car electro-mechanic, and a car dealership mechanic prior to that, I have a good number of tools. So, I chose a 3/8" ratchet and 4mm Allen socket, as you can see. CAREFUL! I applied a little bit too much torque to one screw and sheared it's head off. A little Superglue Gel and no one will be the wiser. Do not tighten them at this stage!

They included a nifty "J" shaped wrench for the nuts that secure the Allen bolts which attach the tops of the legs to the frame of the top.

Insert all 8 bolts and start all 8 nuts. Tighten them with the stool upside down, as shown.

Once all 8 of the bolt/nut combinations are tight, THEN you may tighten all 8 lower leg screws. Remember, don't twist too much, they are not made of the best steel.

Above shows what both sides should look like when all 16 fasteners are tightened. No heads should stick out of their holes.

Above, see how they designed it so that the top of the legs are flush with the bottom of the top? This helps to assure that the completed stool is square and will not wobble.


Viola! Both are done. Attractive and functional.


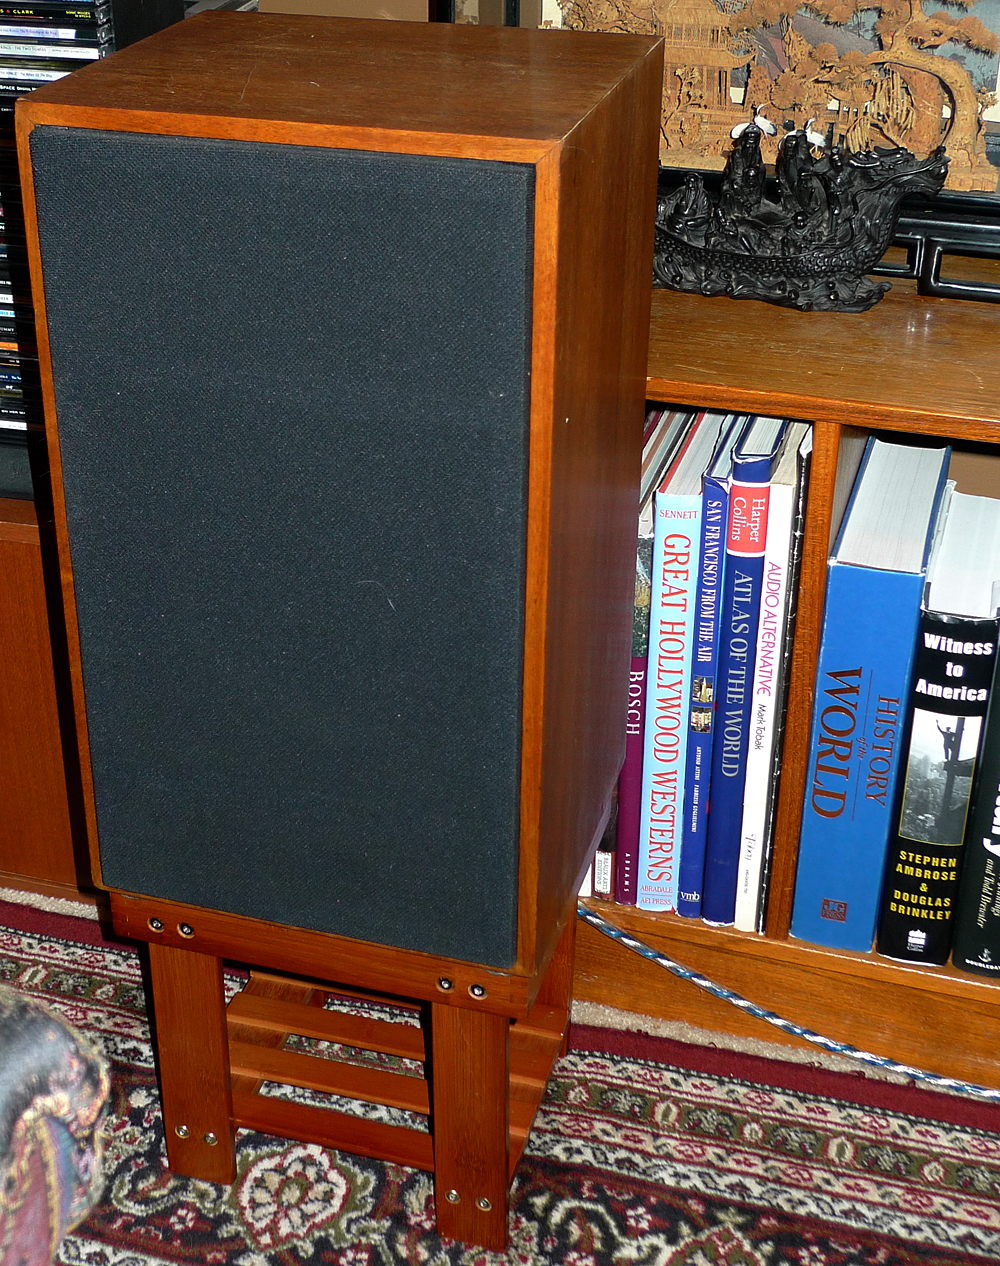


I'm tickled with how perfect these are. They stand not quite ten inches high. There is no wobble to them either. Well made and sturdy. All at a bargain price!
Thank you once again for taking the time to read my humble blog. It is a pleasure to read all your kind words and they encourage me to keep writing.
Scott
September 17, 2018


looks good. thanks for sharing the information!
ReplyDeleteThank you for reading it and commenting.
DeleteEve,
ReplyDeleteThank you for your kind words. I have always wanted to visit New Zealand. You are very busy with so many blogs! And you are very pretty.
Thank you for reading my blog.
Scott
Thank you so much for this informative article, Over 6 years later I found what appears to be the similar Childs Banboo Stool on Amazon.
ReplyDelete