Movin' on up! Panasonic Lumix TZ-ZS Series Cameras. TZ3 to ZS5. Episode Number 300!

March 14, 2019
#300

Gentle reader,

Yes, it's been a couple of months since I last wrote to you. This is due mainly to having not bought anything of interest.

I have been a fan of Panasonic Lumix cameras for many years. I coveted them when they first came out and wanted a BLUE compact zoom model way back then. I mean, they had Leica lenses on them!

You see, Leica had plenty of expertise making film cameras and lenses, but little experience with digital cameras. So, they formed a partnership with Panasonic. Panasonic would build the cameras and Leica the lenses. BOTH sold them under their own brand names. Now get this, physically, they looked the same, they performed the same. YET, the ones with the little red LEICA dot on them sold for around 50% more! "You pay for the name" as the old saying goes.

Thanks to a lively used market and eBay, I've owned a number of them and loved them all.

For more information on Lumix cameras, Wikipedia has a wonderful informative and long page on them:
Lumix - Wikipedia Plus, they have links to individual model's pages within the articles and graphs. Don't you just love the Internet?


Here are the boxes for the two of them:
Some time ago, I came across the DMC-TZ3 still having the box and everything at a flea market. I wrote about it here:

Prior to that, I wrote a three-part series about using classic film lenses on Micro Four Third cameras. Below is the third chapter, both previous chapters are linked in that article.

And way back, I first wrote about my love for them here:

My favorite as far as compact LUMIX cameras go, is my LX3, with it's superb and fast f2.0 Leica Vario-Summicron lens it creates awesome images. But it won't fit comfortably in a pocket. And, it's only a 2.5X optical zoom from 24mm to 60mm (35mm film equivalent).

You see, I do not have nor do I want a "smart" phone. Oh, yes, they are marvels of technology. Not interested, my flip phone works fine, and it's "camera" is crap. So, I always carry a Lumix camera with me.
If you read my previous articles, you know that I started carrying them with this ZS7. Yes, I know it is "better" than either of the cameras that I'm profiling here, but I do not make videos and thus it's HD video capabilities were useless to me.


That being said, let's get started talking about these two cameras.

The image below displays each camera's capabilities neatly printed in little boxes in two languages. Note that the older box does not show Panasonic's "intelligent automatic" logo but the older camera does have it. Just not as advanced.
TZ "Travel Zoom" cameras also come with the model name starting with ZS "Super Zoom". Mostly, the ZS-branded series are sold in North America. Aside from the names, they are the same. A ZS5 is identical to a TZ8. 
The TZ3 came out in 2005, the TZ8, TZ10, ZS5 and ZS7 all came out in 2010. The ZS7 and TZ10 are identical.

Five years in digital technology is a LONG time as far as capability is concerned.
At first glance, these two look identical. The older TZ3 is on the left. It starts at 28mm (35mm eq.) with a 10X optical zoom or 28 to 280mm (35mm eq.). 
The ZS5 (TZ8) starts at a wider 25mm (35mm eq.) with a 12X optical zoom which equals 25-300mm (35mm eq.). 
The views above and below show how much thicker the older body is. The newer model has the tripod socket closer to center.
Controls are similar and similarly placed.
Until you get to the back. On the older model, to view captured images, one rotates the knob on the top. The later model has a switch on the top right of the back. My LX3 is set up the same way, so I am used to it.
Note also, that the older model has the larger screen. The ZS7 and TZ10 have the larger screen because of their HD video capabilities which are superior to the less expensive ZS5 and TZ8 models. Both make PC HD video, however. But, as I stated, I don't make videos.
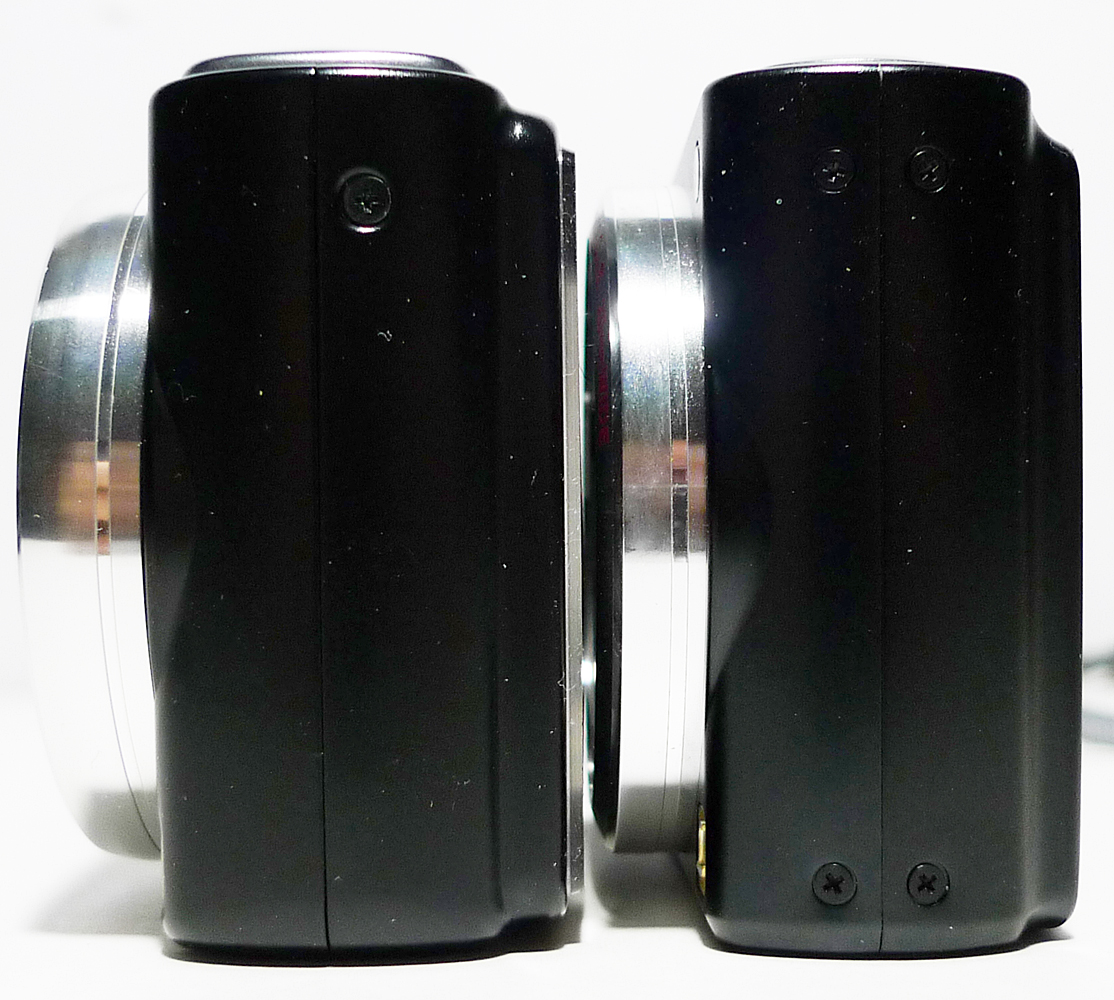
Side views demonstrate how much thicker the older models are.
Strap mount (left) is more traditional on the older model.
The older model has the option of using a "wall wart" AC transformer to power the camera. If I remember correctly, the ZS7 (and TZ10) also offer this. It makes sense if shooting video indoors and/or on a tripod to use the house's current to run the camera rather than have to keep changing batteries.
Placement of the LUMIX logo differs as does the zoom ratio labeling. The newer model also does not have the company name on the front. 
Physical length of the zoom is the same. The thickness of the body makes it look as though it is longer.
Not much difference in their looks above. The differences are inside, older model is 7.2 megapixels verses 12.1 for the newer. A significant difference. However, the only visible differences in the images can be seen on a PC monitor zoomed to 100%. Also, the larger sensor allows for larger prints to me made. 
Now we get to a weightier subject. 
That thickness also adds weight to the camera. 

The ONE thing I wish my point-and-shoot Lumix cameras had is an optical viewfinder. I'm a geezer at 62 years old and aside from a cheap green plastic camera which used roll film (seen below) I was given in the 1960's and a J.C.Penney 110 film camera when my kids were little in the 1980's, I did not have any camera whatsoever.
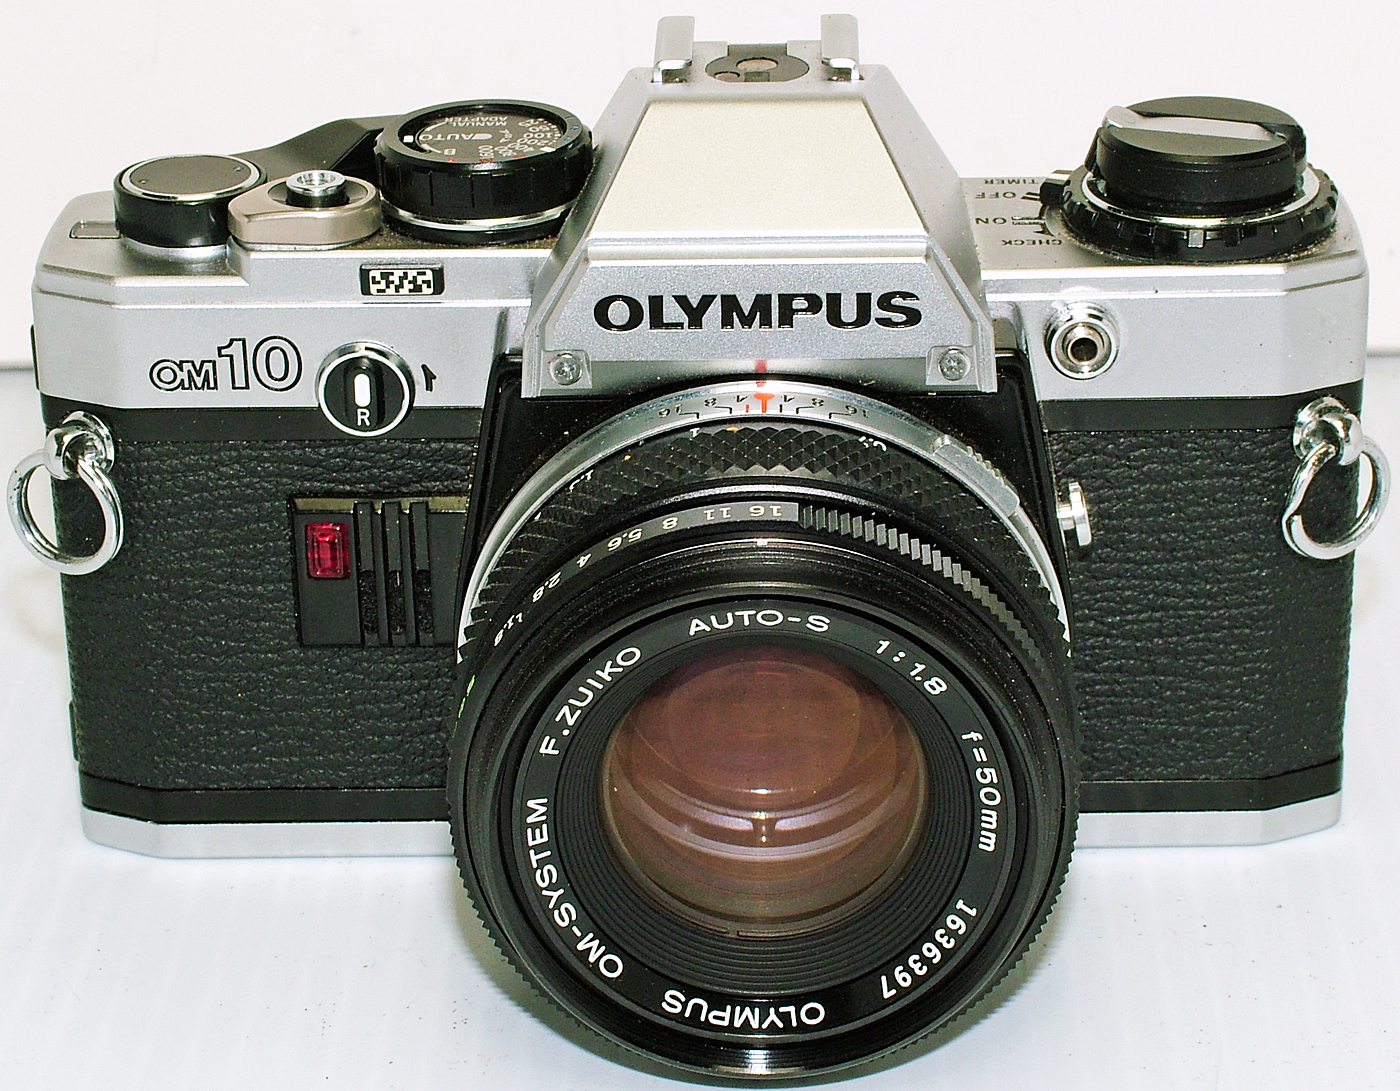
In April, 1995 I bought my first "real" camera, an Olympus OM-10 that I obtained for $100 at a pawn shop, (seen below).
Later, I started collecting cameras and had more than 200. Thus, I am used to having and using a viewfinder. I chose a Lumix G1 M43 body (because on the used market, they are cheap) mostly because it has an optical (albeit electronic) viewfinder, verses the equally capable and more compact M43 bodies that lack that feature. Like my FZ40 and G1 below.
Frank quitely*, I mean, quite frankly, I would have preferred a BLUE ZS5 or TZ8, but this one I bought was (used only once or twice) according to the seller. It appears to be brand new, and at $59.99 with free shipping, I jumped on it.

Aside from one test shot, I have yet to even play with the new ZS5. Since it is so similar to the now departed RED ZS7, I am certainly familiar with it.

So, there you have it. What I did not describe about each can be gleaned by clicking on any image and viewing it larger.

I salute Panasonic for creating and providing quality digital cameras with real Leica lenses for amazing prices.

Thank you once again for taking the time to read my humble blog and viewing my images (all made with my LX3). I truly appreciate all the encouraging words and comments.

Scott
March, 14, 2019
#300 


I Found the Perfect Amplifier Speaker Switch. Plus a Look Under the Hood.

January 22, 2018
#299

Gentle reader,

This is the first time I've written in almost a month. Mostly due to the holidays and all that entails.

Plus, I've not been buying any new equipment.I am perfectly happy with the listening room system and this one too.
I sold the vintage Fisher receiver and Advent speakers, both of which I fixed up and wrote about here. Plus the Legend LE414 speaker switch that I also modified and featured in this space. More on that further on down below.
It's a JAMO JSS4-HP. They sell versions for professional installations that have the small green terminals on the back. This one has banana/binding terminals and they were installed in a cool way.
Not much to look as it is all business. It's seventeen inches wide, the same as most components.
Made from heavy gauge steel and quality components. It has input terminals for TWO amplifiers. And is nice and heavy.
The close-up photos to follow will illustrate what is cool about the way they engineered the terminals.
Here's the bottom of it. The only opening it has is here. I bought it used, or as I like to say, "previously enjoyed". I coined that phrase. I got a wonderful deal. Another right time, right place situation.

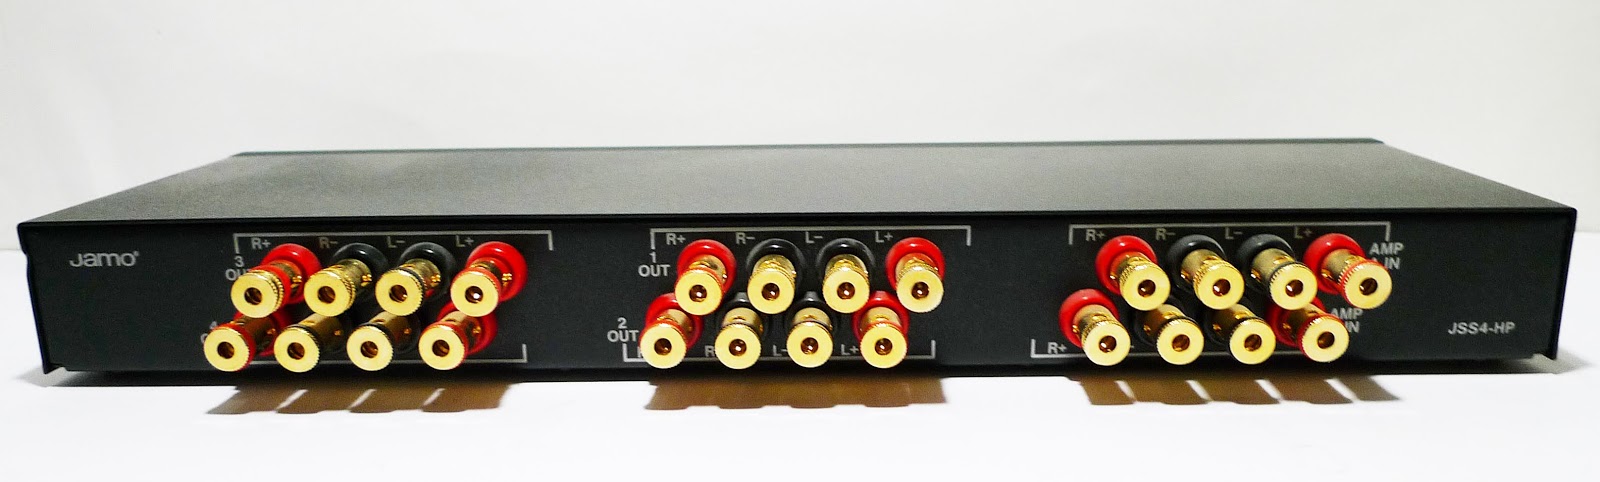
See (below) how they staggered the terminals? These are not traditional three-way binding/banana terminals. They accept banana plugs in the end holes or bare wires. If using bare wire, one presses on the spring loaded, (they have enough physical resistance to assure you they will hold tight to the wires) and inserts the bare wire ends. By staggering the terminals, there is room to pass wires between the upper terminals to the lower ones. See? Pretty cool. The drawback is that one cannot use forked spade lugs. Why are they called spades when they should be called forks? I know what a spade terminal looks like. A spade. No forks in sight.
Above are the input terminals for the TWO amplifiers. Seeing things on my 22" monitor reveals every flaw and speck of dust. Some of the color rings are missing and it is dusty. Dust happens.
Speaker outputs #1 and #2 are here.
And speaker outputs #3 and #4.
Name and button directions as well as A/B amplifier switch and headphone jack. Have you ever seen a speaker switch with a headphone jack? Not I.
Model number and description shown here.   
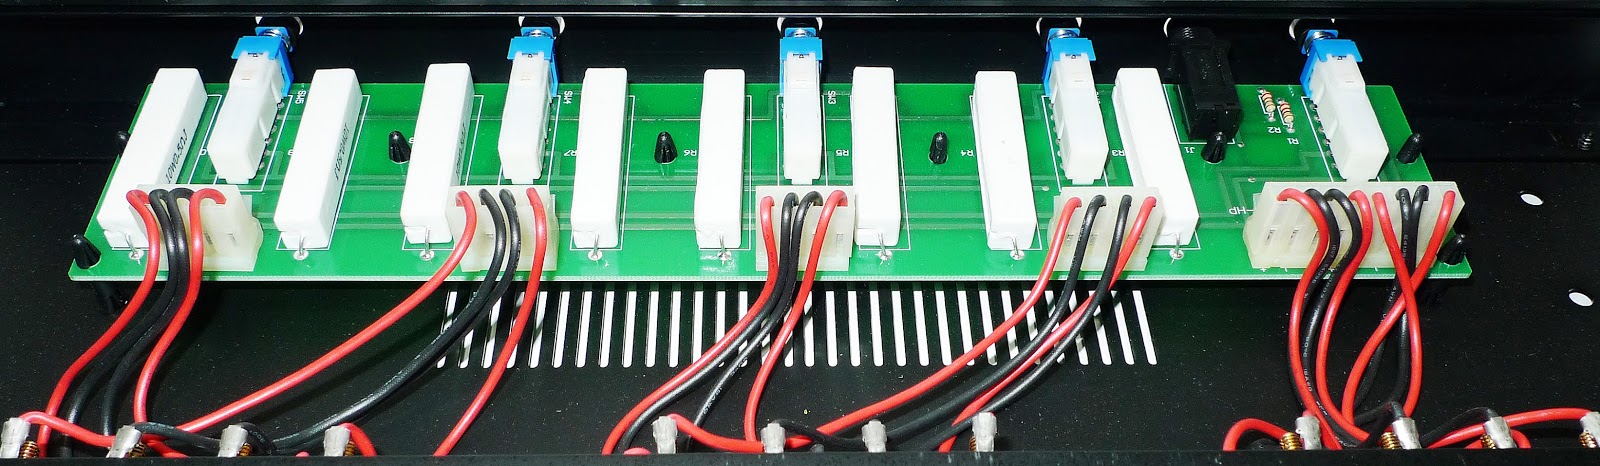
Completely passive, as you can see. I downloaded the PDF file of the owner's manual. It explains how resistors are built in to maintain at least a four Ohm load at all times if two or more pairs of speakers are engaged.
A better look at the board that holds the switches and resistors.
Amplifier input wiring goes to a plug rather than individual terminals as I have seen in other switches.
Speakers #1 and #2 wiring shown here. Note that they are two separate plugs.
As are speakers #3 and #4 plugs shown here. All very neatly done. At first, I thought, "Hmm, they could have used larger gauge wires." Then I realized the circuit board uses relatively small traces, so larger wires would not make sense.

I wrote about the modifications I did to the Legend LE-414 speaker switch seen below here: 
Improving Ultra-Rare Legend LE414 Speaker Control Selector Switch Assembly 
Here it sits atop the JAMO for comparison. HUGE difference in size.
The one advantage the Legend has is three-way binding/banana terminals.
Next, I will show you how I mounted the JAMO and keep it from possibly tipping backwards from the weight of the speaker cables I use.
I first read about Blu-Tak reusable adhesive some years ago in Stereophile or The Absolute Sound.
Other companies jumped on that bandwagon by making their own versions in various colors. But Quake Hold, which makes ALL kinds of things to secure your stuff from earthquakes, makes the most secure of these adhesives.
I have picked up speakers on stands held by Museum Putty and the stands which weigh more than the speakers do not fall off.
To remove speakers, I have had to seriously pry them. Great stuff. And it leaves no residue!
Using my handy Craftsman folding utility knife, I cut four small squares as such:
I then bent them in two so that they are thicker than the feet of the switch and applied them, as seen below.
Since the switch is not as deep as my OPPO universal player, it was fastened to the disc player's top, centered front to rear.
Since I no longer have "surround sound" in the listening room, (oh, by the way, this is the stereo that sits next to my computer in the home "office") I am no longer using the extremely rare 1990's Dynaco QD-2. 
So, I had the Monster Cable Z-Series speaker cables that I shortened to make jumpers to hook up the QD-2 available.
These are all of the Monster Cable Z-Series speaker cables that I have on hand for future use. The ones with green banana plugs came with the 15 foot pair I needed for the listening system. I believe it is for center channel speakers. The other two are about 8 feet long and were once 10 footers.
Here are said jumpers. I always replace speaker cable's factory terminals with Nakamichi ones. They are the best.
Because the ones above hold SO tight, I decided to try their traditionally shaped bananas seen below.
They are a little easier to insert and remove.


Until recently, said vintage Fisher receiver that I mentioned at the top of the article, was at the bottom of this stack. It drove the more efficient speakers and the Yamaha the less efficient ones. The cassette deck was connected to it and the OPPO to the Yamaha. CDs were still an expensive novelty when the Fisher receiver was made.

My decision to pass it on, (along with other things I have on eBay) left me with four speakers in here and only two pairs of terminals on the Yamaha. 

JAMO to the rescue! I now have a superb speaker selector switch that matches the black-stack. And even though it looks narrower than the rest, that is an optical delusion. It is 17 inches wide.
History has shown me that masking tape adhesive eventually softens, makes the tape translucent and leaves a residue that is hard to get off.
So, I began using fiberglass high-heat electrical tape for marking cables. I use a RED marker for the Right channel and BLACK for the left. I also colored the smooth portion of the Nakamichi plug's "insulators" (which by the way ARE conductive!) so that it is easier for me to tell positive from negative at a glance. 
As you can see, they are clearly legible and the tape is designed to be permanent. I used a lot of it working on 700 volt DC floor heaters in many a subway car over the decades.
The photo above justifies my use of Sharpies on the plugs. For some reason, I put shrink tubing on one end of these jumper cables, but not the other. The positive wire does have a red stripe on it but it is hidden in this photo, even so, I always verify by performing a continuity test with a Volt-Ohm-Meter.
Aforementioned shrink tubing seen above.
These photos give a better view of the holes that accept bare wires on the JAMO should one choose that route.
One last thought on speaker cables: All I use are twisted pair speaker cables. Even though they are resistant to 60 Hertz interference, standard speaker wires might have RFI issues. The twists resists. 

You may have seen the little yellow Post-It note I stuck to the speaker switch. That is temporary. My wife has a nice label maker and will be happy to make some proper labels for me. (Which  she has done, see near the bottom of the article.)

OK, you may be wondering what the markings are, right? Go ahead and admit it. OK, I'll tell you:

C-V     Cerwin-Vega LS-12
301      BOSE 301 Series V
LX4    Optimus Pro LX4
M7W  Modified Minimus 7W

Now that you have gotten a good laugh out of the way, each pair of speakers have meanings to me.

I'd never seen nor heard any Cerwin-Vega! speakers prior to finding the LS-12s at Salvation Army. I know they have a reputation as "dorm room speakers" these sound excellent and are slightly more efficient than my Klipsch KG4s. Plus, how many other speaker makers use diecast aluminum woofer frames and make very efficient speakers? Hmm?

My wife bought the BOSE 301 Series V speakers for me years ago hoping I would stop using the large speakers in the living room. I did not. But once I set them us similar to the way 901s are supposed to be and critically listened to them, they aren't bad sounding. Not audiophile quality, but very good. And they are efficient. I mounted them near the ceiling on adjustable flat-screen TV brackets as can be seen below:
The C-V LS-12s sit directly beneath them and the LX4s and M7Ws are atop them as seen below:
Heidi and Gretchen stand guard as usual.
The stormtrooper and TIE fighter pilot are now consigned to the box of donations waiting to return to the same thrift store I found them in.
Both of the small speakers are secured with Museum Putty. The mess of cables above is now neatly tucked away. OCD has it's uses. 

I wrote a series of articles on modifications I made to the Minimus 7W speakers. And since the woven Kevlar woofers I used are from the cult-following LX4 speakers, I watched for and was able to secure a pair via eBay.

By the way, the articles about the M7W speakers and mounting of the BOSE 301s are some of my most popular. So others have chosen those speakers.
The photo above shows the labels that my wife made for me. Much better than the post-it-note.
I also bought a NOS AUVIO 3.5mm-to-stereo-RCA cable via eBay to replace the cheap one I had been using. That's the white one plugged into the HD radio atop the switch.
As I wrote above, I used Quake-Hold reusable adhesive to secure the switch to the top of my OPPO universal player.
Not one to totally trust the weight of the two units, I decided to suspend the eight heavy speaker cables, above and below.
"No wire hangers!" A line from a book and movie about Joan Crawford, I believe. Anyway, wire hangers can and have been used many ways by many people. This use is ideal, unlike say using it to hold up car exhaust.
I slid the other end through an unused hole in the bracket that secures the right BOSE 301 to the HDTV bracket. This also takes the strain off of that speaker's banana plug terminals I installed some years ago. I have spring terminals!

That's it for today's story. I hope you enjoyed it. I do not know when I may write again. As I stated, I am not buying equipment anymore. 

I'm completely pleased with the listening room system (after 44 years!) and really enjoy this kit too. Plus, having four pairs of speakers to choose from and all of the components right next to me is handy and enjoyable.

Thank you once again for taking the time to read my words and view my photos.

Scott

January 22, 2019 
Updated February 6, 2019 

Earbuds In-Ear Verses Over-Ear Headphones Which Ones Sound Better?

 October 8, 2026 #553 Gentle reader, I have been in the best-sounding-enjoyment-of-recorded-music-I-can-afford, hobby for fifty years. I do ...