XBox 360 Forza 4 100% Completed Chapter Ten

Gentle reader,

I am just banging out these posts! Only two days since my last about my project updating vintage die-cast speakers with better drivers.

It's been a while since chapter 9 of my Forza 4 saga. I've been busy with the simulation. I've bought some more cars, redid the livery on others and in fact, finished for a second time! This time I went back to "World Tour" mode of which "League of Legends" is the final season with 27 races total. The last five are R1, the topmost tier of real race cars. I chose my favorite, my Audi R8 Le Mans racer. I found to my delight that there was one car painted in GULF OIL blue and orange livery. I found a 1/43rd scale die-cast car and then found a completely accurate livery by a skilled Forza painter. So, I drove it to five 1st place finishes. The very last race of Forza 4 is two heats of 12 cars racing the complete Nurburgring. The last time I did it, I didn't come close to winning, this time, well, I'm very experienced.

Now, if you are thinking, "But it's just a video game! How hard could it be?" Check out my setup:
The Robb Collections: Racing simulators XBox 360/Forza 4 and PlayStation 3 (PS3)/GT5  Since then, my son-in-law came home from Okinawa and out of the USMC. He wanted his PS3 back. So, since I have decided by apples/apples comparison, that the Forza franchise is the better of the two, I sold all my PS3 racing sims on ebay and concentrated on the XBox 360.

Would I like an XBox 1? Yeah! I've seen Forza 5 and Forza 6 looks awesome! Night racing, weather! Do I want to spend the money? No.

So, without further raving, here follows the next 15 cars of my garage as it existed when I started writing about it. If you haven't seen my previous chapters, these digital racers were shot inside my virtual garage. Car photos are obvious, next panels show their class (F is slowest, E,D,C,B,A, and S, then three classes of race cars: R3, R2 and R1 being the fastest) and bar graphs showing their performance characteristics.

You may be thinking, "Wait a minute, Mazda 3s are front-wheel-drive!" Yes they are, but in Forza, in many cases, one can convert vehicles to rear, or even all-wheel-drive. Swap engines, drive-train, everything that can be done in real life can be done in Forza and the computer figures in all real-life factors in the car's abilities. Believe me, this is no simple "game".

With every car in my garage, I bought "livery" (paint schemes) unless they are already real racers. In that case, I often change their livery too, so I won't see another racer identical to mine. This is a pretty good replica of Mark Donahue's Trans Am Javelin.

Before he raced a Javelin, he raced this Camaro. 

True fact: The Lamborghini Miura was the first car to feature a transverse V12 engine. Prior to it, all sports cars engines were longitudinal (front-to-back) no matter where in the car the engine sat.

Yes, THAT Shelby, as in Carroll. He worked for Dodge and did some wonderful things with a number of vehicles. As you can see, I converted it from front to all-wheel-drive.

What? No number? Yes, back in the day, numbers were assigned for each race in the Sports and Endurance car racing world. Why, in this room I have photos of Porsche 917s numbered, 8,9,10, and 1,2,3 and 22,23 and 24. Three different tracks in the 1970 season.

This was one of the many factory Rally racers of which they were required to make X-number of street versions to homoligate the racers. I dropped the suspension, all-wheel-drive conversion and look out!


Yes, there are electric race cars and motorcycles. Eerie to drive this, no engine sounds.
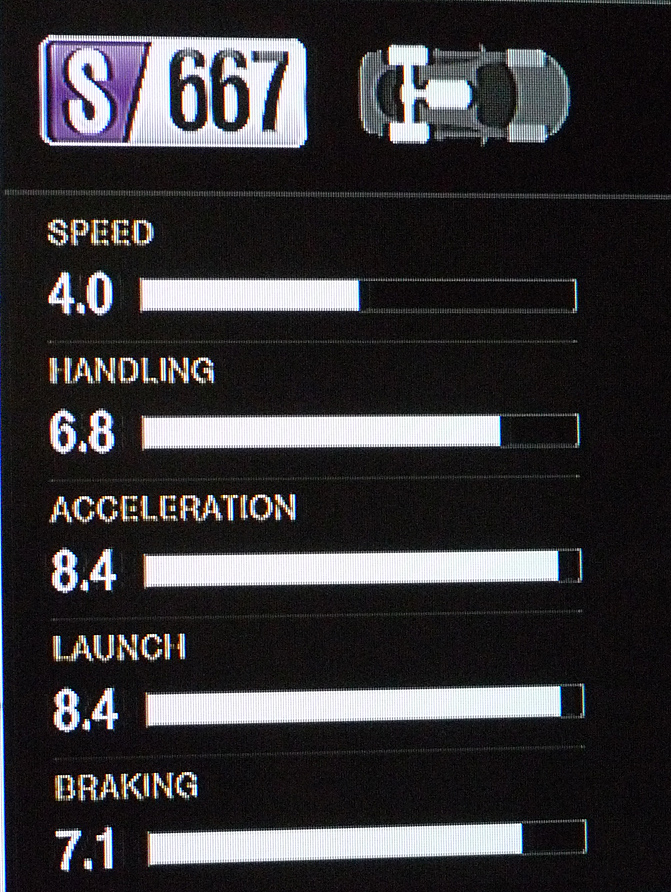
Another street version of the rally car. Set up as a circuit racer.

The first European turbo car. Beating Porsche to the punch. Back then, no intercoolers.


Dodge Daytona. NASCAR required them to build 500 street versions. So they did. But not all-wheel-drive! Accurate livery from the 1969 season.
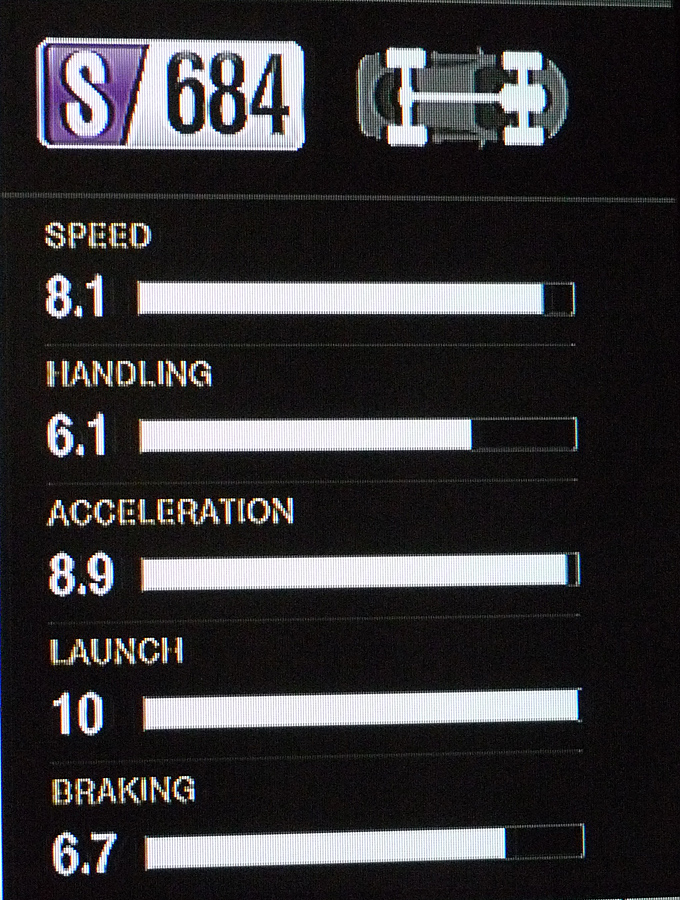
My wife loves RX-8s. I test drove one in my quest to find a car "from this Century" as she put it. Chose my beloved 2005 Volvo V50 T5 with 6-speed manual transmission.

One of  the flaws in repainting or decorating some cars in Forza is the original decorations sometimes cannot be covered. Thus, this Martini livery shows the Carrera stripe!
That's it! The first 150 cars! Less than 100 to go. Thanks for looking!

Scott

Upgrading old diecast Realistic Minimus 11 speakers

Gentle reader,

Yes it's only been a couple of days since I posted a new subject, that being restoring a pair of solid oak CD tower/racks. 

I have owned a NUMBER of speakers, I just counted the one's that I've archived, 63 pairs. Plus all the ones that I have in use. Over 70 pairs! 

Radio Shack, a truly American icon business, is sadly having financial woes and is or may already have, closed a lot of it's stores. Frankly, they could have changed their name to "Phone Shack" for they seemed to be selling more of those. When last I checked, they only had two actual radios and not much in the way of Stereo or A/V equipment.

RCA either bought them, or the other way around, a number of years ago, as their own Radio Shack brands such as Realistic, Optimus and the like was slowly being replaced by RCA branded items. Some were the same, but simply "Badge Engineered" as RCA. An example is die cast metal speakers once sold as Minimus 7 or as Optimus brands. These came usually as die cast metal, but occasionally in traditional wooden cabinets. They were robust and well liked in their day and I suspect there are still many out there making music.
These are, as you can see, RCA branded. Below are Minimus 7 in white. I had some Optimus units in black as well, but am not finding their photos.
Now as to the subject of this posting. I found a pair of larger Minimus 11 speakers, painted silver, that I'd never encountered before and bought them for around $10.00. 
The holes in the grilles are the same size, so that should give you an idea as to how much larger they are. I do not know what kind of metal "die cast" is in this case, but it's very strong and heavy.
The backs on these larger speakers, unlike the "7" series, are removable, as you can see below.

Note the common and cheap spring terminals that barely suffice and limit the size of wiring used to connect the speakers to the amplifier.
Above is with the grille removed. They used some type of sticky caulk to secure the grilles. Square framed 5" woofer and horn-loaded cone tweeter. Do not poo-poo cone tweeters, they work fine and produce good highs. They are all BOSE uses and I continue to be amazed by how great my BOSE 301 speakers sound.

Prior to disassembling these speakers, I looked through my Parts Express catalog for 5" or 5 1/4" woofers and suitable tweeters. I was looking for quality, but not expensive units and seeking the lowest bass response in this size woofers. I chose Tang Band units which are 5 1/4". My thinking was, "I can enlarge the holes a bit to make them work." Right.

Below are a series of photos that show the speakers being stripped down and the fronts and backs of the various components.
Stuffed with a sheet of fiberglass with protective covering.
Above and below, the drivers from rear and side.

Above and below is the crossover from the top and side. Note the resistor is marked "Honda". Curious. It is comprised of a coil (Foster) that removes the high frequencies from the woofer's path. A non-polarized capacitor that removes the low frequencies from the tweeters path. I don't remember the resistor's purpose. Simple and mounted on what appears to be thick cardboard which is secured to the inside of the terminal assembly.

Above the fiberglass as installed and the inside of the rear metal back. Below, the empty die-cast enclosure. Note that the back screw holes are molded into strengthening ribs for the walls.
As I said before, I don't know what kind of metal it is. A magnet is not attracted to it and it seems too heavy for aluminum. 

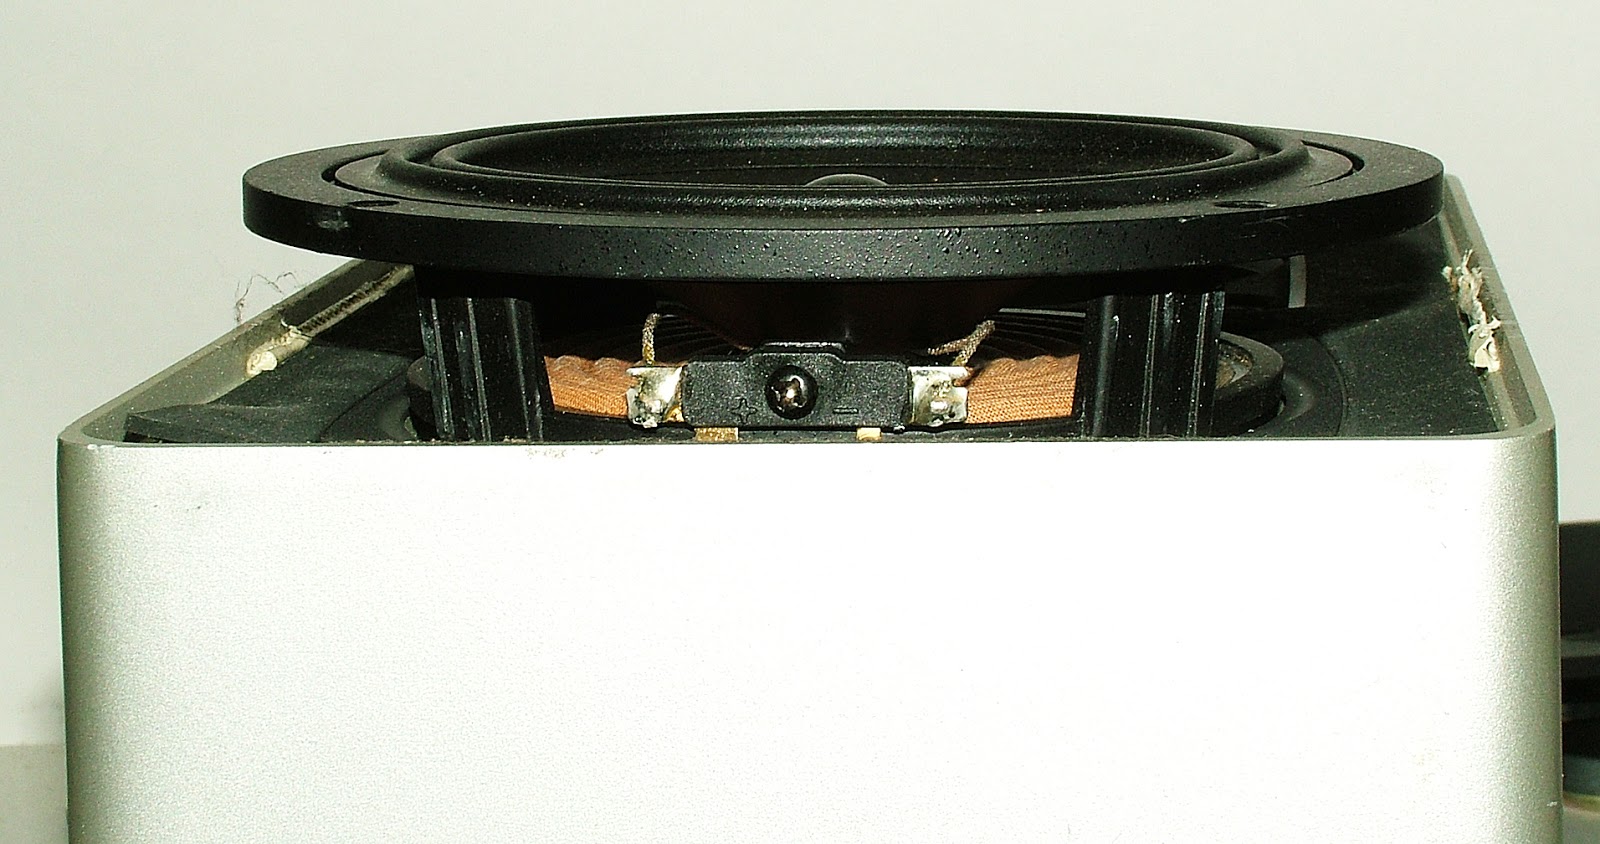
Next, the series of pictures depict the flaw in my logic regarding the extra 1/4" of diameter of a 5 1/4" woofer verses a 5". 
No way these fine Tang Band woofers can be used in these metal cabinets.

Above and below shows the large difference in size between the original 5" and the Tang Bands.

Above and below, the rear and side views. Note how much stronger the cast aluminum structure of the Tang Bands verses the stamped sheet steel of the old drivers.

Above and below are various views of the Dayton Audio 5" woofer compared to the original Realistic driver.
HUGE does describe the magnet structure on the Dayton.
Below shows that the new Dayton's screw holes do not line up with the cabinet's holes. Not a problem as you will see.
Next, a comparison of the new crossover and terminal assembly. They are from a pair of Infinity Primus 150 speakers that employ a 5" woofer and tweeter. So, they should be close to my needs.
Note how much more complex the Infinity crossover is and how much thicker the wiring is. Plus it's built on a fiberglass circuit board that mounts separate from the terminals.
Above and below, the Infinity's terminal "Cup" has gold plated 3-way binding/banana post terminals. The black and red caps come out easily to use banana plugs which are my favorite.
Above, you can see that the round portion of the cup is too wide top and bottom and the whole assembly is too narrow for the hole. Again, no problem as you will see.

Below is a series of pictures depicting how I adapted the Dayton Audio Ribbon Tweeter to the horn tweeter framework. I'm really please with the results. 
Above is the ribbon tweeter from the rear as it will mount to the plate seen below.
This ribbon tweeter is very versatile in the ways it can be mounted.
In the bottom of the above photo is the old cone tweeter still in place. To overcome the problem of mating the new ribbon tweeter to the horn, I unscrewed the old tweeter and sawed it free of it's mounting surface. I sanded the surface flat as seen below. On the rear of the horn, I removed the ridges which lined up and mated the cone tweeter properly to the horn. Then I applied 1/2" wide by 1/32" thick close-cell foam rubber tape to the rear face of the horn. I carefully line up and centered the ribbon tweeter and tightened the original fur screws. The ribbon tweeter is safely sandwiched in place and it is air tight.
Next, you see the completed tweeter/horn assembly in place and the new woofer. Note the white sticky caulk is still there.
Below is the drivers screwed in place. See how I used washers to hold the woofers in place. I plan to make some metal brackets to not only look better but more professional. Note also that the white caulk is gone. Gotta love WD-40. 

Above, the new drivers in place. Below, the new crossover and terminal cup in place. For the latter, I had to file the top and bottom surfaces of the cup and using a rotary file in a drill curve the center sections of the hole so that the cup would fit.
I sealed the holes in the cup as well as the edges with black RTV silicone glue. I allowed plenty of free air during the curing of the RTV as it's fumes can negatively affect electronics.

Below, is one of two sheets of polyfill that an ebay seller used to pad the tweeters. Turns out they are perfect to fill/damp the interior of the speakers.

The woofer's terminals are the same width, so I replaced the narrow negative terminal with a wider one. I used a black marker to remind me it is negative.
Below, are comparison photos of the 5 1/4" Tang Band and 5" Dayton Audio woofers.


Quite significant for only 1/4" difference in cone diameter, isn't it? 
Finally, above is a large picture of the first completed conversion. I hooked it up to the left channel of the Dynaco Stereo 200 power amplifier and set the Adcom preamplifier to mono, turned the balance to the left and played some challenging music. I am VERY pleased with the sound!

I will post future photos of both speakers when they are done and in place in the "Listening Room".

Thanks for looking,

Scott
 

White Van Speakers. Who Fell Victim to those Sneaky "Salesmen" Back in The Day?

  July 10, 2026 #459 Gentle reader, There is an interesting Audio-Equipment-History YouTube channel called "Multimedium". They mak...