Large and small ROCKS collected to make a dry stream to prevent erosion. UPDATE

Gentle reader,                                                                                                                     May 2, 2017

It has been a while since I have written. I just retired from my job of 35 years and it is taking some getting used to. I have held a job for 44 plus years and am only 60. So once I get caught up on the many ideas we have for inside and outside the house, I'm sure I'll get some kind of paying job.

We put in a pond some years ago and built up around it with vegetation and rocks. There was mixed success. Sometimes we had tadpoles and baby fish and sometimes we lost all living things. Other times it would mysteriously empty itself! So, we decided to try a different idea.

The way our back yards were shaped in 1987 allows rain to drain (from the neighbors on our left, if looking out the back of the house) diagonally and the water turns right along the fence line and makes its way down hill to the gutter.

Since we now had an abundance of big granite rocks, flat stones and a lesser amount of various sized quartz rocks, we decided to create a dry creek bed to channel the rain water and prevent it from further washing out areas of grass. 

Above, is a panorama photo shot from a rear window of the house. If you click on any photo, a window opens and the photos are larger.
We had previously built a small deck and my wife purchased a ten foot square metal framed gazebo which was covered with tent fabric and had zippered net sides. She erected it, with help from a couple of the kids, over the small deck and added "zero gravity" chairs. That way we could enjoy the sight and sound of the pond and be mosquito-free.  

Sadly, the trees above the gazebo/tent stained the fabric and I removed it one year. No amount of effort would clean it. Our daughter moved and gave us her smaller version of the same thing and we decided to take down the large one and recycled the metal. 
Above is the framework of that smaller gazebo/tent, sans fabric. The outdoor rug accompanied the tent so we attached it to the small deck and the framework as well. 

I used the flat rocks, possibly slate to cover previously washed out areas and filled the gaps with fine gravel. It appears as mortar but isn't. All areas where there are rocks have anti-plant-growth fabric underneath.

Obviously, we needed a large (much larger!)  amount of river rocks to fill the stream. We at first bought stones that may be sandstone and are various shades of tan. My wife picked up several bags at another source that she thought were the same but turned out, once the mud was rinsed off, to be gray mostly with other colored rocks and in many sizes. We lost count of how many bags we ended up buying but it was MANY.
Above is the left side of the small deck and flat stones.
 From the deck area flowing left and uphill to the neighbor's fence.
 Above and below is two views of the area around our magnolia tree.
 Below is from the fence side of the same tree.

 You can see the variety of river rocks above.
Above is looking downstream from the Magnolia tree.
Above is the view from the deck on the back of our house. My wife came home when I was typing this post. So I went out to meet her and show her the progress. Then our new neighbor, Maria came over. Thus began the three of us trying to communicate in Spanish. When I finally came back in, my display settings had gone form normal to 64 colors and low resolution. After fighting it, I decided to just restart the computer. At first, it was the same, then the Nvidia drivers did their bit and all is normal.

UPDATE 5/11/2017 BELOW:

Since we are getting more beneficial rain here in Virginia (no drought this year!) I took the opportunity to go out on the deck and document how well it is or isn't working. Below are the results from the same position as the photo above this paragraph.

It's been raining steadily for many hours. The flagstones I so artfully arranged on the left side of the small deck are completely submerged. As you can see beyond the deck the creek is no longer dry. We arranged it to empty under the deck and exit the other side as you can see below. The water naturally meanders in an "S" shape around the flagstones on the right side.
Below is a wider view. I read somewhere that "water finds a way". Sometimes where man (and women) do not want it. Also below you can see it makes a right turn......
Then continues parallel to the fences heading toward the front yard/driveway.
I'm not quite sure where it goes from here. Filter through the mulch? The top of our driveway lays just beyond that fence. There is a strip of lawn between our driveway and the neighbors and it gets quite swampy during rain. So I think I'm right on that. No stream on the driveway.
ORIGINAL POST CONTENT BELOW:  

I decided to add historical pictures of the pond. Warning: Some people see a resemblance to a certain anatomy in the first shape of the pond. We set it up so water was pumped to the top and ran down the "creek" and into the pond after being filtered.
ASIDE from that, note the spindly tree to the right of the potted plant? It is a cutting from a Corkscrew Willow tree we came across. I put it in a glass of water and it grew roots. The photo above this one is what it looks like now. It never grows upward like the other one we planted which must be 30 feet or more tall, but in fact weeps.

The next iteration of the pond was making my first attempt at a dry creek bed. It's "source" is a large quartz rock next to a weeping cherry tree atop the hill. You can just see it in the top left corner of the photo.
Above, as you can see, the tree is larger, but it must have been early Spring. 
We had originally had thought about running water all the way up the hill, but realized the potential for losing a lot of water along the way. 
And the last photo from the original pond setup with the first generation of gold fish. One year, SOMETHING came along and ripped all the water Lilly plants, of which there were many, out of the pond as well as all the fish, but the fish were not eaten. We never did figure out what could have done that. Sigh. 

But the pond days are over, the last two fish now reside in a neighbor's pond and no doubt are much happier in their new pond.

Thanks for looking. We are rapidly approaching 100,000 page views. I can't believe it. But many people tell me they really enjoy my writing and photography and have learned from it.

Scott

My wife shows once again how awesome she is: Sneaker collection rack!

Gentle reader,

Way back in March, 2015, I posted about another collection that was unplanned  but happened anyway: The Robb Collections: I was an elementary school trendsetter! ADIDAS and driving shoes collection.

The other day, out of the blue, my wife asked me how many Adidas did I have. Being a literalist, I answered, "Fifteen." What she really was asking was how many pairs of shoes did I have. I thought no more of it and came home a few days later to a HUGE and heavy box from Amazon. She got home right after I'd managed to get it inside and up the stairs. 

This is what was inside:
Both made from solid steel, above is a rack to hold 50 shoes, below a plant stand.
As shown from two years ago, my unintended sneakers collection on the cheap plastic rack from China, via eBay. Looks like it's holding up, OK, right?
If you look closely, you will see staples (from a staple gun, not paper staples) which were my first attempt to keep the plastic pieces together. Not strong enough, I added screws. Yet, the softness of the plastic succumbed to the weight and this was the result:
I had to secure it to the wall to keep it from falling forward. The old saying, you get what you paid for is very true. Now, see the new all-steel rack in it's former location:
And, compare the photo below with the newly assembled shelf, both in the same location.
Let me show you that photo of ALL my footwear again and give a list of what brands occupy it.
Top shelf is obvious, except the ones on the right are my river shoes, one atop the other. The military boots are too wide and unyielding  to be able to drive my Volvo V50 with it's closely spaced three pedals. But I digress.

Forth shelf holds two Adidas, a very colorful pair of Ralph Lauren Polo driving shoes and my second pair of GEOX driving  shoes. I love that they are khaki! Match my khaki cargo pants.

Fifth shelf holds three pairs of Adidas, the ones on the left are runners and are SO lightweight! The ones on the right are Puma driving shoes in olive, khaki and orange.

Sixth shelf holds my (Elvis approved) blue suede Rebok driving shoes, two pairs of Adidas and another pair of darker blue/light blue suede Adidas.

Seventh shelf holds black/white Puma driving shoes, Adidas/Goodyear brown suede driving shoes, Adidas ROM in blue/red and a pair of Sketchers driving shoes.

Eighth shelf holds a pair of Keds-like Adidas in the color of my very first pair of ROM I had in the 1960's, white/silver ROM, white/green SAMBA, white/red ROM.

Ninth shelf has black and brown Sketchers driving shoes, as well as two vintage Adidas driving shoes. One pair also Goodyear models and the others are PORSCHE DESIGN.

Tenth holds black dress shoes, brown tassel loafers, two pairs of deck shoes disguised as driving shoes. 

NOT SHOWN are my first pair of GEOX (red, white and black) in original photo at the top. They replaced the Piloti driving shoes that my awesome wife bought me years ago. I literally wore them until they fell apart. A LOT of left foot braking while racing!

Now here is a photo of the plant shelf loaded with plants and other things:
So that's it for this installation. Today is March 10, 2017. It is cold and rainy here and shall be for a few days. This winter has been fabulous for it's lack of snow and record HIGH temperatures. 

While snow in the mountains is ESSENTIAL to provide water year round, especially in the western US, most people hate having to deal with it. If we could convince the weather to only snow in the higher elevations.....but we can't.

Thanks for looking,

Scott


So impressed with BLE Design speaker cables, I bought the bigger ones too!

Gentle reader,

I recently wrote about my adventures in trying a pair of unique speaker cables that are hand made in Florida. The company is BLE Design and they sell all kinds of audio cables and bits on eBay. Here is a link to the first post:
Here is a link to the maker/seller's eBay seller's page: ble-design02 | eBay 
Brian is the fellows name and he read my review of his 6BC cables and decided to put a link to that post in his eBay auction page. He offers many lengths and gives you your choice of terminals for each end. The terminals are top-line too.

He wrote to me and suggested that I try his 10BC cables, they have 40 per cent more conductors and can handle more power. So I took him up on his offer and two days later, they arrived. 
As you can see, these are thicker and even more complicated looking in their weave. I still do not know how he does it. I suspect Kimber Kable has machines that weave theirs. But of course, Kimber's are MUCH more expensive. I specified NO terminals as I had plenty of Nakamichi banana plugs.

If you read his description of these cables on eBay, you will see they are made of top-line wiring. Without further ado, you will see step-by-step, the process of making them ready to install, below:
The first step is separating the white and blue wires from the weave. Doing so making them about four inches long and twisting them. 
Make sure to twist each set in the same direction and get them as tight as you can.
Next, you have to separate them for about an inch and a half. Strip the insulation from each of the ten (or six if that is what you bought) conductors.
Logic would dictate that one strips each wire's insulation the same length. But when you re-twist them, you will find that some still have insulation getting in the way. Which requires you to tease out each wire and strip some more insulation off. It takes time, but with practice, you get quicker at it. 

Below is a pair of wire strippers that work the best, are quickest and do the neatest job of not also removing some of the tiny copper strands. I bought this particular pair at Harbor Freight which has become the quickest growing tool company thanks to quality, yet inexpensive tools. Yes, many are made in China, but what isn't? Plus, if China can make a nuclear reactor and some of the most amazing buildings and bridges, they can make tools.

The jaws are shut above showing the various gauge holes. Below is the other side. That side gently grips the wire so the other side (above) can cut the insulation and slide it off the wires.
Below shows one of the cables completely terminated. One end has the bent pin terminals that I needed for my PROTON D540 integrated amplifier which only accepts bare wire or this type of pin terminals. The other end are the super conductor banana plugs that grip so well. 
Nakamichi's banana plugs silver grip/housing slips over the banana plugs from the pointed end. The pin terminals, one has to slide the grip/housing on the cable FIRST, then attach the gold-plated terminal. The terminals have two tiny set screws, one on each side that secure the copper wiring to the terminals. The the grip/housing threads (screws) on.

Now a series of photos depicting the installation process into the D540's "A" speaker terminals after removing the thick gray Monster Cable M-Series cables from the Cerwin-Vega! LS-12 speakers and the Legend speaker switch. I transferred the 6BC cables from the amp's terminals to the switches #1 terminals. Which required me to remove the pin terminals and install banana terminals.
Look's like an electrician's nightmare, doesn't it?
A closer view shows the 10BC cables now firmly attached to the D540. Note the folded Velcro pieces between the terminal grip/housings in the "B" speaker terminals. Turns out the grip/housings are in fact conductive. Good thing the D540 has protection, as the music kept cutting off and I couldn't figure out why. So, if you have to use something other than banana plugs AND they are Nakamichi brand terminals, take care to keep them apart!
Above shows the completed speaker switch's wiring. The inputs are on the right. I deliberately used double-banana plugs from Monster Cable in those inputs for two reasons: 1, The cables, in this case; Monster Cable M-Series, come in from the sides, and, B, double-banana plugs have the ability to have other banana plugs plugged into them. As you can see. 

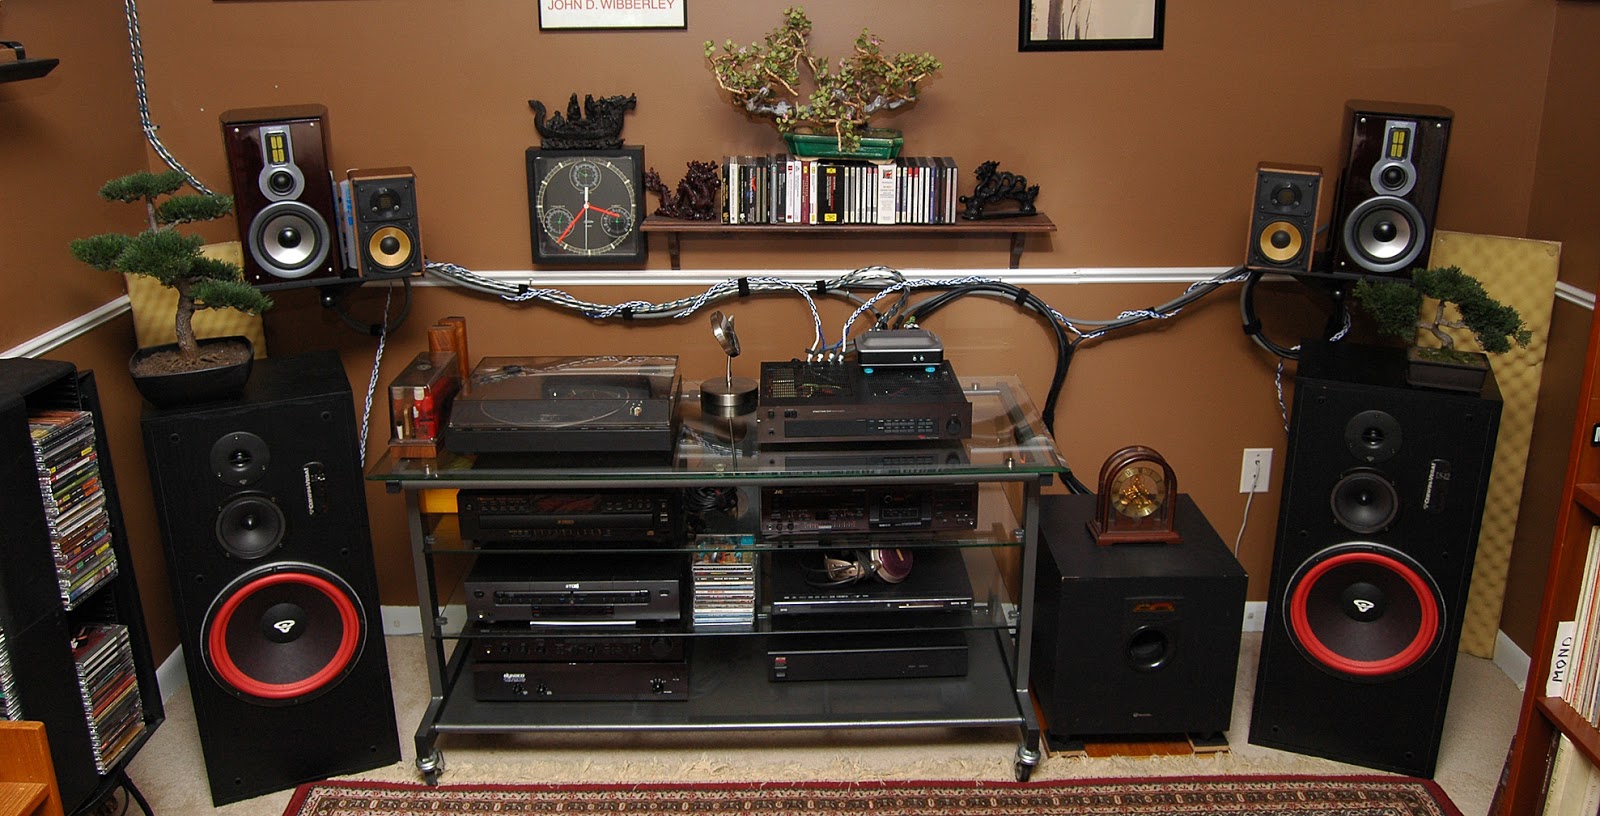
As my little wooden former Radio Shack Minimus 7W speakers are my main speakers and are wired through the 12" subwoofer, AND as they are wired with (when new) super expensive, top-of-the-line Monster Cable Z-Series cables, they are connected thusly. I simply leave the speaker switches buttons off. If I choose to listen to the Philips speakers OR either of the pairs of speakers in THIS room (BOSE 301s and my former Radio Shack Minimus 11 speakers), I simply unplug the black cables from the double-banana plugs and choose "B" on the amp and either #1 or #2 on the speaker switch. Confused yet? 

Yes, your math IS correct, I have no less than FIVE pairs of speakers capable of being driven by ONE amplifier. Oh, and the subwoofer too. That makes eleven speakers. Does it surprise you that my wife doesn't even think about trying to listen to music in the "Listening Room"?

OK, now for some photos of the completed set up:
Above, the whole shebang. 
That blue stuff under the speaker switch is Blu-Tak. Great stuff for audio.

Above, on the right, you can see the black cables that descend to the subwoofer's high-level inputs. If using the subwoofer, it electronically separates the bass from the rest of the music and reproduces that portion itself. It sends the rest of the music out the high-level output terminals and up to the small speakers. If it is OFF, all the music reaches the small speakers. 
As I have pointed out in previous posts, it's easier to make a wire shorter than it is to make it longer. Thus, the coiled cables around the support posts. The right speaker is above and the left speaker is below.
Note that the "umbilical cord" cables as my wife calls them that attach to the #2 terminals on the speaker switch are not yet attached and routed in these photos. But fear not, in this reprise photo below, they are.
Those cables travel to a speaker terminal plate in the corner of the ceiling. They same cables travel through the attic to a speaker terminal plate in the ceiling in THIS room. Two pairs of Monster Cable speaker wires attach to the BOSE 301 speakers and/or the metal former Minimus 11 speakers in here. I have blogged about modifying both sets of former Radio Shack speakers and mounting the BOSE 301s too.

NOW, how do these 10BC cables sound? In a word: Fantastic! As I did all this work today (March 4, 2017) I haven't had a lot of time to enjoy them. But I did play David Sanborn's CD Up Front tonight before starting on this post. I savored the incredible clarity of each performer's music. I could clearly "see" where each stood as they played. There was width, height and depth to the music. I could also "feel" the space they played it. How? There was a real sense of ambience to the sound.

I highly recommend giving BLE Design's products a try of your own. Hand made in America. Incredible attention to detail in their design and construction. First rate components are employed. True high performance home and studio products which will give you a lifetime of enjoyment. I cannot give them a higher recommendation. I've been seeking the best sound from my music since 1975. Brian's complex 6BC and 10BC braided speaker cables have brought me closer than ever to that goal.

So, finally, these are the thick, heavy and expensive Monster Cable M-Series cables that the 10BC cables have replaced:

Will I miss them? Not in the least! 

Thanks for looking, and again, give Brian's products a try!

Scott
  

Unique PROTON D540 Integrated Amplifier has entered the Listening Room. Part TWO

Gentle reader,

I previously wrote about my buying a PROTON integrated stereo amplifier because it was genetically related to my Dynaco Stereo 200 power amplifier here:
The Robb Collections: Unique PROTON D540 Integrated Amplifier has entered the Listening Room 
Here it is, in situ as they used to say in Latin:
It now resides where the Dynaco power amp once sat. I moved the JVC 3-head cassette deck to the location the preamplifier usually sits as it's interconnect cables would not reach. This left an empty slot, so I stacked the Yamaha and Dynaco and slid them as seen below:
Yes, this photo IS different than the one above. I found that what I thought were plastic sleeves on the Nakamichi speaker terminals must not be. Two would touch and trip the amp's protection. So, I redid it all, as you can see.
What I have been able to do, finally, is use it as PROTON intended as an integrated amplifier instead of as a preamplifier as I had been. If you've read the previous post (linked above) you will know that PROTON invented a unique way to have tremendous power on demand, AKA: as needed, while still having it play in Class A mode most of the time.

Why I had to wait was because this integrated amp's speaker terminals, like the huge Technics integrated amp that I had also written about previously, are what appears to be 3-way binding/banana posts. I wrote about those type of termianls and some neat braided speaker wires I found here:
Here is a photo of them, empty. Note, no metal tube inside the holes.
Here are two photos from previous blog posts showing 2-way binding/banana speaker terminals. Why 2-way? Because they also will not accept spade lugs:
The photo above is a close-up of the amplifier at the bottom in the photo below. The one on top, is of course my Dynaco power amp. Clearly you can see the metal tubes I wrote about that accept banana plugs which are my favorite speaker cable/wire terminals.
Since copper can oxidize, I don't like using it bare. So I needed pin plugs, but not straight ones. Ones that I could only get directly from China. Here they are below in two photos.
The reason they are bent is to fit around the curved post and make better contact.
Now, here is a view of the speaker terminals from a higher angle showing the opening on the top-right portion of the black plastic behind the red and black plastic "nuts" that tighten down.
One unscrews the plastic nuts, they don't come all the way off, and slides the wire, or in this case, fancy bent pins into the opening sliding the curved portion (think the letter j) in and down then tightens the nuts. Below shows them attached to the braided wires. I went ahead and used the banana terminals on the other ends of these wires. So much for those spade lugs.
Those banana terminals came from the ends of these huge Monster Cable M-Series speaker cables that I use as jumpers to the speaker switch.
Below shows all eight terminals in place. Kind of annoying that they stick up, but I found out they break easily. Yes, I did.
Let's talk about, OK, let ME write about, conductor girth. No, not orchestra director's size, the diameter of wires as they conduct the signal or electricity from one end to the other.

These braided wires, which sound fantastic, are comprised of six 18 gauge wires cleverly braided to resist RF interference and also get the music dizzy on it's way to the speakers. I jest. When I stripped them and twisted them together, they were still quite thin. 

I had bought brand new, two reels of Monster Cable speaker cable and wrote about them here:
I had found that they lacked bass significantly. An A/B comparison with the thicker cable as seen above, clearly showed that. So, I bought used Monster Cable Z-Series which is their top of the line, and sold the small stuff on eBay.

Despite these braided wires thinness, I have not found any lack of bass. So far. So perhaps Monster Cable miscalculated something. Fear not, I intend to listen critically as time permits.

So, this last photo shows the PROTON D540 fully loaded and ready for use:
All of the interconnects in the image above except the lighter blue ones, which are the last of the Liberty Cable units and the black ones which connect the cassette deck, are various Monster Cable units. NOTE that the Liberty Cable ones replace the simple U shaped pins that connected the preamp portion to the power amp portion of the D540.

I redid the speaker switch as mentioned at the top of the post. I made feet from Blu-Tak to secure it to the top of the amp which also prevents it from letting the amp breathe and cool itself.
I now have all four pairs of speaker cables attached electronically to the amp most via the switch. The black cables are the Monster Cable Z-Series cables which are my default littlest speakers. If I wish to listen to other pairs, I slip the black ones out of the switch's inputs and choose #1 or #2. The big Cerwin Vega! LS-12 speakers are attached to speakers "A" and gray jumpers are attached to speakers "B". I continue to really enjoy the new braided wires.
 

So, how does it sound all by itself? At first, I wasn't sure. This was last night and I couldn't turn it up much because my wife was watching TV and reading in the living room. So, rather than making a rash decision. I put in a really well made CD and listened exclusively to the smallest speakers and the subwoofer. 

The design works and it doesn't generate heat. Crescendos were loud and crystal clear, bass was excellent, wide, deep and high soundstage. I could point to unique musicians locations. Since I hadn't played a cassette in a long time, I chose a MCA HQ cassette of Acoustic Alchemy performing their first album called Red Dust and Spanish Lace.

There was one piece where it was just the two of them (both play acoustic guitars, one has steel strings, the other nylon) playing something very Flamenco like and I was hearing echoes and really felt like I was IN the recording room as they played. I have NEVER experienced that without some form of surround speakers and multi-channel playback. 

Does this mean I am going to pass on the Dynaco Stereo 200 power amplifier? No, but maybe the Yamaha preamp will find a new steward to house it.

Thanks for looking,

Scott

I bought a NEW Yamaha CD Player! Build Date of April, 2026. Check it Out!

  August 19, 2026 #551 Gentle reader, Most of you are aware that I have been in the home audio hobby for fifty years now. Thanks to the thri...