Installing the upgrade kit for Minimus 7 speakers Part 2

Gentle reader,

As promised in the first part of this post: The Robb Collections: Installing the upgrade kit for Minimus 7 speakers Part 1 . I have received the woofers I bought via ebay that were once in Optimus Pro LX-4 speakers. They are made of woven Kevlar which is the main bullet-stopping material in bullet proof vests and also is used in military helmets. Stronger than steel, but much lighter.

As you can see, above, they are the same frame as the paper-coned Minimus 7 woofers. So, they are an exact fit. Kevlar looks so much cooler, doesn't it?
Each magnet seems to be the same size. They were made in different countries. The M-7 has a bump on the bottom for some reason only the designer knows. Note that the LX-4 models have a hole clean through the middle. This is to vent the inside of the center cap. Perhaps it also cools the voice coil.
The bump is more obvious from the angle below.
Below, you can see it installed in the Minimus 7W speaker.

Above and below is my idea and result to hold all four pairs of speakers on one bracket. In case you haven't seen my listening room before. I bought two brackets designed to hold a small, say 13" conventional (CRT) TV. They mount to wall studs and thus provide a steady solution for speakers. I bought them originally to hold my BOSE 301 speakers that my loving wife bought me years ago with hopes I would get rid of the large (15" woofers) speakers I was using. At the time, the stereo was in the living room.
The upper photo is the right bracket and above is the left. Note that all four speakers are in the same order on both shelves. 
Oh, forgot to tell you, the original shelves are made of sheet steel, so they are not wide enough for more than two speakers. I acquired some 1/4" Lexan sheet which happened to be dark tinted. Lexan is a brand name of a poly-carbonate sheet that is often referred to as "bullet-proof-glass". Not when it's this thin, but it IS unbreakable.
Back to why I put both pairs in the same order. My thinking is that it keeps each pair the same distance apart. The room is too small to detect any shifting of the sound stage in either direction. 
I secured the Lexan sheets to the steel shelf with Blu-Tak a form of putty that is sticky, but doesn't leave residue or parts of itself. I also used four pieces of it under each speaker as you can just see through the Lexan.

These shelves are adjustable in many planes. Originally made for hospital rooms or a small bedroom TV, perhaps.

So, how do these vintage Radio Shack Minimus 7 speakers sound now that I have put so much money and effort in to them? VERY good! 
When I first tried them, stock, so to speak, I was unimpressed. I'd read about the ebay seller and his upgrade kit, so I decided to give it a try. I can't tell you exactly what difference the Kevlar woofers make, but rigid cones are what the better speaker makers seek, so Kevlar verses paper seems to accomplish that. 

Good luck trying to get a pair of these woofers. Optimus Pro LX-4 speakers have a cult following for their amazingly clean sound. The have the front mount version of the top-mounted Linaeum tweeters on the Optimus Pro LX-5II speakers next to the M-7s. 

In case you missed prior blogs, the left speakers are current model AR PS-215 speakers. They too have quite the following and have amazingly deep bass for 5" woofers. 
Next is the Minimus 11 die-cast speakers I upgraded with Dayton Audio ribbon tweeters and woofers from Parts Express.
Next, the aforementioned LX-5IIs which I also used the same woofers in. THEY have the full 360 degree Linaeum tweeters atop them. All have their unique sound and all are keepers!

Thanks for looking!

Scott

Installing the upgrade kit for Minimus 7 speakers Part 1

Gentle Reader,

It's been a while since I posted, but you, dear reader continue to read it. 174 page views yesterday! Thanks so much!

As you may have seen, I've been buying the better small speakers once made for and sold by Radio Shack. Frank quitely*, it ought to be called Cell-Phone Shack nowadays as they have wandered far from what they once were. But I digress...  *Frank Quitely was a character's name on a comedy radio show some decades ago. I used it instead of "quite frankly".

Here is part one (of 2.5) of the first ones I did:
The Robb Collections: Upgrading old diecast Realistic Minimus 11 speakers
Here is part 2.5:  
Here is the next ones I did:
And here is where I introduced you to this version of the Radio Shack Minimus 7:

Now, there is a seller on ebay that has capitalized on the love many have of these tiny speakers. Here is one of the two kits that he sells, the other has "world-class...woofers":

Since I was unimpressed by the sound of these in stock form, I bit and paid the $39.95 for the kit. I added some modern three-way binding banana terminal cups as well to replace the cheap spring speaker terminals.

Since you just saw them fully clothed in the intro-blog, I did not include a picture with the grille installed.
Front above, and rear, with said "spring terminals" as from the factory, below. Oh, and note the "keyhole" bracket for hanging them on the wall. WORST place to put speakers! They need to be some distance from the rear and side walls for the best sound and sound stage.
Directly below is the kit the ebay seller provides. The separate yellow capacitor is for the tweeter, the rest is for the woofer. He states that these speakers have no crossover part(s) for the woofer, but based upon my inspection of the factory crossover, it has an air-core coil for the woofer. Perhaps the more widespread die-cast metal models do not have this coil.
A little explanation: Tweeters, in this case the dome-shaped small driver at the top of the speaker baffle board, is for high frequencies. They will be destroyed if deeper sounds than they are designed to reproduce reach them. So a non-polarized capacitor is installed to block low frequencies. The woofer, is for lower sounds. To protect them from higher sounds, a crossover will contain one or more components, including a choke coil, to block the high frequencies. Speaker designers test their drivers and choose the size of the cabinets and more in order to get the best sound they can for the target price of the speakers. Thus, the simple crossover mounted on the inside of the rear terminal cup seen below.
The next two images are close-ups of the factory crossover.


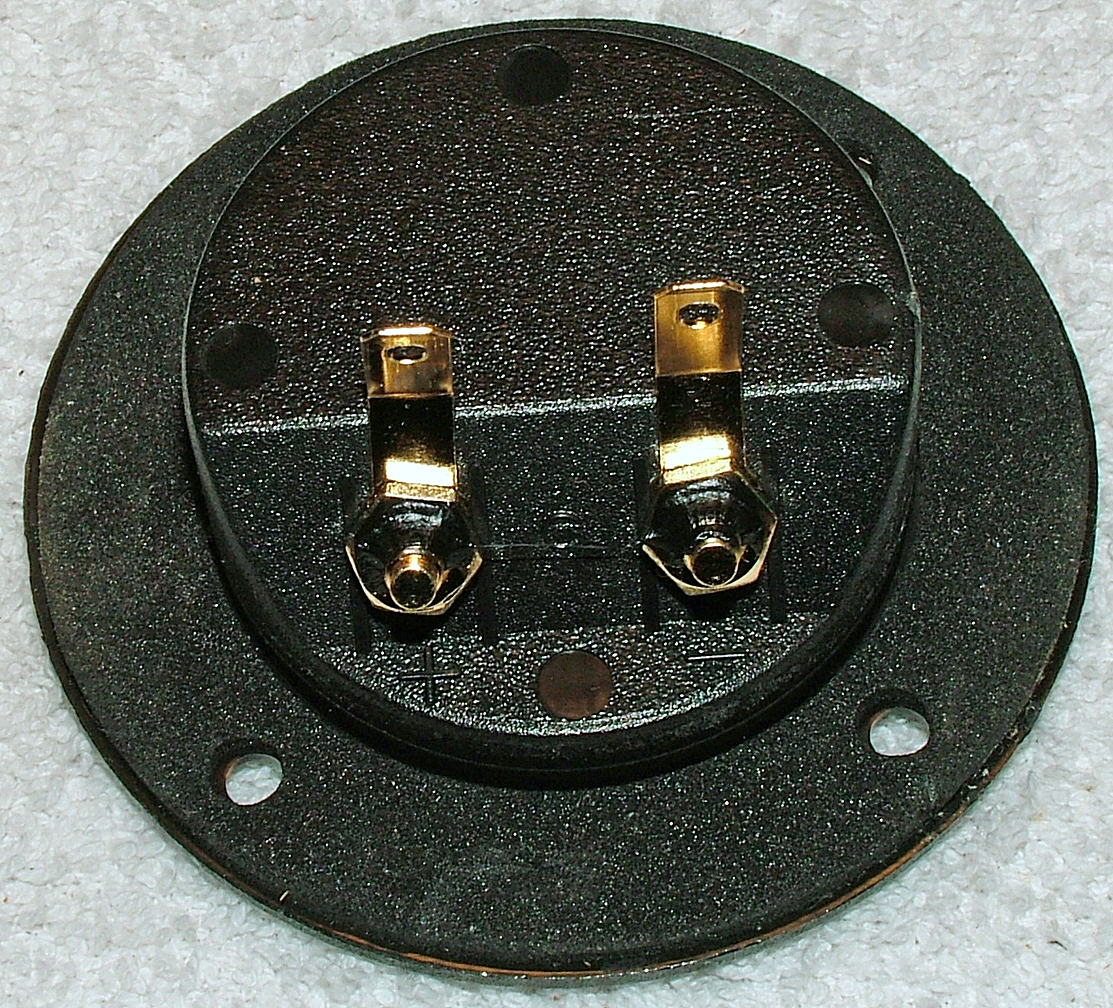
Above is a comparison of the old and new terminal cups.
The new ones are from Parts Express, a company in Dayton, Ohio that specializes in speakers and audio for home, auto and professional. Below is the part number for these nice cups.
Step one after removing all the components, and by the way, most Minimus 7 speakers and their descendants are made from die-cast aluminum. So they differ in construction. Glue the board with the provided Gorilla Glue to the inside of the top of the cabinet. This prevents the woofer's magnet from hitting these components upon re-installation.
A great thing about these cups is that they are 1/16th of an inch bigger around than the hole from the factory. So, a little work with a file to enlarge the hole and it fits perfectly.
I have soldered one wire of the yellow capacitor AND the yellow wire of the rest of the crossover to the + terminal. I cut the wires off the old crossover and used the blue wire for the other wire on the yellow cap and the black wire for the ground side of the tweeter. That wire and the black wire of the rest of the crossover are soldered to the - terminal as seen above.
Above shows what I just described. I used some heat-shrink tubing to insulate the other wire so it won't short out if it touches anything metal inside the speaker. Above is NOT where the wires need to go!
Above shows where the wires need to be routed. You'll have to pull-split the red pair as the terminals on these woofers are on opposite sides. Also, I had to make a notch at 3 o-clock and 9 o-clock positions on the woofer's hole to clear these thick wires.
Above shows the factory filler on the left and on the right some polyfil-type filler. Since the new parts take up so much room inside, I feel that a more complete filling will trick the woofer into "thinking" there is more room behind it. 
Above and below are the new cups installed. The original screws are too small, so I used other ones that are bigger. 
So, those are the steps necessary to complete the upgrade on Minimus 7 speakers, specifically the wooden ones. 

But wait, there's more! In looking at various Radio Shack speakers on ebay, I came across ones with a cult following: Optimus Pro LX-4. They are, like these, made with a wooden cabinet and like BOSE's mdel 301 they are in a horizontal format rather than the usual vertical ones. 

Like their LX-5 models that I have, they also have Linaeum ribbon tweeters. Unlike the 360-degree dispersion of the top mounted tweeters, they have ribbons that fire forward only. 

Here is a link to a review about them: LX4 review

Why did I bring them up? They too have 4" woofers, however they are make of woven Kevlar. Kevlar is a brand name of Aramid fiber, which is what bullet-proof vests are made of. Well, someone had a pair for sale on ebay. I bought them and will install them once they arrive and give a complete review in Part 2.

Thanks for looking!

Scott
 

Some small but classy speakers have joined the system: Walnut Minimus 7W is their name.

Gentle reader,
 
To those that participate in the American tradition of Thanksgiving, I hope you had a nice one. We, both being "essential" employees, worked yesterday, so we celebrated Wednesday evening instead. And we had spiral sliced ham, not turkey. Although a coworker brought in the fixings to make turkey sandwiches for lunch....which was delicious.
 
As I do every year about now, I stopped my usual prowling of thrift stores for cool new items to enjoy and also ceased ebay actions. (Yes, I mean actions, not auctions. Covers buying AND selling.) Too many packages being moved around the world what with Christmas coming up. 
 
One of the last things I did buy on ebay is a pair of Radio Shack Minimus 7W speakers. I've always loved the look of walnut wood and these fit the bill, being nicely veneered with black walnut. Back in the day (1970's) my dad had KLH 17s and my first pair of speakers in 1975, were Dynaco A25s. Both sets were walnut with off-white grille cloths.
 
Anyway, I got these for less than $30 and they arrived safely. Frankly, I'm disappointed with their sound. I mean, look below, they look like they have nice components. Plus, unlike their metal encased mates, these woofers have rubber surrounds. Thus, they will never deteriorate. Also, note the bespoke woofer frame these and so many of their kin have rather than standard woofer's frames. They were made from 1984 to 1986 and retailed for $100 a pair. That's about $229 today. 
There has been much discussion on the Internet about all versions of these speakers, especially the all-metal one that were sold under various names. There have been kits created to replace the minimal crossover these have with better components. But it seems the ebay seller of these kits is not providing them anymore.
 
I can replace the dome tweeters with folded ribbon ones like I did in the Minimus 11s from Parts Express: the #1 source for audio, video & speaker building components they are on sale right now for $25 each, but if the crossovers are the problem, that will probably be the way I choose to go. No rush, other things to do in the mean time and it will make a nice winter project.
 
So here they are in the room, two views from my standing behind my wingback chair and more eye-level if sitting:
You can see how tiny they are!
Next are some other angles and compared to the LX5II speakers:
See how they used solid walnut pieces on the corners rather than trying to wrap the round edges with veneer?
Also, those cheap spring terminals will have to go and I'll remove the keyhole brackets for hanging them on a screw on the wall. The worst place to put speakers!
The Optimus Pro LX5II, also Radio Shack speakers, use 5" woofers, the Minimus 7s use 4" ones. No one seems to make replacement foam for the metal model's woofers. Too bad as there is much demand for these speakers and they sold very well when new.
Above, with the cloth covered grille attached, next to some books. They stand only 8" high. Still, I like them and plan to improve their sound.
Lastly, I moved the LX5II speakers aside and brought out the Cerwin-Vega beasts. I was listening to an extraordinary recording of Benjamin Britten conducting the English Chamber Orchestra and the LSO in performance of his: THE YOUNG PERSON'S GUIDE TO THE ORCHESTRA, SIMPLE SYMPHONY and VARIATIONS ON A THEME OF FRANK BRIDGE. Yesterday I listened to it on the boombox I made at work*, again in the car on the way home and then on the LX5II speakers. So I had a very good idea how it sounds. Then I hooked up the CVs and had a listen. No matter HOW good small speakers can sound and all mine sound excellent, you can't beat large speakers for bass! Anyway, this is a LONDON CD, 417 509-2. It came out early in the life of CDs, 1986. The original LPs were made in 1964, 1968 and 1969. I had never read up on Britten and did so while listening via the CVs. Quite an exceptional musical genius he was! A 20th Century Mozart. I checked through my LPs briefly and only found one LP so far of his music. I want MORE! This CD sounds incredible!

OK, so the above paragraph wasn't last. The Yamaha preamp I bought to replace the Adcom still continues to work great and I am very happy with it. My coworker/audio buddy took a look at the Adcom and found the source of the 60 Hertz hum. One of the RCA terminals outside (return or ground) terminal had broken and it would be difficult to repair. He found that running a wire from the ground terminal of the preamp (where you hook the ground wire from your turntable) to the ground on the power amp, the hum is gone. He says it's a "ground loop". Prior to him looking at it for me, I found that hooking a jumper from the Adcom's ground terminal to any of the six RCA output external terminals also stops the hum. So, I'm going to make a custom (bespoke) jumper to accompany the Adcom when I start back up with ebay after the new year. The next steward should be OK with that and it will no longer be sitting next to this desk. Looking at me sadly.... Just kidding! It has served me well, but as I said, I needed a preamp with a subsonic filter. The Yamaha has this as well as the option of using a moving coil turntable cartridge.

Thanks for looking and have a safe and enjoyable day.

Scott


Improving Radio Shacks vaunted Optimus Pro (Linaeum ribbon tweeter) LX5II speakers with Dayton Audio woofers.

Gentle reader,

You may recall my finding old Radio Shack Minimus 11 die-cast aluminum stereo speakers:

Well, you may also have seen that I scored a pair of Radio Shacks vaunted Optimus Pro LX5II speakers with Linaeum ribbon tweeter for only $25.00 via ebay.

Like so many older speakers with foam surrounds (the ring of material that attaches the front edge of the woofer cone to the metal framework that is screwed to the cabinet baffle) had started to tear. BTW, "baffle" is what the front panel of a speaker cabinet is called.

While testing the SONY six-channel preamp (that is now on it's way to the next steward) I heard a buzzing sound in the left channel and blamed the SONY. Only later did I see that the foam had torn on that speaker. Oops.

Some years ago, I came up with the idea of a preventative step that would hopefully stop any future failure of foam surrounds in this post: The Robb Collections: Rubberize your woofers!  I plan to coat the famous red foam surrounds on my Cerwin Vega speakers next to save them from failure.

So, I thought, "I have left over speaker glue, it should repair the tear and then I can coat both sides with RTV* and that should fix it." Well, I did so and when applying the RTV Silicone glue to the inside of the foam, it tore through at the same spot. 

*Room Temperature Vulcanizing Silicone rubber glue. Great stuff, but it puts out nasty fumes so use it with a small fan blowing away the fumes, or outside. BTW, no matter what the actual temperature is, it IS room temperature. I learned that from "Real Facts" inside of a Snapple bottle cap.

Now, there are lots of people that will gladly sell you new foam for your old speakers. I have had mixed results with this process, so did not want to go that route. Remembering how great the Dayton Audio five inch woofers sound in the Minimus 11 speakers (link above and shown below, as well as a link to Parts Express' page) so did some measurements and decided they would work.

Above is one of the completed speakers with the new Dayton Audio Designer series five inches (5") woofers which have rubber surrounds. Here is a link to their page for these woofers:
Dayton Audio DS135-8 5" Designer Series Woofer Speaker  

Now, below is a picture of the original woofer installed in the cabinet:
See the difference? The fact that the surround is made of foam is obvious. Foam is much cheaper than rubber but over time it degrades. 

Next is photos showing the process of replacement. As you can see, the woofer is installed from the rear, but how to get to it? I had to figure out how to open these cabinets. Unlike the Minimus 11s, these have a molded plastic front piece for the baffle. I looked on line for and found images that showed me how: Pry out the rubber plugs on the front that conceal the four philip's screws. Careful prying after removing the screws and the front baffles came off easily. 

Here is what's inside:
Note how the designer used different kinds of material to direct or absorb the rear sound waves from the woofer. I have left it as is with the new woofers. Later, I may try adding more polyfil material.
I have heard of, but had never seen a crossover that uses a light bulb as a resistor. But here is one. The yellow device is a non-polarized capacitor used to stop all music below a predetermined frequency from reaching the tweeter. The round item is a coil that does the opposite; block all music above a predetermined frequency from reaching the woofer. That's what crossovers do.
The Dayton Audio woofers have both terminals the same size. They are 1/4" so I bought a bag of 1/4" and a bag of 1/8" terminals via ebay for this and future speaker projects. Cut off the old ones, strip the wires and crimp on the new terminals. Just remember, red is positive. Polarity is important.
Above and below is the new woofer in place. I know it is not centered. I repeatedly got it centered and when tightening the screws, it always moved. The OCD part of me hates that, but the rational part overruled and it accepts that it doesn't affect the sound.

I used an electric die grinder to turn the mounting holes on the woofer to notches. I did not measure the screw spacing, the woofers may have fit fine without doing that, but I didn't think of it at the time. The flat washers help hold it securely. 
As you can see, these woofers have huge magnets.
Now for some pictures of the old woofers which have steel shields over their magnets so that these speakers could have been used near a traditional television set. Modern flat screen TVs are not affected by speaker magnets.
Above is my attempt to rubberize the foam, but it failed. The tear can be seen at about the one o'clock area above. Note that below these are marked as 6 Ohm resistance. That has become the middle ground between the traditional four and eight Ohm choices. I do not know whether that makes a significant difference in the speakers performance with the new 8 Ohm woofers.
Below is the steel shielding cup over the magnet assembly. Note also that they have custom made mounting frame, unique to these speakers which came out in 1999 and sold for $149.99 a piece. That was a princely sum for small speakers, especially ones from Radio Shack. That's about $214.00 in today's money. Ever hear or see the word "bespoke"? That's British for custom made.
Now, for some comparison photos of the completed Radio Shack Optimus Pro LX5II speakers as well as the Minimus 11 units and the AR PS-215 which have traditional tweeters but also sport five inch woofers.
Note how much smaller these cabinets are than the other two. More in line with the Minumus 7s that have four inch woofers and came with either a small bass reflex port on the back or were sealed cabinets. The also sold with the Optimus Pro brand and as RCA models sold via Radio Shack.

You may be wondering what that convoluted foam is doing in the corners? Room boundaries can trap some frequencies or increase bass. I use the foam to prevent the former with speakers like my Cerwin Vegas that have rear bass reflex ports. 
And now some close up of the three different models.
I have yet to reinstall the rubber plugs that also hold the front grilles in place. LX5II is above, Minimus 11 below. Both have die cast aluminum housings. The Minimus' rear panel is steel and removable. Both now sport the same Dayton Audio woofers.
Below, the AR models (PS 215) which I believe are still being made. They also have had rave reviews as to their sound. And I agree, they sound really good.

A note on the trees. Back in the late 20th Century, I got interested in bonsai trees and had a number of them that I was tending to. They all died eventually. However, one can buy realistic looking ones such as these and they never need anything except the occasional dust removal.
Oh, yes, and how do the newly overhauled speakers sound? FANTASTIC! I put some classic rock CDs in the Nakamichi player and sat back. WOW! Do they sound great!

So, if you have or have always wanted to have a pair of these legendary speakers and the foam is bad, try what I did. You won't be disappointed.

Thanks for looking,

Scott


Earbuds In-Ear Verses Over-Ear Headphones Which Ones Sound Better?

 October 8, 2026 #553 Gentle reader, I have been in the best-sounding-enjoyment-of-recorded-music-I-can-afford, hobby for fifty years. I do ...