Restoring a 1937 Zenith 8S154H 6B06 TUBE Console Farm Radio

September 2, 2020
#401

Gentle reader,

My brother-in-law, married to my baby sister, is from Upstate New York. His Grandparents lived on a farm up there all their lives. 
While today most people living in the United States take running water, electricity, landline telephones and even broadband Internet for granted, well into the 20th Century there were STILL millions of citizens who relied on a hand-pumped well for water, an outhouse to do their business and candles or oil lamps for light when the sun went down. 

Bob's grandparents and their children were one of the millions who knew no better than the way they lived like people had done so for hundreds of years.

Also, something people did without was television. Firstly because it was not invented and available (for the wealthy) until the early 1940's. Now we can watch what we want, when and where we want and on countless devices.

But long before all that, people relied on word-of-mouth and if they were available in their area, newspapers, for news of what was happening outside their small wold.

Some electronics companies, rather than ignore those non-city dwelling people, saw an opportunity to fill a niche. They took some of their radios and made them able to be operated with a battery. 

How did one charge that battery? Well, like a windmill was used to pump water out of the well and to provide power to run all kinds of tools, there were also wind-driven battery chargers for the farm's battery.

Now, you may be thinking, "Battery? Everything runs on batteries!" Not in the 1930's. Automobiles and trucks of all sizes used six-volt wet-cell batteries, similar to this one below.
Called "wet cell" because inside is either hydrochloric acid wetting lead plates to provide the power. Some larger wet-cell batteries use and alkaline solution instead. BOTH will burn you if not careful.  
Nowadays, and since the 1970's, cars and trucks use twelve-volt (or sometimes multiples of 12) batteries to start their engines.
Thanks to TubeRadioLand.com for finding this ad and displaying it on your site.
$89.95 in 1937 dollars is equivalent to $1,652.92 today. A LOT of money for a radio!

The ads above and two images below are from this website: Zenith Model 8-S-154H (8S154H) Console Radio with Rare Maple Finish (1937)
This is the same radio as Bob's grandparents had on their farm. It is in far better condition than one that lived in a farmhouse heated by firewood.

We did not take "before" photos because we began cleaning out the DECADES of dust and cobwebs the radio had accumulated during it's eighty-three year lifetime.  
The speaker had been removed and the wires were cut prior to Bob giving it to us. As we were carrying it across their family room, one of the tubes fell out. Fortunately they have thick soft carpeting and the tube's "chimney" protected it. More on that later.
That dust gets everywhere is true, even UNDER the radio's chassis.
I did not know when plywood was invented, but it sure existed in 1937 because some of the structure is made of it. 
I know what speaker transformers were for, they used DC voltage to carry the sound long distances in large building PA systems for instance. 
But this radio uses one which the other one (shown above) does not. The speaker is twelve inches in diameter. What would be considered a large "woofer" these days, it was a full-range "High Fidelity" speaker almost 100 years ago. 
As you can see, we cleaned off dust and grime where we could reach it while the radio was in one piece. Cover was off the transformer housing too. But it came with the radio to us. 
The thick red and black wires coming out of it are to hook to the battery which sat on the floor of the radio beneath the speaker. 
Four of the six vacuum tubes have metal "chimneys" around them. It seems counterintuitive to me but they must have been designed to help funnel the tube's heat upward.
Inside the steel box (above and below) are two transformers (rectangular objects with round sections) and two capacitors. 

The larger transformer changes the six volt DC power to a MUCH higher power to run the tubes which require HUNDREDS of volts to work. Induction is the magic of transformers that makes that happen.  
The tube which fell out is the one on the right, above. The finned device between the square metal objects is the tuner. The "combs" rotate between other fixed fins to tune in certain frequencies. In the case of this radio MANY frequencies.
The tuning dial with four switches surrounding it. A photo down below shows a better look at the dial (after cleaning) which shows how many different types of radio this was capable of receiving.
The four shafts with white/black dials are for various functions, lower left one is the on/off and volume control switch. 
I carefully removed each tube and the wire that connects to the terminal that is atop the four tubes with chimneys. I carefully cleaned them and all the components I could get to while also carefully trying not to break or damage any wiring.

Well into the 1970's at least, there were TUBE TESTER machines in MANY stores in the US and around the world. I remember going with my Dad with a bag of tubes to the local Rexall Drugs store and helping him use the machine to see which tube(s) might be bad.
Transistors, and now integrated circuits, will never have the visual appeal of tubes.
While I have worked on and with electronics since the 1970's, as an amateur and professionally,  I have never worked on anything with tubes. So, this is a cosmetic restoration of this radio.
Those square metal covers house I know not what beneath. One of the many reasons I am not attempting to get this radio working. 
Old tube equipment is very liable to spark and possibly start burning if one simply plugs it in (or in this case hook up a six-volt battery to it) and then turns it on to see what will happen.

Below is the underside of the radio's chassis. 
For example, the large red and black wires the other end of which have battery cable clamps on them, are missing insulation right where they enter the chassis, above. 

The large metal wheel is a flywheel that is attached to the main shaft below the tuning dial. The AD refers to the radio's "Lightning Station Finder" and that is the flywheel. The fabric belt and strings that once wound around it and made the tuner and tuning dial rotate, were of course broken, so I removed the pieces.

For safety's sake, I cut off the 83 year old red and black wires and threw them away. I also removed the pieces from the clamp (above) so that none of our kids might get hurt after we are gone. 
Much less dust and dirt inside now.
Fortunately, whomever cut the speaker wires did them individually and at separate places so that matching them up by color and soldering them together much easier.
Transformer cover back on, I had to find the appropriate screws to secure it, and everything as clean as I could safely get it. Nice shiny tubes once again.
"A" is for antenna and a piece of wire was still hanging on to the screw terminal.
Speaker's five-pin plug is back in place on the radio chassis.
A shame the chimneys block the view of the tubes.
I suspect the yellow ring of plywood covers a hole big enough to hold a fifteen inch woofer. Possibly used in larger model console radios.
The following images show the radio laying flat so that I could (after considerable further cleaning of the wood) apply lemon oil to all wooden surfaces to restore life to the ancient wood.
Nice and shiny once again.

Nicks, chips and scratches do not bother us, it shows the long life the radio endured in the wilds of upstate New York.
If you look at the rear of the bottom of the radio, you can see it was wet many times. In fact, some pieces were crumbling off as I added feet to the back corners.
These are what I used to safely finish cleaning and restoring the wood. The GRIME we removed from it!
Each of the knobs are wooden and have Zenith's lightning bolt stylized "Z" on them.
If you click on any photo (or enlarge them with your fingers on a portable device) the photo will open over this page much larger. Then you will be able to see all the fascinating information the dial holds.
I made this image black and white to make it look more era-correct. While it would be awesome to have the radio working, the only frequencies it would still be able to receive are AM radio. All the other ones which people might listen to are now using much more modern (and thus unable to be received by this) and higher frequencies, if not in fact via satellite radio.

I have bought "retro" radios as well as other tube radios over the years. And written about them as well.
The black metal one above and below was Nancy's fathers and it still worked when we inherited it.

The wooden one on the top shelf, below, is also tube and it did work when I bought it and later sold it. 

Above is a retro floor radio I was delighted to find. It is large but much smaller (and lighter than) the Zenith. I wrote about it here: The Robb Collections: I found a floor radio. What's a floor radio? They Were Called Console Radios Once. Take a look.
This 1960's Zenith radio is also tube, but all I could get out of it was a buzzing sound. 
Older articles I wrote about our radio collection are listed below in order of writing.
The last article deals with a modification to the floor radio which greatly improved it's sound.

Thank you SO much for taking the time to read this article. Hopefully you learned somethings as well.

Please take a moment to click FOLLOW above which is below the long list of article dates and leave a comment below or on Facebook.

Scott & Nancy
September 2, 2020
#401


Configuring Downhill 1:64 Scale Diecast Hot Wheels Racing Course Chapter TWO Classic Track

August 19, 2020
#400

Gentle reader,

When I typed "400" just now, I thought, "Wow, who knew I would still be writing this blog, let alone 400 times?"

To get you caught up, here is the first chapter of this series:


We scored a major find at a local thrift store when I found this plastic bin marked $7.99:

There were several cars inside the bin as well. I knew immediately that this was original or classic Hot Wheels track as there are no holes or notches in the ends for the new, easy to remove blue connectors.
Here's most of what was inside of the bin. Nancy began researching some items to see what they were and we were able to put together some, such as the long black piece and others.

Some of it is high-walled track, three pieces, the walls are painted silver. 

In building downhill race courses for 1:64th scale cars, generically referred to as "Hot Wheels" although there are many makers of these iconic toys, there are choices as to what to build it from: 1, Hot Wheels Sizzlers "Fat" track which many use although some cars tend to spin even on straight sections. 2, Far Out Toys Crash Racers track. And/or a combination of both and Hot Wheels orange track and pieces with Crash Racers and/or Fat Track.
The problem with new Hot Wheels track is the blue (why blue?) connectors with their three blue round faces at every connection as seen above in our test drag strip.
These are photos of all of the Classic Hot Wheels track we have found either on eBay or in stores.

The "S" track, called esses or chicanes in the racing world are from Hot Wheels 1969 Sizzlers electric powered cars track sets. The white device attached to one is a pneumatic braking system to slow the cars before the esses. 

The second esses and thirty feet of 24 inch long classic track is from another eBay find.  
The two lane track 180 degree curve is Sizzlers track as are the three narrow pieces (one came with each curve set originally) with which one can change the angle of the curve.
We have never seen the track with arrows in it before. They have unique joiners with a raised dot on one end. 

The rubber band powered drag launcher has track with one hole to attach to the launcher. 
Not sure yet as to the age of this "D" cell battery powered motorized unit that speeds up cars passing across it. We already had two new ones, this one still works.

I just searched for some still shots of 3Dbotmaker's courses, but there don't seem to be any. You can view the races here:
(36) 3Dbotmaker - YouTube

The reason we are excited about using classic Hot Wheels track is the smoothness of their joints and lack of blue dots at every connection. 

Now, as a bonus, here are some cars that just came our way:
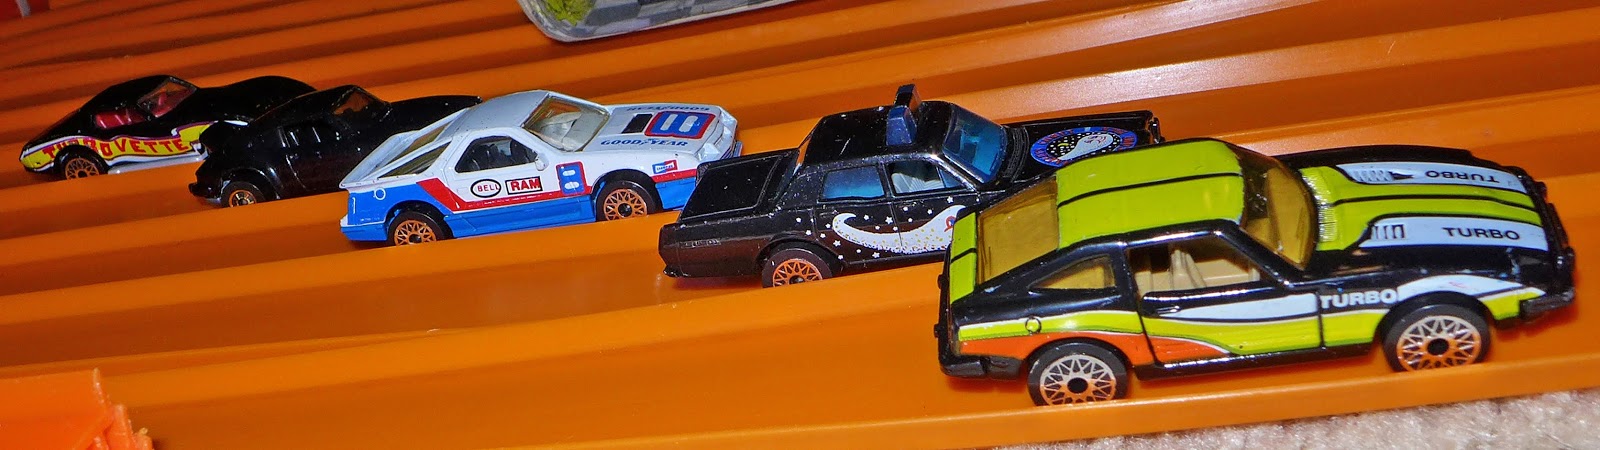
The ones above are from various makers, below are what we call, "Cheap Chinese" cars. Note Trans Am with opening doors.
Some unsuspecting parent stepped on the Jeep and bent the windshield frame. I hope they were wearing shoes.
"FIRE BIRD TRANSAN"
These five and the NASCAR at the bottom I got last night along with a bunch of stuff to sell on eBay for a friend.
I particularly like the 1980's Dodge Daytona coupe in the middle.
This Racing Champion's card has seen better days, but it's all there.

Thank you SO much for reading this blog. Take a moment to click FOLLOW to the right a few inches above these last photos. Also feel free to leave a comment below or on Facebook.

Scott & Nancy
August 19, 2020
#400
 

Configuring Downhill 1:64 Scale Diecast Hot Wheels Racing Course Chapter One

August 13, 2020
#399
 
Gentle reader,
 
I have written before about the YouTube Phenomenon that is happening around the world and best represented by 3DBotmaker's YouTube Channel. Here is a link to their channel: (36) 3Dbotmaker - YouTube
 
We, like countless others, are going through the process of coming up with our own downhill (gravity) course. 3Dbotmaker has TWO courses, both new for 2020. 
 
One, called King of the Mountain is a perfection of the previous mountain course seen in 2019 and earlier iterations he tried prior to 2019. He has learned by experimentation, trial and error and LOTS of races.

The second is DRC, for Diecast Rally Championship a Rally course which features a track layout with jumps and a bridge and other features which create truly exciting racing. 

If all this puzzles you, please watch some of their races and the other DRC racing: (36) DRC Racing - YouTube This person is in Shri Lanka where Hot Wheels track is hard to get a hold of, so he created two epic downhill courses mostly from cardboard. The races are really interesting on both layouts.

3D uses a combination of his own 3D printed track components, Hot Wheels track and Crash Racers track. He has figured out what kind of paint to color Hot Wheels track to match the terrain in the rally course and the CR track in KoTM.
Here is one of the many layouts we have tried. At the top of the Hot Wheels track is a 3D printed starting gate. Below is a photo created by the makers of Crash Racers of their latest track made with the cooperation of NASCAR.
And here is a photo I made of an earlier version with 1950's cars which we found at Target.com for $30.
There actually is REAL Figure 8 racing in many US states. The idea is to MISS the other racers at the intersection, but many fans hope for crashes.
We bought a second Crash Racers set and combined the tracks to create this setup. A "corkscrew" downhill section attached to the ramp then goes into an oval, then turns right and another ninety degree curve ending with the cars hitting the pillow and landing in the box.
The girls really get excited and try and catch the cars. We have six young grandchildren and thus a lot of toys which provide materials to support various track pieces.
 
See the blue painter's tape on the CR track? Hot Wheels joiners do work, but don't stay together. I have figured out a solution to that. That will be in the next chapter.
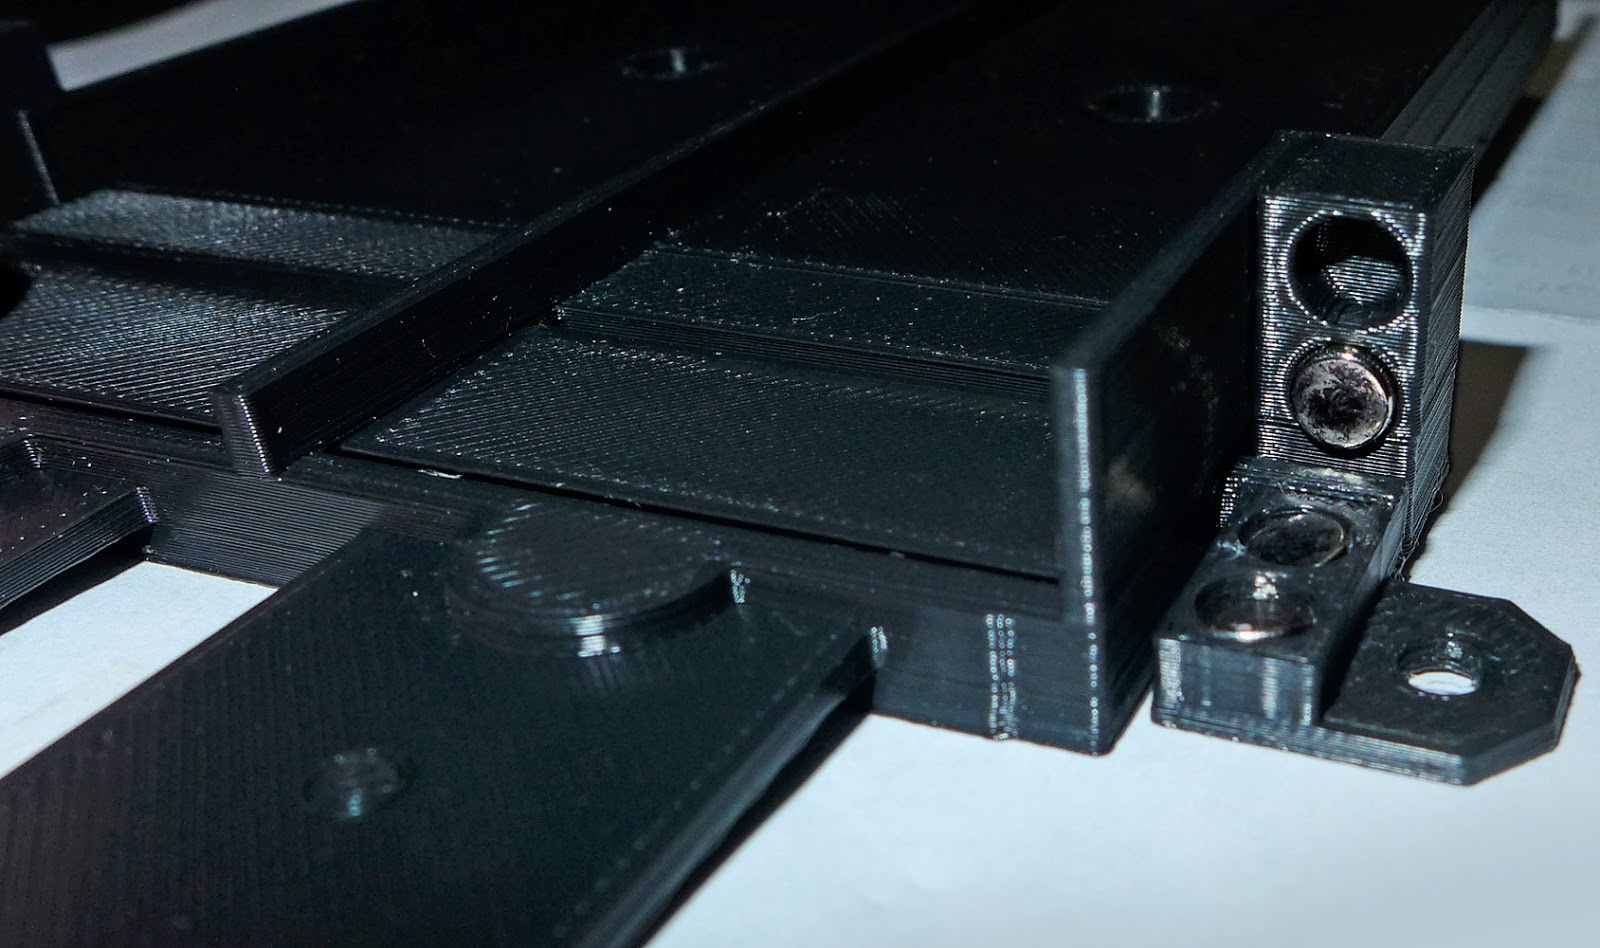
Here is the 3D printed starting gate made by JLH Kraft Racing. It is designed to hook to the latest Hot Wheels track whose joiners are made to be easily slid into the track and be removed just as easily by pressing the round BLUE button at the track joints.
It has two screw holes included to secure the gate to wood or whatever you make your track structure out of.
Gate closed above and open below. 
Tiny, but strong magnets hold the gate closed and magnetically swing it back up after it has been opened.
Since Mattel's patent on their Hot Wheels track has expired, other companies have climbed on the band wagon with their own tracks and pieces which readily join to HW track.
There are 3D printed dual-lane curves and chicanes ("S" bends) made, but they are pricey.
These MAX TRAXXX curve's drawback is their banking is abrupt which greatly slows the cars, called "scrubbing off speed" in the real racing world. Plus, they are glow-in-the-dark green. Also, wider cars can get stuck between the walls.
3D incorporates circa 1969 Hot Wheels dual curves into KoTM (painted grey to match the CR track) early on in the course, and in the beginning of the DRC course too.
So, I bought a set via eBay and created this test section as an idea for the beginning of our course.

Note how the blue section is right next to the downhill portion? That will allow us to have a fairly narrow layout with there being another downhill section of all Crash Racers track to complete the course. 
The two sections of curves, being fifty years old, tend to separate slightly creating a misalignment which causes cars to crash in the middle of the turn. For now Gorilla Tape is doing a good job of keeping that from happening.
Above are my collected smaller scale diecast cars. Completed since this photo. The shelf, which I made to hold lots of books and cars, has a 1/4" thick Lexan cover removed for this photo to keep the cars dust-free and not played with.

We tested ALL of the hundreds of "play" Hot Wheels and other brands of cars on a scale 1/4 mile drag strip and on the various downhill courses to determine which are the quickest AND that can handle the corners without crashing.
You can see the blue push button HW track connector in this photo at lower left.

The case shown is a classic Hot Wheels case which came with a poorly designed divider to keep the cars in place. I created a stronger one from Plexiglass and a few things around the house. The sheer weight of the cars required addition of a few strips of Gorilla tape to help secure them when opening the case.
These cars are the "best of the best" when it comes to both types of racing: drag and gravity. 

Many of you have also discovered that there is no consistency of speed in HW car production. I, like others, have bought a copy of one or more cars which did well in races seen on YouTube, only to find the one which came in the mail is not that quick. 
One thing I have noticed in the 3Dbotmaker races is that ALL the cars are based upon real cars. Nothing wrong with that. I used to be prejudiced against original designed Hot Wheels cars. Not snobby, but a realist when it comes to little cars.
I have changed my views on that as there are many fantastic cars that Mattel's HW designers have made over the last fifty two years.
The three trucks in the case above, managed to make the cut as did ALL the other cars shown above, on the purely dual-lane track and corners combination. The cars below did not.
The cherry-picker white fire truck and chrome armored car did very well on the Crash Racers track courses we have tried out, but they and ALL of these cars could not complete the very short, but technically difficult track layout which I believe is a good START to building our own layout.
This is a lot of vintage Hot Wheels track I just bought via eBay. Note the "Esses" dual-lane track at the bottom. I have another one on the way with the two-lane Hot Wheels Sizzler braking device it attaches to also coming via eBay. Sizzlers are battery powered, electric motor powered cars they came out with in 1969.

I believe I can combine the two "S" curves into one long one and we will be using the classic HW track since it does not use any visible push button joiners like the modern track does. 

That's it for now. Next chapter will be covering a way I came up with to not only connect the Crash Racers track to Hot Wheels track, but also will strengthen the entire length of CR tracks and allow for some creative methods of structure building.

Thank you SO much for taking the time to read this article. Please take a moment to click the FOLLOW button which is at the bottom of the long list of dates of previous articles. Also, feel free to leave a comment below or on Facebook.

Scott & Nancy
August 13, 2020
#399  

White Van Speakers. Who Fell Victim to those Sneaky "Salesmen" Back in The Day?

  July 10, 2026 #459 Gentle reader, There is an interesting Audio-Equipment-History YouTube channel called "Multimedium". They mak...